Driveway Dumpster Rental: A Contractor’s Pro Guide
The truck is booked, the crew is lined up, and the client wants the driveway looking untouched when the job is done. Then the container arrives and the driver stops in the street because overhead lines are too low, the HOA starts calling, and pickup day ends with a surprise invoice for weight overages. That's how a simple driveway dumpster rental turns into a project problem.
This happens because teams treat dumpster rental like a commodity instead of a site operation. It isn't. The container affects access, surface protection, scheduling, neighbor relations, disposal costs, and in some jobs, environmental compliance. In a market that reached $654.0 million in U.S. revenue by 2025, with a 7.2% increase in 2025 alone, contractors are handling driveway-accessible roll-off containers more often, largely because renovation and construction demand stays active (IBISWorld dumpster rental industry data).
Your Guide to a Damage-Free Dumpster Rental
A bad dumpster placement usually starts with a small miss. Somebody assumes the driveway is “probably fine.” Nobody checks branch height. The crew loads broken concrete into a mixed debris box because there's still room. The customer only finds out about the risk after the truck has already left marks.

That's the wrong way to run a driveway dumpster rental. The right way is to treat it like any other temporary site setup. You verify access, protect the surface, match the container to the waste stream, and document conditions before delivery. When you do that, the dumpster becomes a tool that keeps the site cleaner and the schedule tighter.
Practical rule: If you haven't checked the surface, the overhead clearance, and the waste type before booking, you're not ready to schedule delivery.
Most expensive dumpster mistakes aren't dramatic. They're ordinary. A hairline crack that spreads under load. A no-show because the truck can't turn in. A pickup delay because material is heaped above the rail. The fix is a repeatable field process, not guesswork.
Selecting Your Dumpster Size and Weight Capacity
The first decision is rarely about price. It's about fit. A dumpster that's too small creates double handling and extra hauls. A dumpster that's too large can crowd the drive, limit access to the garage, and put unnecessary load on a surface that's already marginal.

A lot of contractors focus on cubic yards and forget the second half of the equation. Weight is what triggers many of the expensive problems. A 20-yard roll-off dumpster measures about 22' L x 8' W x 4.5' H and holds roughly 4 to 8 tons, but the delivery truck itself can exceed 60,000 lbs, and 65% of driveway damage incidents stem from structural weaknesses not prepared for that load (Republic Services dumpster guide).
Read the job by material, not by room count
“Kitchen remodel” doesn't tell you enough. One kitchen job is cabinets, drywall, flooring, and packaging. Another includes tile mud, old countertops, and partial masonry demolition. Same room. Very different load.
Use this rough field logic:
- Bulky but lighter debris usually pushes you toward more volume.
- Dense debris pushes you toward tighter load control and often a smaller, dedicated container.
- Mixed renovation debris needs enough room for awkward shapes, but you still need to watch tonnage.
- Concrete, brick, dirt, and asphalt should never be treated like ordinary demo debris.
If the material is heavy enough that a skid steer bucket feels “surprisingly full,” assume the dumpster can hit its weight limit long before it looks full.
Common Driveway Dumpster Sizes and Use Cases
| Size (Cubic Yards) | Typical Dimensions (L x W x H) | Best For (Project Examples) | Weight Limit (Tons) |
|---|---|---|---|
| 10 | Varies by provider | Small bath tear-outs, tight-site cleanouts, small concrete or dirt loads when allowed | Varies by provider |
| 20 | 22' x 8' x 4.5' | Kitchen remodels, deck removals, mixed renovation debris, general driveway placements | 4 to 8 |
| 30 | Varies by provider | Larger renovation debris, bulky cleanouts, roofing and demolition work where access allows | Varies by provider |
| 40 | Varies by provider | Large-volume commercial or major construction debris where driveway space and access permit | Varies by provider |
Only the 20-yard dimensions and weight range above are verified in the provided source. For other sizes, confirm exact specs with the hauler before booking.
Ask the questions that prevent change orders and surprise fees
A clean booking call sounds more like a pre-task plan than a quick order. Ask:
- What material am I loading? Mixed C&D, roofing, wood, masonry, dirt, concrete, yard waste, or clean fill all behave differently.
- What weight is included? Don't settle for “standard allowance.” Get the limit in writing.
- Is this container approved for heavy material? If not, ask for the correct box.
- What are the dimensions and the truck access requirements? Don't assume every 20-yard can be placed the same way.
- What happens if the load is above the top rail or unevenly distributed? Pickup rules matter as much as delivery rules.
What works and what doesn't
What works
- Matching the dumpster to the heaviest material on the job, not the average material.
- Reserving mixed debris boxes for actual mixed debris.
- Leaving room in the schedule for one swap if the scope is messy or uncertain.
What doesn't
- Ordering by habit. “We always get a 20” is not a plan.
- Filling a large box with concrete because there's physical space left.
- Letting laborers load without one person owning the fill line and material rules.
The cheapest dumpster on paper gets expensive fast if it's the wrong container.
Navigating Permits HOAs and Booking Logistics
Administrative mistakes can stop a dumpster job before the truck even backs in. A site may be physically workable and still fail because no one checked whether the container, truck, or swing area touches public space. In planned communities, the HOA can create a second layer of restrictions that has nothing to do with the city.
One issue catches people more than it should. Most driveway placements on private property don't need a public permit, but that changes the moment any part of the setup occupies the street or sidewalk. In the assigned guidance for this topic, 90% of private property driveway placements skip public permits, while street permits are often required if the dumpster or delivery truck uses the road or sidewalk, with fines reaching up to $500 in some major U.S. markets. The practical takeaway is simple. Check with the municipality before delivery if there is any chance of public right-of-way impact.
Handle permits before the truck is dispatched
Crews often ask about permits too late. By then, the trailer is already on the board and the schedule is tight. The smarter move is to review placement options during estimating or at least when the job is awarded.
Look at these conditions early:
- Street width and parking patterns. If cars usually line both sides, the driver may need more room than you expect.
- Sidewalk pinch points. A driveway placement may still involve truck positioning that affects pedestrian space.
- Setback and lot layout. Some drives are technically long enough, but the approach angle makes placement impractical.
- Municipal rules on duration and visibility. Some jurisdictions care where the container sits and for how long.
If you suspect the road will be involved at all, call the city, town, or township office before you confirm the booking date. Don't rely on assumptions from another town across the county line.
HOAs care about more than legality
A city may allow the container and the HOA may still object. That usually comes down to appearance, timing, or where the box is visible from. If the project sits in a managed neighborhood, get the rules in writing.
Check for these common friction points:
- Placement restrictions that limit front-drive visibility
- Time limits that are shorter than the project cleanup window
- Quiet hours that affect delivery and pickup timing
- Requirements for boards or protective barriers under the container
- Neighbor notice expectations for renovation work
A dumpster that is legally placed can still become a client-relations problem if the neighborhood feels blindsided.
The project manager's job isn't just compliance. It's reducing avoidable conflict. A short notice to the client and nearby residents about delivery day, pickup timing, and parking restrictions can save a lot of calls.
Booking details that matter in the field
The order confirmation should answer operational questions, not just commercial ones. If the only thing you know is “20-yard on Tuesday,” you don't know enough.
Confirm these before release:
- Delivery window so the crew isn't blocked waiting on the truck
- Site contact who can answer the driver immediately
- Exact placement location marked on-site
- Access route for turning, backing, and exit
- Rental term and extension rules so you don't drift into extra days by accident
- Pickup call procedure and cutoff times
A marked site almost always runs better than a verbal description. Paint, chalk, cones, or temporary tape all work if they clearly show where the rails should land and what must stay clear.
Logistics failures are usually coordination failures
If the driver arrives and can't place the box, that isn't just a hauling issue. It's a project coordination miss. Same with pickups that fail because a van is parked in front of the container, the gate is locked, or overflow blocks safe removal.
Good site teams assign one person to own the dumpster from booking through pickup. That person confirms access, surface prep, crew rules, and removal timing. When nobody owns it, everybody assumes somebody else already handled it.
A Contractor's Guide to Driveway Protection
Driveway protection starts before the container leaves the yard. If the surface can't take the load, no careful driver is going to change the physics. Most rental agreements are written to protect the provider, not the contractor or homeowner, so surface risk needs to be managed as your responsibility from the start.
The key fact is straightforward. Industry benchmarks show 85% to 90% of reported driveway cracks stem from inadequate site prep, and 3/4-inch plywood under the dumpster's contact points can reduce damage risk by 60% to 75%. The same preparation guidance notes that a roll-off truck needs 10 to 30 feet of vertical clearance to tilt and place the container (Countryside driveway preparation guide).
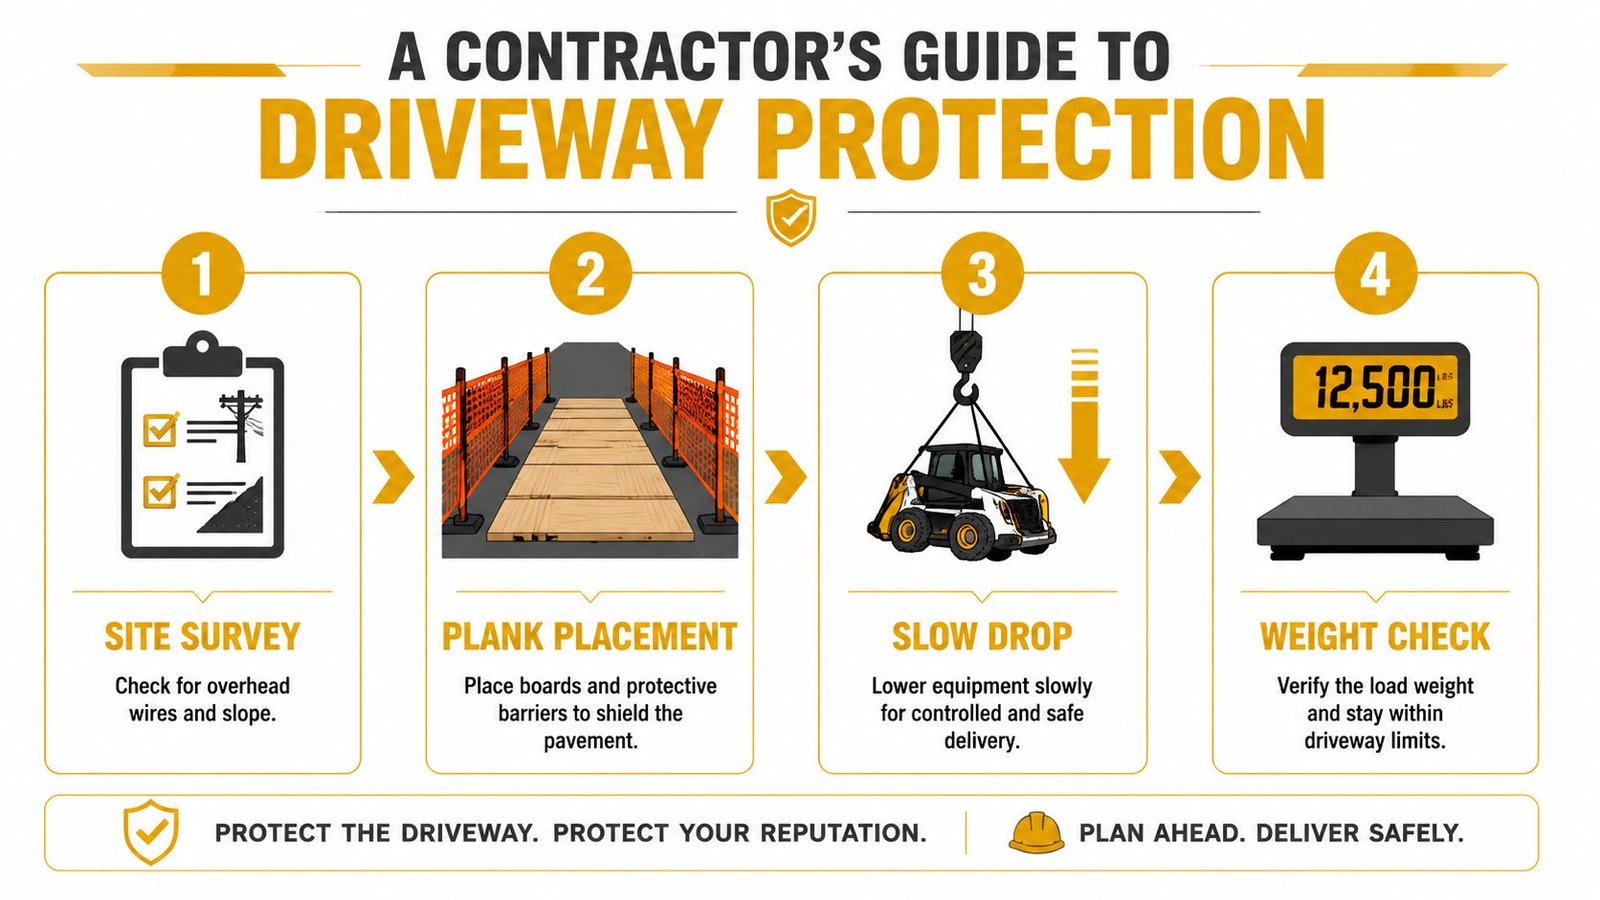
Start with a real site survey
Don't just glance at the driveway from the street. Walk it. Look for existing cracks, patched sections, soft edges, low spots, recent paving, and any visible signs of movement. Pay attention to transitions where concrete meets asphalt, apron sections near the road, and decorative surfaces that may not be built for concentrated loading.
Take photos before delivery. That protects everybody. It also forces you to slow down and inspect what's already there.
Mark these conditions:
- Existing cracks or settled panels
- Soft shoulders or broken edges
- Drainage issues, especially where water has undermined base material
- Slope changes that can shift loading onto one point
- Obstacles overhead, including branches, service drops, and roof eaves
Use a four-step protection routine
This is the process that keeps jobs out of the claims folder.
Verify the footprint
Measure the usable landing area, not just the overall driveway. Account for garage doors, parked vehicles, gate swings, and truck approach. If you need the dumpster in a specific spot for workflow, mark it.Protect the contact points
Place 3/4-inch plywood sheets where the rails or wheels will bear. Full sheets are better than scraps because they spread load more evenly and resist shifting during placement. Keep extra boards on-site in case the driver adjusts the landing spot slightly.Clear the overhead path
The truck needs room to raise the bed during rollout. That means checking not only where the container sits, but also the vertical path while the truck is angled up. Branches, utility lines, and roof overhangs can all become problems here.Control the drop and the load
Guide the driver into the marked position, then watch how the crew loads the box over the rental period. A well-protected placement can still go bad if one side gets overloaded with masonry while the other side stays light.
The best protection setup is cheap compared with one driveway repair conversation.
What helps and what gives false confidence
Some teams think “driveway-safe” marketing language is enough. It isn't. What matters in the field is surface condition, load distribution, and whether anyone inspected the site before placement.
These practices help:
- Plywood under the contact points
- Before photos from multiple angles
- A marked landing zone
- A site contact present during delivery
- Crew instructions on where heavy debris goes inside the box
These practices don't:
- A verbal “be careful with the driveway”
- Assuming newer asphalt is stronger than older concrete
- Dropping the box directly on decorative or questionable surfaces because the schedule is tight
- Hoping the load stays light on a demo job with masonry or wet debris
Document liability before the driver arrives
A lot of damage disputes happen because nobody established the condition of the surface or the placement plan ahead of time. The contractor should document the driveway condition, protection materials used, exact placement area, and any pre-existing defects. If the homeowner is concerned, walk the area with them before delivery and note what you both see.
That matters even more on renovation jobs with premium hardscape, stamped concrete, exposed aggregate, or newer asphalt. If the driveway looks marginal, use another location or another disposal plan. The best risk mitigation move is often saying no to the driveway entirely.
Managing Waste Types and Avoiding Overload Fees
A dumpster gets expensive when the wrong material goes into the right box. Most crews understand volume. Fewer crews manage weight discipline well, especially once demolition is moving fast and laborers start tossing everything into one container.
That's a problem because construction debris accounts for 28% of all dumpster rental revenue, and U.S. landfill tipping fees average over $54 per ton, which is why overweight loads often bring real surcharges at the back end (dumpster industry statistics summary). The same source notes that compactors can reduce volume by a 4:1 ratio, but that doesn't solve the main issue with dense debris. Heavy material still weighs what it weighs.

Separate by disposal behavior, not just by trade
A clean site doesn't mean one container for everything. It means putting material where it belongs so hauling, disposal, and compliance all stay predictable.
Group waste this way:
Light mixed renovation debris
Drywall, trim, cabinets, packaging, flooring, and general demo waste usually work in a standard mixed load container if allowed by the hauler.Heavy inert material
Concrete, brick, block, dirt, and asphalt need special attention. These materials can overload a container long before it appears full.Prohibited or restricted items
Liquids, hazardous materials, tires, electronics, refrigerant appliances, and certain regulated waste streams often need separate disposal channels. Provider rules vary, so verify before loading.Concrete slurry and washout waste
This should not be treated like ordinary dumpster material. Wet, semi-liquid concrete waste creates both weight and compliance issues.
Heavy debris is where budgets get blown
A standard mixed debris container can tolerate some dense material, but it's a mistake to use it as a catch-all for concrete or masonry. Those jobs need a deliberate plan. If you're saw-cutting, breaking out pads, replacing sidewalks, or chipping curbs, expect weight to become the controlling factor.
Good field practice looks like this:
- Keep concrete and masonry separate whenever possible.
- Don't wait until the container is nearly full to ask whether the material is overweight.
- Load heavy debris evenly. One-end loading creates handling issues and can complicate removal.
- Keep the load below the top rail. A box that can't be tarped or hauled safely may sit until labor removes the excess.
A dumpster can be underfilled by volume and still be overloaded by weight.
Slurry needs its own containment plan
Many renovation and concrete crews get sloppy at this stage. Washout residue, slurry, and wet concrete waste shouldn't be dumped into the same roll-off you're using for general cleanup. It adds weight fast, creates mess at the door and floor of the container, and can trigger disposal or environmental problems depending on the site setup.
If the job includes cutting, pumping, placing, finishing, or cleaning out concrete equipment, plan a separate washout containment method from the start. That keeps your main dumpster usable for dry debris and helps you avoid turning one waste stream into two problems.
Crew rules that prevent overage charges
A few simple site rules do more than arguing about the invoice after pickup.
- Assign one person to approve heavy loads. Labor moves fast. Somebody needs authority to stop a wheelbarrow of dense material from going into the wrong box.
- Load flat and level. Don't mound the center or stack over the rails.
- Break down bulky items. Better packing reduces air gaps and preserves capacity for the material that belongs there.
- Keep water out when you can. Wet drywall, carpet, and absorbent debris get heavier and nastier to handle.
- Post a prohibited items list on-site. The crew won't remember every rule from the morning meeting.
What works is visible control. Mark containers by waste type. Talk through the plan with the foreman. Revisit it when the work shifts from framing to concrete, or from demolition to finish cleanup. Waste management on a driveway dumpster rental is not a one-time decision made at booking. It changes with the phase of work.
Your Pre and Post Rental Site Management Checklist
A clean dumpster job comes down to disciplined routine. Before delivery, photograph the driveway, confirm the placement area is clear, stage the plywood, and make sure the driver has a reachable site contact. If the spot is tight, mark the landing area so the driver isn't guessing.
During the rental, keep one person responsible for what goes into the container. Stop prohibited items before they hit the box. Watch fill height, keep weight distributed, and don't let loose debris pile around the exterior. If the job includes concrete operations, keep slurry out of the general dumpster and in its own containment setup.
Before pickup, close and latch the door, clear cars and material from the access path, and make sure nothing is sticking above the top rail. After removal, walk the driveway with the pre-delivery photos in hand. Look for fresh scuffs, new cracks, chipped edges, and stray fasteners left behind.
A driveway dumpster rental should leave the site cleaner than it found it, not leave you explaining preventable damage.
If your project includes concrete work, don't let slurry and washout waste overload your main dumpster or create a compliance issue on the client's property. Reborn Rentals provides specialized concrete washout containment with straightforward booking, clear pricing, and delivery coordination that fits active job sites. It's a practical way to keep concrete waste separate, protect the site, and run a cleaner operation from pour day through final pickup.