Dumpster Rental for Dirt: The Contractor’s 2026 Guide
You order a dumpster for an excavation job, the crew loads it, and by the end of the day it still doesn't look full. Then the hauler flags it as overweight, adds overage charges, or refuses pickup until material comes back out. That's the moment most contractors realize dirt doesn't behave like demo debris.
Dumpster rental for dirt is a different job category. If you treat it like a standard cleanout, you can lose time, blow the disposal budget, and create a compliance problem on a site that was otherwise running fine. The fix isn't complicated, but it does require planning the load by material class, not just by dumpster size.
Why Renting a Dumpster for Dirt Is Different
The mistake usually starts with what the eye sees. A bin that looks half-full feels safe. With dirt, that visual check can mislead you badly because the hauler isn't pricing around how “full” the box looks. They're pricing around how heavy the box is when the truck tries to lift and transport it.
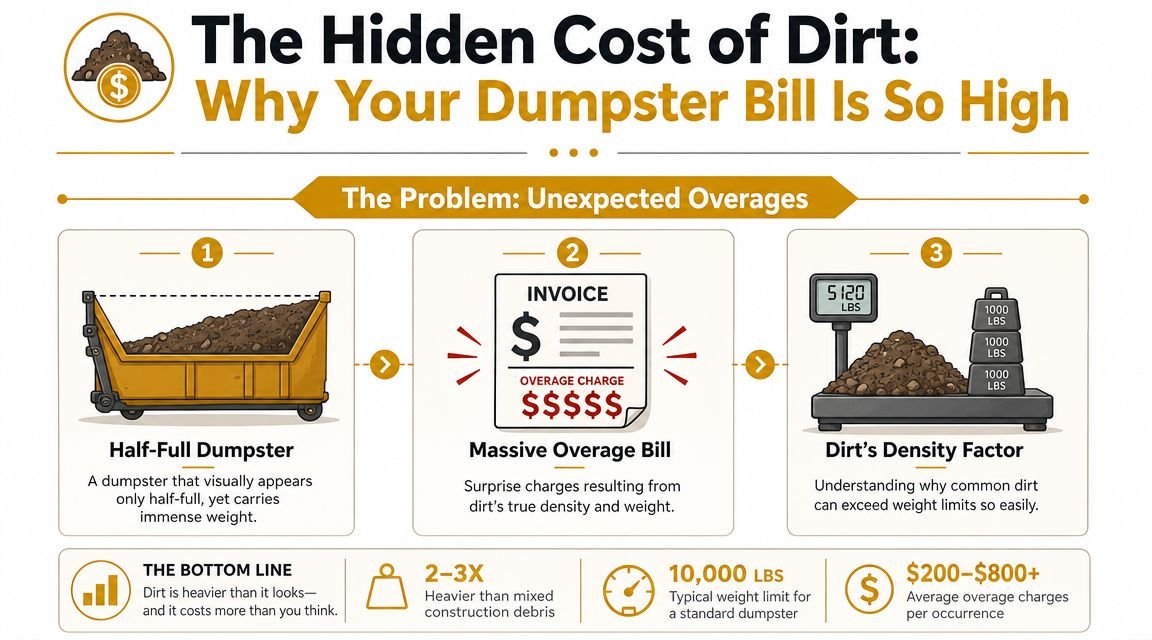
Weight drives the job
Historically, the economics of dirt disposal are weight-driven, not volume-driven. One rental guide focused on dirt notes that dry loose dirt is roughly 2,000 lbs per cubic yard, while wet or compacted dirt can run about 2,500 to 3,000 lbs per cubic yard. The same guide notes that a 10-cubic-yard load can weigh roughly 10 to 15 tons, which is why companies impose strict weight caps and often require the container to be loaded well below the top for safe transport, as explained in Hometown Waste NJ's dirt dumpster guidance.
That's the core rule. Once you understand that rule, the rest of the decisions get clearer.
A 30-yard container full of light renovation debris may move without much trouble. A much smaller dirt box can become the more expensive and more restricted load because the truck, disposal site, and hauler all care about gross weight.
Practical rule: Dirt doesn't punish you for underestimating space first. It punishes you for underestimating mass.
Dirt creates a different set of risks
General debris gives you some visual warning. Piles of drywall, wood, and packaging rise toward the rail, so the crew can tell they're close. Dirt is flatter, denser, and easier to overdo without noticing.
That creates a few common problems:
- Overage charges: The box looked manageable, but the tonnage wasn't.
- Pickup delays: The driver won't haul an unsafe or non-compliant load.
- Reload labor: Someone has to shovel material back out so the container can move.
- Bad sequencing: Excavation stops while the site team fixes a disposal issue that should've been handled before delivery.
What works and what fails
The jobs that go smoothly are the ones where the foreman treats dirt as a specialized waste stream. They estimate spoil volume, ask how the hauler handles heavy inert material, confirm the weight allowance, and tell the crew exactly what belongs in that container.
What fails is the casual approach. Ordering “a dumpster” without clarifying it's for dirt is how you get a standard mixed-debris setup, a bad allowance, or a container type that wasn't meant for soil in the first place.
If your disposal plan for soil is “we'll know once we start loading,” you're already behind.
Choosing the Right Dumpster Size and Type
Once dirt is treated as a heavy material instead of ordinary trash, sizing gets easier. The right choice comes from two separate questions. First, how much spoil are you generating. Second, what material classification will the hauler accept in that container.
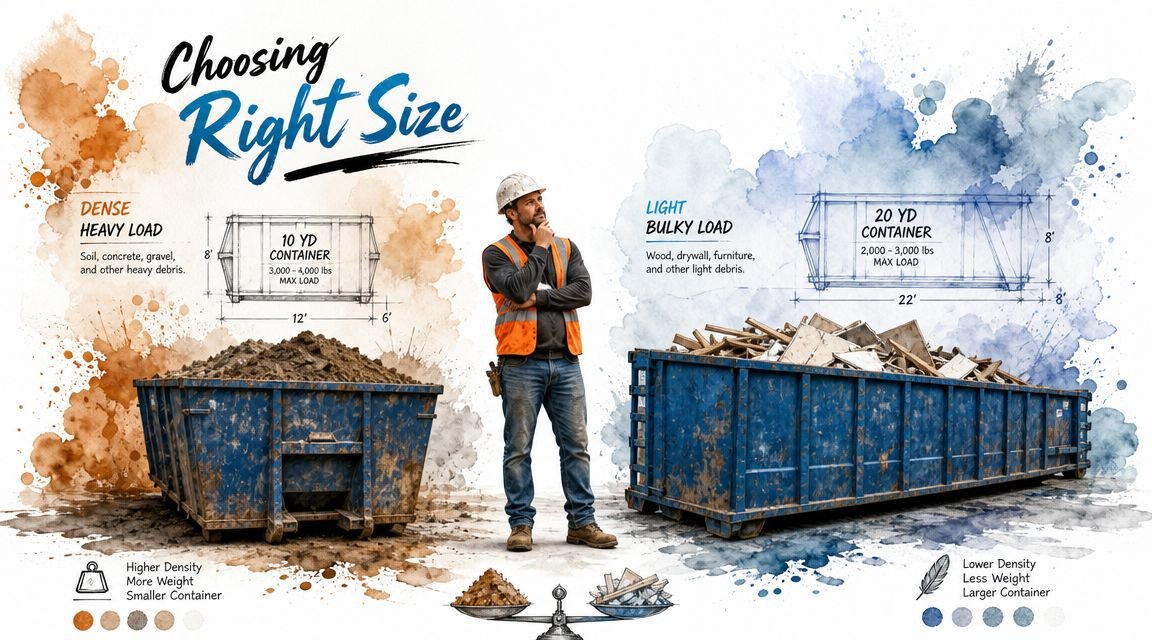
Size the dirt load by the work, then verify the allowance
Practical rental guidance says small residential or landscaping jobs may fit in a 10-yard container, medium grading or excavation spoil often needs 20 yards or larger, and larger construction or demolition projects may call for 30-yard units or specialized heavy-material containers. The safest workflow is to measure the excavation, convert it to cubic yards, match that to a container size with a weight buffer, and confirm whether pricing is by ton or by container, as outlined in Kevin Szabo Jr Plumbing's dumpster sizing guidance.
That field logic matters more than generic online size charts. Dirt from trenching, grading, footing work, or hardscape removal doesn't behave the same way fresh fluff from a garden bed does. Moisture, compaction, and mixed fill can push a job out of the “simple dirt” category fast.
A good estimator asks for dimensions of the cut, not just a guess from the superintendent.
Clean dirt and mixed material are not the same order
A frequent mistake is assuming any roll-off can take soil. Some haulers treat clean dirt as a separate heavy inert material and won't allow it in a standard mixed-waste dumpster. They also warn that a smaller container can hit weight limits long before it looks full, which can turn the cheapest quote into the most expensive option if tonnage rules weren't understood, according to Dumpsters.com guidance on dirt disposal rules.
That changes how you book the job.
| Job condition | Better approach |
|---|---|
| Pure excavated soil with no debris | Ask for a dedicated clean dirt or clean fill container |
| Soil mixed with roots, trash, concrete chunks, or demo debris | Declare it as mixed material before delivery |
| Uncertain material condition | Send photos and get the accepted-material list in writing |
A quick decision filter on site
Use this before placing the order:
- Small excavation with clean spoil: A smaller heavy-material container often makes more sense than a larger general debris box.
- Medium grading or foundation work: Plan for more than one haul if the soil is wet or if access limits how aggressively you can load.
- Mixed cleanup after demolition: Don't try to sneak soil into a standard debris stream. That usually costs more once the load is reclassified.
- Unknown soil condition: Stop and verify disposal rules before the truck rolls.
Crews save money on dirt by getting stricter, not looser. The tighter the material definition, the fewer surprises at pickup.
Navigating Local Permits and Disposal Rules
A dirt dumpster can be correctly sized and still become a problem if the placement or disposal path wasn't checked early. Most headaches come from two points in the chain. Where the container sits, and where the soil is allowed to go.
Placement rules affect the schedule
If the dumpster sits on private property, the process is usually simpler. If it has to sit in a street, alley, sidewalk lane, or other public area, local permit requirements can apply. The exact office varies by municipality, so the practical move is to call the city or county department that handles public works, right-of-way use, or building permits before delivery is scheduled.
Ask direct questions:
- Street placement: Is a permit required for a roll-off on the road or curb?
- Duration limits: How long can the container remain in place?
- Protection requirements: Do they require boards, cones, or reflective markings?
- Traffic impact: Are there restrictions near intersections, hydrants, school zones, or fire lanes?
Write down the answer, the date, and the name of the person who gave it. That record helps when a neighbor complains or an inspector shows up after the dumpster is already on site.
Disposal rules depend on how the load is classified
The bigger compliance issue is usually at the back end. Disposal sites don't all treat soil the same way. Clean fill may go to one type of facility or program, while mixed soil or suspect excavation waste may go through a different intake process altogether.
A dirt load can be rejected even when the container itself was ordered correctly. The problem is often the material classification, not the box.
Here's the practical checklist to run before loading starts:
- Describe the origin of the soil. Was it landscaping, footing excavation, utility trenching, or a teardown site?
- Ask whether the hauler considers it clean fill, mixed soil, or contaminated excavation waste.
- Request the accepted-material list in writing.
- Clarify what contaminates the load. Roots, brick, plastic, rebar, and treated wood scraps are common problem items.
- Confirm the receiving facility's standard. Don't rely on “we usually take that” language.
Documentation protects the job
The foreman's version of risk control is simple. Save the quote, the material approval, and any permit confirmation where the PM and superintendent can find them. If the load gets challenged later, you want a paper trail that shows what was represented when the order was placed.
That step doesn't feel urgent when the schedule is tight. It becomes urgent when a loaded container can't be hauled.
Loading Best Practices to Avoid Overages and Fines
Loading dirt the right way is a site operation, not a paperwork exercise. The best booking in the world won't save a job if the crew dumps the wrong material in the box, heaps one side, or lets rainwater turn a borderline load into a problem.
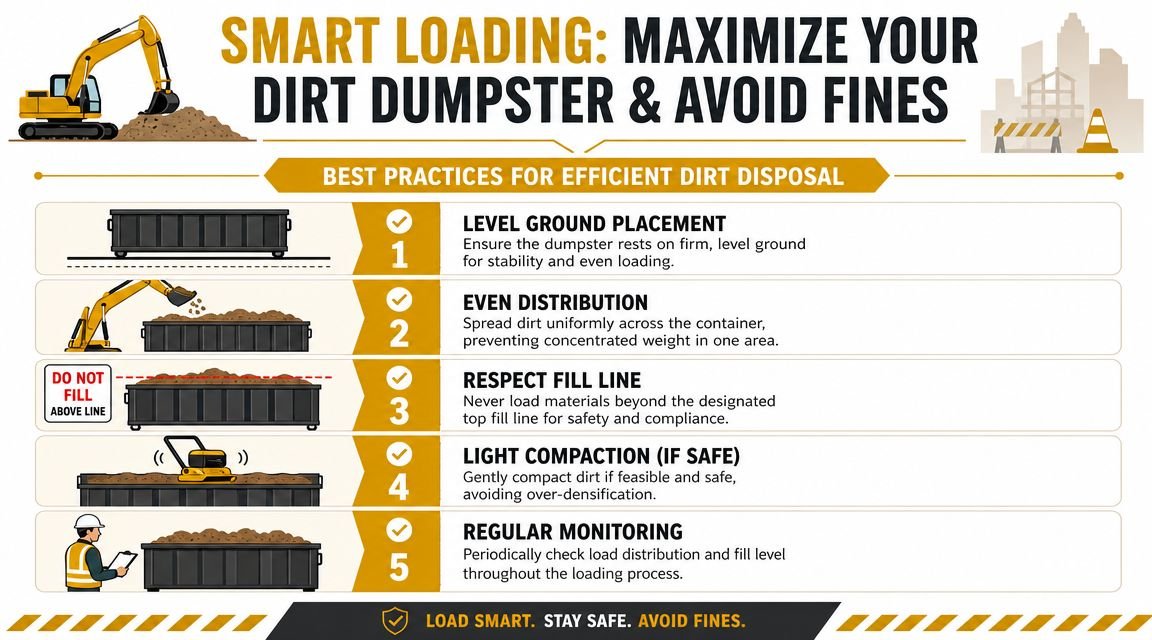
Start with load classification, not loading speed
For dirt jobs, the most important technical step is to classify the load as clean fill, mixed soil, or contaminated excavation waste before booking. Even a small amount of debris can reclassify the load and trigger higher disposal fees. Operational guidance also recommends staging the site so only approved fill dirt enters the container and keeping rainfall out with a tarp to avoid unnecessary mass, as explained in EasyWM's guide to avoiding dumpster rental mistakes.
That means the loader operator and the labor crew need the same instructions. If the box is for clean dirt, then it's for clean dirt only. No broken stakes, no wrapper, no roots tossed in because “it's just a little.”
What the crew should do in the field
A dirt dumpster works best when the site is set up for separation before excavation starts.
- Stage spoil piles deliberately: If possible, keep approved soil in one area and questionable material in another. Don't sort it after it's already in the container.
- Load evenly: Spread weight across the box instead of building a mound at the front or rear.
- Stay below the top edge: Heavy material needs room below the rail for safe transport. If the load crowns over the top, expect trouble.
- Cover the container when rain is coming: Water adds weight without adding usable capacity.
- Watch the last bucket: Overages often happen near the end, when everyone wants to finish the cut and move on.
Field note: The cheapest bucket of dirt on the job is the one you never have to shovel back out of an overloaded dumpster.
A simple loading sequence that works
Instead of letting the entire crew improvise, use a short sequence:
| Loading stage | What to check |
|---|---|
| Before loading | Confirm this box is for clean dirt only, or mixed heavy material if that's what was booked |
| During first loads | Check balance and keep one person responsible for spotting contamination |
| Mid-load | Reassess height and stop judging capacity by appearance alone |
| End of load | Tarp it if weather is turning and inspect for stray debris before pickup |
Common mistakes that cost money
Most preventable dirt-dumpster problems come from a short list:
- Using the wrong box type: A standard mixed-debris dumpster gets dirt because it was already on site.
- Letting everyone throw into the same container: Once multiple trades use the box, contamination becomes likely.
- Ignoring rain: Wet soil gets expensive fast.
- Loading to the brim: Safe transport rules still apply even if the material “settles.”
- Failing to inspect before pickup: A final walk-around catches a lot of avoidable issues.
Good dirt disposal is mostly discipline. The crews that avoid fees aren't lucky. They control the stream.
Managing Concrete Washout and Other Site Contaminants
A site that handles dirt well can still fail a compliance check if slurry, rinse water, or other regulated material is managed loosely. Dirt disposal and concrete washout usually show up on different line items, but on a real job they're linked by the same standard. Keep each waste stream contained, separated, and handled on purpose.
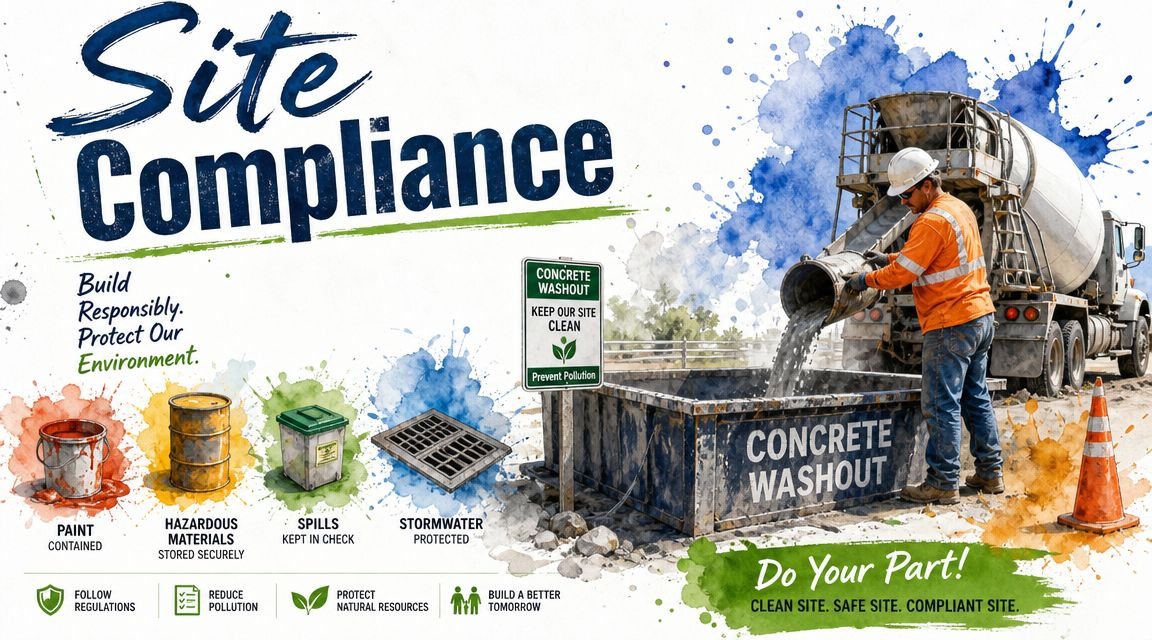
Dirt control and washout control belong in the same plan
The same crews that struggle with dirt contamination often run into washout problems. Someone rinses tools where they shouldn't. A pump truck crew uses an improvised spot. Hardened residue and slurry end up where inspectors, owners, or environmental staff don't want them.
Those aren't separate management failures. They come from the same blind spot. The site didn't define where each material goes before the work started.
A clean site plan should answer these questions early:
- Where does clean dirt go
- Where does mixed heavy debris go
- Where does concrete washout happen
- Who checks each area before haul-off or demobilization
Why this matters in practice
Soil can often be reused, hauled as fill, or disposed of through heavy-material channels if it stays clean. Concrete washout slurry is different. It needs dedicated containment and a controlled handling process. Trying to combine those streams creates a mess operationally and a bigger one from a compliance standpoint.
The fastest way to complicate a straightforward disposal job is to let one waste stream contaminate another.
Strong site managers don't just rent a dumpster and hope the rest sorts itself out. They assign material zones, mark them clearly, and make sure every trade knows the rules. That's what keeps pickups clean, paperwork defensible, and closeout smoother.
Your Dirt Disposal Plan and Next Steps
If you're arranging dumpster rental for dirt, keep the plan simple and strict.
First, estimate the spoil from the excavation itself. Don't order by guesswork. Second, tell the hauler exactly what the material is and get the accepted-material rules in writing. Third, load for weight, not for appearance. Dirt can stay visually low and still be too heavy. Fourth, protect the load from contamination and rain. That's where a lot of avoidable cost comes from.
Use this checklist before every dirt haul:
- Confirm material class: Clean fill, mixed soil, or contaminated excavation waste.
- Match the container to the load: Not just by cubic yards, but by how the hauler handles heavy inert material.
- Control the loading area: Keep other trades and stray debris out of the dirt box.
- Inspect before pickup: Look for overfill, imbalance, and contamination.
- Treat site compliance as one system: Dirt, concrete washout, and other problem materials each need their own containment plan.
Contractors usually don't get burned on dirt because the work is complicated. They get burned because the disposal side was treated like an afterthought. Handle it early, and the job stays predictable.
If your site also needs a clean answer for concrete washout, Reborn Rentals is built for that part of the job. They provide specialized washout containment rentals for construction and renovation sites, with straightforward booking, clear pricing, and equipment designed to help crews contain slurry responsibly. If you're tightening up site compliance instead of patching problems later, line up your dirt disposal plan and your washout containment at the same time.