Concrete Environmental Compliance Checklist 2026
You're on a live concrete job. The pump is booked, trucks are stacking up, the finisher wants a clear path, and dark clouds are building over the site. Then somebody asks where the washout goes if the rain starts before the last load is down. That is how compliance failures happen. A rushed call, no clear owner, and no record of what was decided.
On a concrete site, environmental exposure shows up fast. One bad washout spot, one expired permit, one unprotected inlet, and the job can stall while the inspector documents the problem. Tight schedules do not carry any weight once slurry reaches a drain or the crew cannot produce the required paperwork.
A good environmental compliance checklist does more than list rules. It gives the superintendent, foreman, and crew a working playbook for the pour. It shows what has to be in place, who owns it, how to verify it in the field, and why each control matters when time is short and pressure is high.
That practical approach is what concrete contractors need. The risk is not theoretical. Wash water, sediment, fuel, dust, and disposal mistakes all happen at ground level, around active crews, equipment, and changing weather. Compliance has to hold up under real site conditions, not just read well in a binder.
This guide is built around the ten areas that decide whether a site is ready, from pre-pour setup through cleanup and documentation after the trucks leave.
1. Stormwater Pollution Prevention Plan Compliance
Rain starts halfway through the pour. The pump crew wants to rinse out, the laborers are dragging hoses, and an inspector asks for the SWPPP. If the plan is buried in a trailer, out of date, or disconnected from what the crew is doing on the ground, you have a paperwork problem and a discharge problem at the same time.
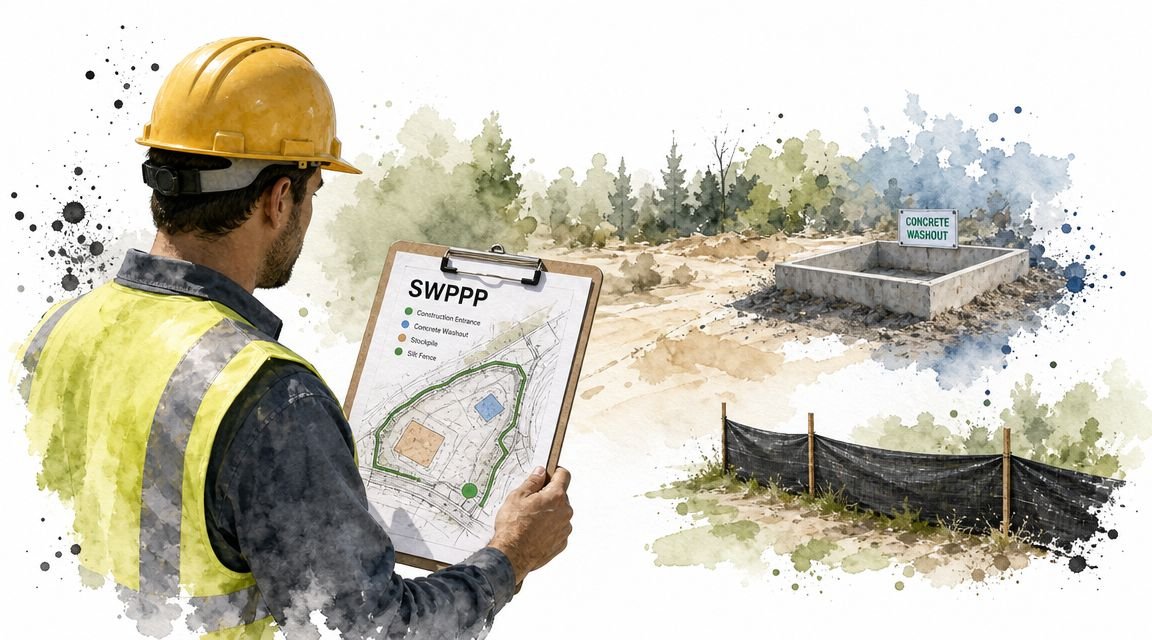
A usable SWPPP is a field control document. For concrete work, it needs to show where slurry, wash water, sediment, and residue can leave the work area, what control stops each path, who is responsible for it, and how the site will verify it during the shift. That is the difference between checking a box and running a site that holds up under inspection.
The common failure is simple. The plan exists, but the crew cannot work from it. Locations are vague. Responsibilities are split between trades. Corrections never make it back into the current plan set.
What good SWPPP execution looks like
Keep one current copy on-site where the superintendent, foreman, and inspector can reach it fast. Mark the active controls on the site map, not just in a narrative. If the washout area moved, a new inlet was added, or access changed after grading, update the plan before the next concrete operation.
On a slab or paving job, walk the actual sequence before the first truck arrives. Start at the truck approach, move through the pump setup and placement area, then finish at cleanup and material containment points. That walk tells you whether the written controls match the site you are about to run.
Use this as the field standard:
- Map each concrete-related discharge risk: Include chute rinse areas, pump cleanup, saw-cut slurry, stockpiles, exposed soils, and any low point that can carry runoff off-site.
- Tie each risk to a specific control: Identify the berm, inlet protection, stabilized entrance, cover, containment area, or diversion that handles that risk.
- Assign one decision-maker: One field lead should own inspections, updates, and corrective action closeout.
- Keep records with the plan: Permits, inspection logs, rain event notes, and correction records should stay together so the crew can prove what was checked and fixed.
- Train the trades that touch the work: Pump operators, finishers, laborers, and cleanup crews need site-specific direction, not generic orientation language.
Here is the trade-off crews run into. The shortest route for cleanup is rarely the safest route for runoff. If the quickest washout path crosses traffic, slopes toward a drain, or depends on every driver making the same judgment call, the control will fail under pressure. Set the plan around the way the job will move.
A good test is blunt. Ask a new crew lead where concrete rinse water goes, what inlet is most exposed, and who signs off on corrections after rain. If the answer is vague, the SWPPP has not been implemented in the field.
2. Concrete Washout Containment Requirements
A pour goes sideways fast when washout is treated as a cleanup detail instead of a planned control. The first truck finishes, the pan is half a site away, the pump crew rinses where they can, and now you have gray water tracking across the job toward a drain. That is how a manageable task turns into a reportable problem.
Washout water carries high pH, cement fines, and slurry that can stain pavement, kill vegetation, and trigger violations if it leaves containment. A workable environmental compliance checklist for concrete contractors needs to do more than say "provide washout." It needs to spell out where the washout area goes, how much use it needs to handle, who monitors it during the pour, and what the crew does when capacity gets tight.
Size the containment for the actual rinse load
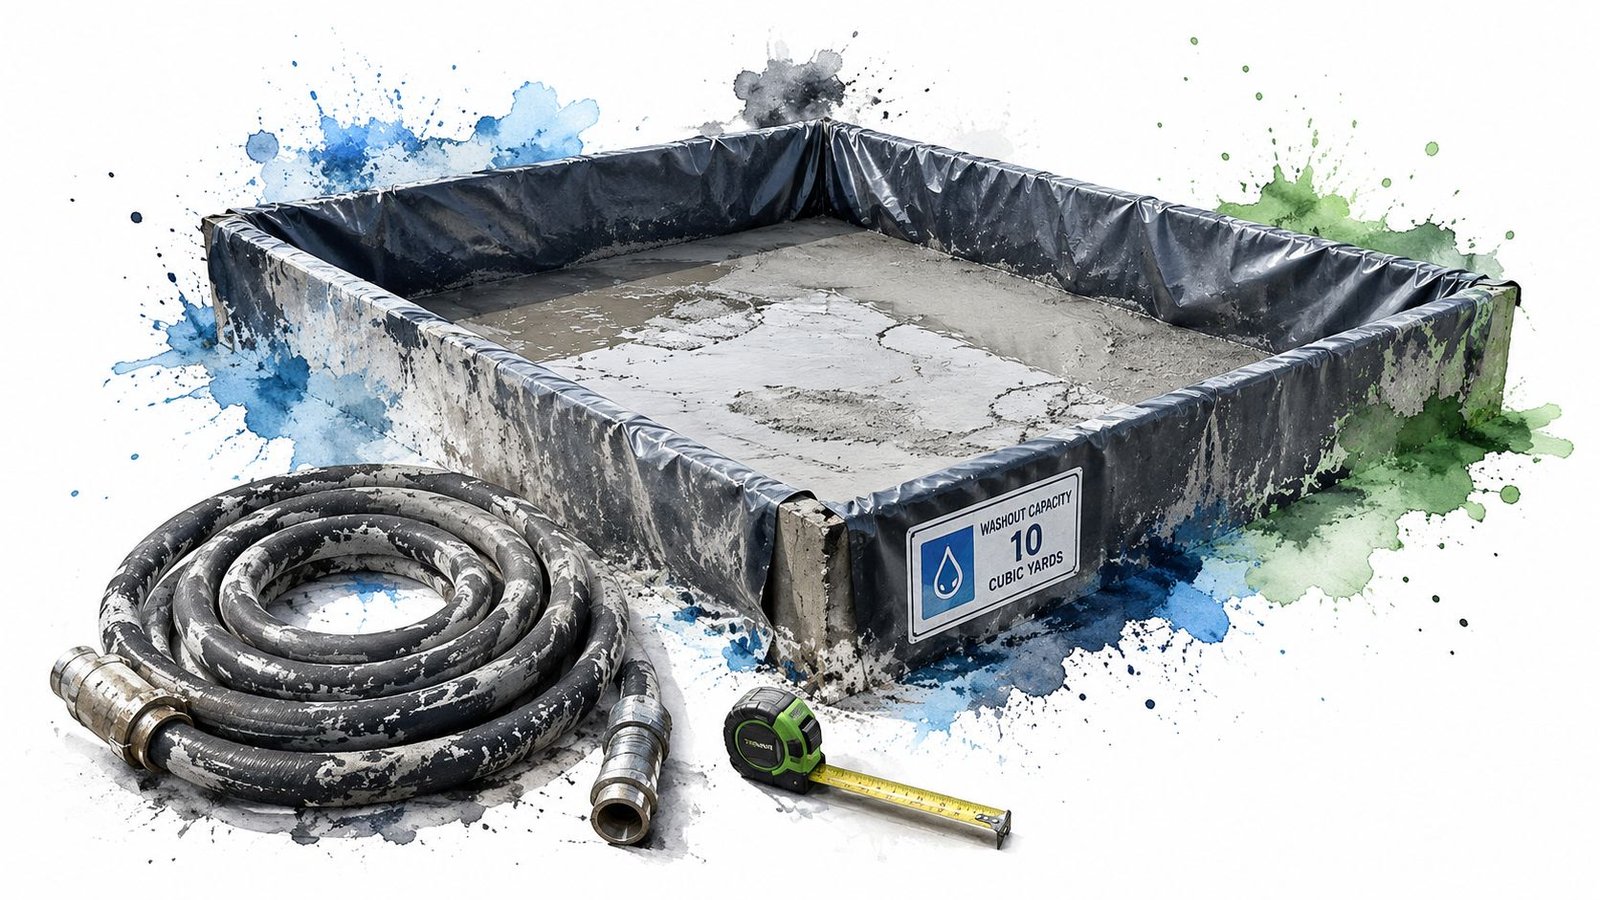
Choose the washout setup based on the pour sequence, not whatever container happens to be available in the yard. Pump washout, chute rinse, tool cleaning, and multi-truck turnaround all add volume. If those activities hit one pan, crews need enough capacity and enough access to use it without improvising.
The trade-off is straightforward. A smaller pan saves space on a tight site, but it leaves less room for error. That can work on a short slab pour with limited cleanup. It fails on a long placement, a pump job, or any operation where several crews wash out at once.
Set the containment where the work naturally flows. If drivers have to cross active haul routes, back into congestion, or stop in a spot that blocks the pump, they will start rinsing early or washing out somewhere else. The control has to match field behavior under pressure, not the ideal version discussed in the trailer.
Use these checks before concrete arrives:
- Put washout close enough to be used every time: The best location is near the pump and truck path without forcing cross-traffic or backing conflicts.
- Set it on level, stable ground: Soft subgrade, fresh fill, or a sloped shoulder can shift the container and send liquid to one side.
- Allow clear approach and exit: Keep rebar, pallets, and parked equipment out of the access path.
- Plan for overflow before it happens: Have a second container, vacuum support, or a changeout plan ready for heavy-pour days.
- Post the location and tell every affected crew: Drivers, pump operators, laborers, and finishers should all get the same direction before placement starts.
I have seen this fail on parking structure work more than once. The pan gets placed far from the pump to keep the truck lane open. By mid-pour, the rinse path is too long, production is tight, and the crew starts doing partial washout at the edge of the deck or down by the ramp. Nobody planned to violate anything. The setup pushed them there.
Good washout control also needs active maintenance during the day. Check freeboard, remove hardened buildup that steals capacity, and keep berms, liners, or sidewalls intact. If the container is nearly full at lunch, the answer is not "we'll make it work." The answer is to swap it out or bring in backup before the afternoon trucks arrive.
3. Spill Prevention, Control, and Countermeasure Plans
A laborer tops off a saw near a curb inlet. A mechanic sets a hydraulic hose on cardboard behind the generator. A fuel truck hits the site before sunrise and leaves a few gallons behind at the tank fill. None of that looks dramatic in the moment. It still creates the kind of release that gets photographed, reported, and written into the job record.
Concrete crews usually pay close attention to washout. Spill control has to cover the rest of the operation with the same discipline. Fuel, hydraulic oil, release agents, curing compounds, and maintenance fluids all need a defined storage method, a defined response, and someone clearly in charge.
Split responsibility causes a lot of preventable violations. The superintendent assumes the equipment manager owns fuel controls. The equipment manager assumes the GC's environmental plan covers site-level response. Then a spill reaches soil or runoff, and the crew burns the first ten minutes figuring out who is supposed to act. That is the wrong time to sort it out.
Build spill control around how the site actually runs
Start with the places where product is stored, moved, and used. That includes bulk tanks, day-use containers, transfer points, refueling areas, mechanic work spots, pump staging, and generator pads. On many jobs, the highest-risk area is not the main laydown yard. It is the spot where people are in a hurry and handling fluids between other tasks.
As noted earlier in the article, secondary containment should be sized so crews can verify it holds more than the largest single container. The field check that matters is simple. If the biggest tote, drum, or tank fails, containment has to keep that release on site long enough for cleanup.
Use that standard in a way the crew can apply without guessing:
- Match containment to the largest container in the area: Do not drop one small spill pallet under a row of mixed containers and assume the requirement is covered.
- Put spill kits at the point of use: Fueling areas, maintenance stations, and pump setups need absorbents, socks, gloves, bags, and disposal containers within reach.
- Keep storage away from drains, gutters, and downhill flow paths: Distance gives the crew time to stop a release before water carries it off.
- Post the call sequence where the spill could happen: Crew lead, superintendent, environmental contact, then outside cleanup support.
- Protect transfer work, not just storage: Hose connections, nozzle shutoff, drip pans, and attended fueling prevent more spills than paperwork does.
A spill plan in the trailer satisfies a file. A spill plan at the work face controls the job.
I have seen small spills turn into expensive problems because the response gear was technically on site but stored two trades away, buried in a conex, or missing half the contents. If a laborer cannot grab the kit in seconds, the kit is in the wrong place.
Inspection matters here too, but it needs to be specific. Check containment for cracks, standing rainwater, open drain valves, saturated absorbents, missing labels, and containers stored outside the berm because someone needed room for one shift. Those are the details inspectors notice, and they are the same details that decide whether a spill stays contained or reaches a storm drain.
A diesel release inside a lined containment area is usually a cleanup issue. The same release tracked by water across pavement and into an inlet can trigger reporting, outside remediation, schedule disruption, and a hard conversation with the owner and regulator. This is the stark trade-off. A little planning up front costs less than one avoidable spill.
4. Sediment and Erosion Control Best Management Practices
A concrete crew can lose control of a site in one rain event. The usual failure point is not the main work area. It is the gate where trucks track mud onto pavement, the curb inlet below the pour, the stockpile at the edge of the lot, or the torn silt fence nobody reset after equipment passed through.
That is why this part of the environmental compliance checklist has to work like a field playbook, not a box-checking exercise. The job is to keep soil, slurry, and cement fines out of runoff before they leave the disturbed area. The method changes by site. A tight urban infill lot needs fast cleanup, protected inlets, and strict traffic control. A larger site gives you room for more perimeter controls, but it also gives runoff more ways to escape if inspections get lazy.
Concrete work creates its own erosion and sediment problems. Pump washdown near exposed soil can turn into a slurry track. Mixer traffic can carry sediment to the street. Forklifts and telehandlers can flatten wattles, break fence lines, and open a path for runoff in one pass. Those are concrete contractor problems, and they need concrete contractor fixes.
Use layered controls that match the actual flow paths on site.
- Install perimeter controls before any disturbance starts: If grading or material delivery starts first, runoff already has a route off site.
- Harden traffic access points: Stabilized construction entrances, rock pads, and routine street sweeping control track-out better than perimeter fence alone.
- Protect every downhill inlet: Put inlet protection where water will reach it, then check it after each storm and after heavy traffic.
- Control stockpiles and bare soil: Cover or ring stockpiles, shorten the time soil stays exposed, and stabilize inactive areas as soon as the schedule allows.
- Repair damaged controls the same shift: A torn fence or displaced wattle is an open discharge point until someone closes it.
- Treat washout and slurry migration as part of sediment control: If slurry can reach soil, pavement runoff, or an inlet, the site is already out of control.
The trade-off is straightforward. More controls take time to install and maintain. Fewer controls save labor for a day and create cleanup, rework, and inspection risk for weeks. I have had crews push back on replacing track-out stone or resetting inlet protection after repeated truck traffic. The answer is simple. Replacing rock is cheaper than a city complaint, a failed inspection, or a shutdown while the site gets cleaned and documented.
Inspection has to focus on weak points, not just whether controls exist on paper. Walk the downhill perimeter. Check for undercut silt fence, sediment bypassing the ends, rills on exposed slopes, clogged inlet bags, track-out at the gate, and damaged BMPs near loading or staging areas. If water can get around it, under it, or through it, fix it before the next storm finds the gap.
A street-side infill project makes the point well. You may not have room for large traps or wide berms, so the crew has to win with tighter housekeeping, shorter repair times, and daily attention to inlets and access points. On a spread-out civil site, the controls are larger, but the inspection route is longer and easier to neglect. Different layout, same rule. Sediment control works only when someone owns it from install through repair and keeps it aligned with the way the concrete operation moves.
5. Concrete Slurry Disposal and Waste Management
Capturing washout is only half the job. The other half is what happens next. I've seen sites run clean for days and then ruin their record by mishandling removal, mixing slurry with general debris, or failing to keep disposal paperwork organized.
Your environmental compliance checklist should treat slurry removal like a scheduled operation, not an occasional cleanup task. Once containment starts filling, you need a disposal plan, a responsible party, and records that match what left the site.
Keep the waste stream clean and documented
The best crews separate concrete slurry from trash, scrap wood, and packaging from the start. That sounds basic, but it saves problems later. Mixed waste creates confusion over disposal methods, delays pickup, and makes it harder to prove the material was managed correctly.
Reworld's audit guidance highlights the same core checks inspectors and auditors look for. Are permits current, is required monitoring performed on schedule, are reporting obligations met on time, and are copies retained onsite or electronically, as described in Reworld's overview of environmental compliance audits. Disposal records fit directly into that same recordkeeping discipline.
Here's what works in practice:
- Schedule removal before the pan is near capacity: Waiting until it's almost full leaves no room for weather or extra washout.
- Keep manifests and pickup records together: Don't scatter them across emails, truck tickets, and trailer binders.
- Photograph condition before and after service: That closes arguments about volume, timing, and housekeeping.
A practical example is a multi-week foundation package with repeated pump use. If you don't coordinate pickup timing with pour sequencing, the pan fills during your busiest days. Then crews improvise, which usually means poor disposal decisions and avoidable exposure.
6. Daily Environmental Inspection and Documentation
A concrete crew finishes a late pour, cleans up fast, and heads out. Overnight rain hits. By 7 a.m., washout water has pushed past a damaged berm and tracked toward the low side of the site. The problem started the day before. The citation shows up today because nobody caught the weak spot, logged it, and made one person responsible for fixing it.
That is the primary job of daily inspection. It is not paperwork for the trailer file. It is how a concrete contractor proves the site was under control, problems were identified early, and corrective action happened before runoff, slurry, or fuel turned into a reportable issue.
What a daily inspection needs to cover
On a concrete site, the walk needs to follow the actual risk. Start where water moves, where concrete is being placed or cleaned up, and where a small housekeeping miss can become an environmental violation after one rain event. Check washout containment, perimeter controls, active discharge paths, spill response materials, and any area disturbed by yesterday's work. Then verify the fixes from prior inspections. A repaired silt fence, patched berm, or relocated pan only counts if it still works under field conditions.

Crews also miss scope changes. A new subcontractor, a shifted pump location, a temporary material stockpile, or a rerouted access path can change drainage and exposure in a single day. Good supervisors inspect the site that exists now, not the one shown on last week's plan.
Documentation has to hold up under scrutiny
A usable inspection record answers four questions fast:
- What was checked
- What condition was found
- Who owned the correction
- When the correction was completed
That sounds simple. It is also where weak programs fail. Vague notes like “site good” or “repaired as needed” do not help when an inspector asks for proof after a complaint. The record needs location details, photos, timestamps, and a clear description of the deficiency. If the issue was serious enough to require same-day action, the closeout should show exactly what changed.
Paper forms can work. I have used them on jobs where phones died, signal was poor, or the client wanted hard copies in the trailer. But paper only works if the superintendent or foreman fills it out in the field, signs it, and keeps the file organized. Digital systems are better when they force photo capture, time stamps, and corrective action assignment. The trade-off is simple. Digital tools improve consistency, but only if the crew uses them during the walk and not after the shift from memory.
If your inspection log cannot show the location, the date, the condition observed, and the closeout evidence, it will not do much for you when a regulator asks for backup.
The best daily inspection process works like a control loop. Inspect early. Fix the issue. Record the correction. Recheck it after weather or production changes. That is how this checklist becomes a playbook. It tells crews what to look for, how to verify conditions in the field, and why each record matters when the site gets questioned later.
7. Storm Drain Protection and Inlet Management
Storm drains are unforgiving. Once slurry, sediment, or fuel gets into the system, your options shrink fast. Cleanup gets harder, documentation gets more serious, and inspectors stop treating the issue like a minor housekeeping lapse.
This part of the environmental compliance checklist needs zero ambiguity. Every inlet on or near the work area should be identified before concrete starts. Not after runoff shows up. Not after a neighbor calls. Before the first washdown.
Set primary and backup controls
Your primary control is keeping pollutants away from drains in the first place. That means placing washout containment well away from inlets, managing slopes, and controlling traffic patterns. Backup control is the inlet protection itself, whether that's a catch basin insert, gravel bag barrier, filter device, or another approved method for the site.
For concrete work, distance matters. A pan placed where a small overflow can move downhill toward a curb inlet is badly placed even if the pan itself is compliant. The same goes for tool wash areas and temporary stockpiles of slurry-contaminated material.
- Map every inlet during pre-task planning: Include adjacent public inlets, not just the ones inside the fence.
- Protect high-risk drains first: Low spots, curb returns, and drains downhill from pump operations.
- Inspect after rain and after cleanup activity: Inlet controls often fail during the very operations meant to keep the site tidy.
An urban sidewalk replacement job is a good example. Space is tight, the nearest drain is usually close, and public traffic limits where you can place equipment. On those jobs, drain protection has to be checked constantly because crews, deliveries, and pedestrians all interfere with it.
8. Permit Acquisition and Regulatory Compliance Verification
The crew is lined up, the pump is booked, and the inspector asks for the permit set. If the answer is “it should be in the trailer” or “the office has it,” the job is already off balance. Permit problems rarely start with complicated regulations. They start with assumptions, missing paperwork, and field conditions that drift away from what was approved.
For concrete contractors, permit control is a production issue as much as a compliance issue. If the permit requires a specific washout location, inspection schedule, protected buffer, discharge restriction, or agency notification, that requirement has to show up in the field plan before work starts. Otherwise the checklist is just paperwork, and paperwork does not stop a violation.
Verify permits against the actual work, not the bid set
A permit package can be current and still be wrong for the phase you are in. I have seen crews rely on an approved plan drawn months earlier, then run into trouble because access roads changed, a stockpile moved, or a pour sequence shifted runoff toward an area that was never set up for active concrete work. The permit stayed the same on paper. The site changed underneath it.
That is why permit verification needs two checkpoints. First, before mobilization. Second, before any major change in disturbance, sequencing, or concrete operations. Review the permit conditions against the live site, not the original assumptions.
Use plain checks that a superintendent or foreman can confirm fast:
- Confirm which permits apply to this phase of work
- Keep current permit copies and approvals on-site
- Match permit conditions to the field setup, including washout, access, staging, and protected areas
- Assign one person to track expirations, revisions, inspections, and agency communication
- Recheck compliance after scope changes, resequencing, or added disturbance
Read the conditions like operating instructions
The permit is not just proof that someone filed something. It tells the crew how the site is allowed to run. On concrete jobs, small misses create expensive problems fast. A washout area placed outside the approved location, a missing inspection record, or a discharge that violates permit language can turn a routine pour into a notice, a shutdown, or both.
Phased work makes this harder. One part of the project may be stabilized while another is still open and exposed. Permit conditions often apply differently by area, timing, or activity. Treating the entire site as one uniform condition is how teams miss the requirements tied to the active work zone.
Good compliance practice here is simple. Verify the permit. Read the conditions. Compare them to the field. Update the plan when the work changes. That is how contractors avoid the familiar problem of being technically permitted but operationally out of compliance.
9. Employee Training and Environmental Responsibility Awareness
Most environmental failures on concrete sites are training failures in disguise. The pan may be there. The permit may be current. The SWPPP may be in the trailer. None of that helps if the pump operator, laborer, or cleanup crew doesn't know the procedure.
Training has to be short, specific, repeated, and tied to the actual work that starts that day. Generic orientation videos don't carry the load by themselves. Crews need to know where washout goes, what never goes into a drain, who to call after a spill, and what proof is required when they finish the task.
Train by role, not by broad category
The finisher doesn't need the same level of instruction as the person staging washout containment or handling slurry removal. A strong environmental compliance checklist should match training to responsibility. That's especially important on multi-employer jobs, where handoffs create the biggest gaps.
One recurring weakness in construction compliance is document control and ownership across subcontractors. Practical guidance in this area points back to clear owners, accessible records, change-management, and training systems, while noting that multi-firm construction work often fails at interfaces rather than inside one company's own procedures, as discussed in this construction-focused environmental compliance checklist analysis.
Use that lesson in the field:
- Brief subcontractors before they start work: Don't assume the GC orientation covered concrete-specific risks.
- Post instructions at washout and fueling areas: Signs help when crews rotate.
- Track attendance and sign-offs: If it isn't documented, it didn't happen in the eyes of an auditor.
The cleanest sites usually have the simplest training. One page, one map, one responsible person, and no guessing.
A pump crew arriving for a one-day placement is the perfect test. If they can follow site environmental controls without chasing three different supervisors for answers, your training program is working.
10. Weather Monitoring and Emergency Response Protocols
A concrete crew can start the day on a clean, well-organized site and still end it with slurry in the gutter if nobody watched the forecast. That is how environmental violations happen. Not from lack of paperwork, but from crews getting caught by rain, wind, or a hard freeze without a response plan they can use in real time.
Weather monitoring belongs in the field routine, not buried in the trailer. The supervisor, pump operator, and labor lead should all know the trigger points that change the plan. Rain means checking washout capacity, exposed soil, drain protection, and haul routes before the first drop hits. High wind means securing lightweight materials, checking perimeter controls, and controlling dust around saw cutting, stockpiles, and cleanup. Freezing conditions create a different problem. Frozen berms crack, inlet protection shifts, and tracked sediment stays in place until the next thaw sends it downstream.
The practical question is simple. What changes on this site when the forecast turns?
Strong crews answer that before work starts. They assign one person to watch conditions, one person to verify controls, and one person with authority to stop or delay work if containment, access, or cleanup will fail under expected weather. That authority matters. I have seen jobs push through a pour with a washout pan already near capacity because the concrete was on the way. The result was predictable. Overtopping, emergency cleanup, and a much more expensive day than a short delay would have been.
Digital tools can help if they support field decisions instead of adding another reporting layer. As noted earlier, contractors are putting more of their compliance work into cloud-based systems because weather alerts, inspection records, photos, and corrective actions are easier to access from the field than from a binder in the trailer. That only helps if the site team still knows what to do when an alert comes in.
Emergency response procedures should fit on one page and read like instructions, not policy language.
- Stop the source if it is safe to do so
- Protect storm drains, curb lines, and low points first
- Call the site supervisor and environmental contact immediately
- Take photos, note the time, and record what failed
- Repair the control, clean impacted areas, and document the follow-up inspection
Keep spill socks, inlet protection, plastic, stakes, and a shovel where crews can reach them fast. If response materials are locked in a conex on the far side of the project, the plan is not ready.
A good test is a forecasted afternoon storm before a scheduled placement. Check the pan level, confirm who will service it, walk the flow paths, and decide whether the site can hold runoff and slurry if the weather arrives early. If the answer is no, service the containment or delay the work. That is not overreacting. It is the difference between managing risk and explaining a discharge to an inspector.
10-Point Environmental Compliance Checklist Comparison
| Item | Implementation complexity | Resource requirements | Expected outcomes | Ideal use cases | Key advantages |
|---|---|---|---|---|---|
| Stormwater Pollution Prevention Plan (SWPPP) Compliance | High, requires professional plan development and updates | SWPPP consultant, documentation, inspections, BMPs, washout equipment | Regulatory compliance; reduced stormwater pollution risk | Projects ≥1 acre, regulated construction, large infrastructure | Legally required; reduces liability and fines; comprehensive risk management |
| Concrete Washout Containment Requirements | Moderate, sizing, placement, and routine maintenance | Containment pans/units, delivery/logistics, emptying services | Prevents slurry discharge; protects waterways and permits | High-volume concrete pours, pump and finishing operations | Direct pollution control; ready-to-deploy rental solutions |
| Spill Prevention, Control, and Countermeasure (SPCC) Plans | High, threshold analysis, certified plan, periodic updates | Environmental consultant, secondary containment, spill kits, training | Spill prevention and rapid response readiness | Sites storing fuels/oils above regulatory thresholds | Reduces spill liability; integrates with SWPPP and emergency response |
| Sediment and Erosion Control (SEC) BMPs | Moderate, multiple devices and sequenced installation | Silt fences, erosion blankets, inlet protection, inspection crews | Reduced sediment runoff and erosion control | Sites with exposed soils, slopes, or rainy seasons | Broad sediment prevention; widely accepted by regulators |
| Concrete Slurry Disposal and Waste Management | Moderate–High, hazardous handling and recordkeeping | Licensed haulers, pH testing, disposal facilities, manifests | Lawful disposal of slurry; lower enforcement risk | Projects generating significant slurry or in sensitive watersheds | Ensures compliant disposal; simplifies regulatory documentation |
| Daily Environmental Inspection and Documentation | Low–Moderate, routine but disciplined process | Trained inspector, checklists/apps, camera, record system | Early detection of issues; defensible compliance records | All active sites, permit-mandated inspection programs | Prevents violations; documents good-faith compliance |
| Storm Drain Protection and Inlet Management | Low, straightforward installation and frequent checks | Catch-basin inserts, sediment socks, signage, replacement materials | Prevents direct pollutant entry to drainage network | Urban sites near inlets or sensitive receiving waters | Cost-effective first line of defense; simple backup to containment |
| Permit Acquisition and Regulatory Compliance Verification | High, agency coordination and lead time needed | Permit fees, consultant time, application documents, plan revisions | Legal authorization and clear permit conditions | Any project requiring construction/stormwater permits or special area work | Prevents stop-work orders; clarifies regulatory obligations |
| Employee Training and Environmental Responsibility Awareness | Low–Moderate, recurring training and documentation | Training materials, time, attendance records, refresher sessions | Fewer human errors; consistent BMP implementation | Sites with multiple crews, high turnover, or complex BMPs | Cost-effective risk reduction; builds compliance culture |
| Weather Monitoring and Emergency Response Protocols | Moderate, monitoring systems and pre/post-event actions | Weather services, emergency supplies, extra inspections, staff on-call | Minimized storm-related BMP failures; documented responses | Regions with frequent storms or extreme weather seasons | Proactive mitigation of weather risk; preserves BMP effectiveness |
From Checklist to Culture Making Compliance Automatic
A good environmental compliance checklist does more than help you survive an inspection. It gives the crew a repeatable way to run concrete work without creating preventable risk. That's the difference between sites that stay ahead of problems and sites that spend the whole project reacting to them.
The big shift is moving from occasional compliance activity to routine operating discipline. On strong jobs, environmental controls aren't treated like side tasks for the safety person or the SWPPP consultant. They're built into setup, sequencing, cleanup, and closeout. The superintendent checks them. The foreman reinforces them. The labor crew knows what “right” looks like before the first truck arrives.
That approach lines up with how compliance is implemented in day-to-day operations. Environmental laws and guidance have pushed facilities and project teams toward ongoing management systems built around records, training, recurring verification, and auditable controls. That's why modern programs focus so heavily on permits, logs, inspections, corrective actions, and accessible records. You're not proving perfection. You're proving control.
For concrete contractors, the highest-risk points are usually simple. Washout placed badly. Drain protection ignored. Slurry removal delayed. Subcontractors left unbriefed. Weather seen too late. None of those failures require a complicated fix. They require planning, ownership, and follow-through.
That's also where the trade-offs get real. The best containment option may cost more to mobilize but save you a much bigger problem later. A pre-pour inspection may feel like a delay until it catches a missing inlet control or an overfilled pan. Extra crew training may feel repetitive until a new subcontractor shows up and already knows the washout rules. Good compliance often looks slower in the moment and faster over the life of the project.
If you want this to become automatic, build the routine around a few habits that never change. Keep current permits on-site. Use containment sized for the actual work. Inspect every day. Train every crew that touches concrete. Document what you fixed, not just what you found. When scope changes, revisit the controls before the work changes your risk.
The contractors who do this well usually earn a reputation for more than just staying out of trouble. Their sites stay cleaner. Their pours run smoother. Their crews waste less time improvising. Inspectors see an organized operation instead of a defensive one. Clients notice that too.
A clean site isn't cosmetic. It shows that the team knows its work, respects the permit conditions, and can manage pressure without cutting corners. That's what makes compliance profitable. You avoid enforcement issues, reduce rework, protect schedule, and build trust job after job.
If your crew needs dependable washout containment without wasting time chasing vague pricing or uncertain delivery, Reborn Rentals is built for the way concrete jobs work. Their ready-to-deploy washout pans, clear daily pricing, and straightforward checkout make it easier to get compliant equipment on-site before the pour, not after the problem.