Spill Containment Requirements: A Contractor’s Guide
You're on a pour day, trucks are cycling in, the pump crew wants room, finishers are asking where to wash tools, and the “temporary” washout spot somebody marked yesterday is already turning into gray soup. The water is creeping wider than planned. A laborer drops a board at the edge, hoping it slows the spread. Another storm drain sits farther downhill than anyone likes.
That's how a lot of spill problems start on construction sites. Not with some dramatic tank failure. With a rushed decision, a soft spot in the dirt, a torn liner, or a washout area that looked fine at startup and failed by lunch.
The issue isn't just appearance. A sloppy washout area creates cleanup work, puts the superintendent on defense during inspections, and can stop work at the worst time. Concrete slurry and wash water don't stay where you want them unless the site is set up for the mess you already know is coming. That's the part many teams miss. They handle the pour like production and treat containment like paperwork. In the field, that order needs to be reversed.
The Real Cost of a Messy Job Site
A messy site rarely stays a small problem.
On paper, the washout area may exist. It may even be marked on the SWPPP map and mentioned in the pre-task plan. But paper compliance falls apart fast when the actual setup is a shallow pit lined with thin plastic, sitting in a traffic path, with no one assigned to monitor it once the pour starts.
What failure looks like in the field
A common scene goes like this. The crew puts together a makeshift washout using a scrap liner and a few stakes. It works for the first truck. Then more rinse water shows up. Someone tosses chunks of leftover mud into the same area. The liner shifts, one corner collapses, and now you've got gray water moving into active work space.
At that point, the problem multiplies:
- Production takes a hit: Someone has to stop and deal with the mess.
- Safety gets worse: Wet slurry creates slick walking surfaces around hoses, forms, and tools.
- The inspection risk goes up: A site that looks unmanaged invites more scrutiny.
- Cleanup becomes expensive in labor: Field crews end up doing unplanned containment and removal work instead of scheduled tasks.
Practical rule: If your washout setup only works when everyone remembers to be careful, it isn't a real containment system.
Paper compliance versus site reality
Discrepancies often burn contractors. The plan says there's containment. The site says otherwise.
Real spill containment requirements aren't satisfied by intent. They're satisfied by whether liquid stays contained when the job gets busy, weather changes, or a crew member uses the area harder than expected. That's why concrete washout is such a trouble spot. It's repetitive, messy, and easy to underestimate because crews deal with it so often.
The best sites treat containment as part of operations, not an afterthought. They pick a location that makes sense, use equipment that can handle actual use, and assign someone to keep an eye on it during work. That approach protects the schedule just as much as it protects the site.
Understanding Spill Containment Laws
A lot of spill problems start with paperwork that looks fine in the trailer and falls apart in the mud. The plan shows a washout area. The field condition is a torn liner, a low spot that overflows in rain, or a containment setup crews avoid because it is too far from the pour.
That gap is where citations, cleanup costs, and off-site releases happen.
Why these rules exist
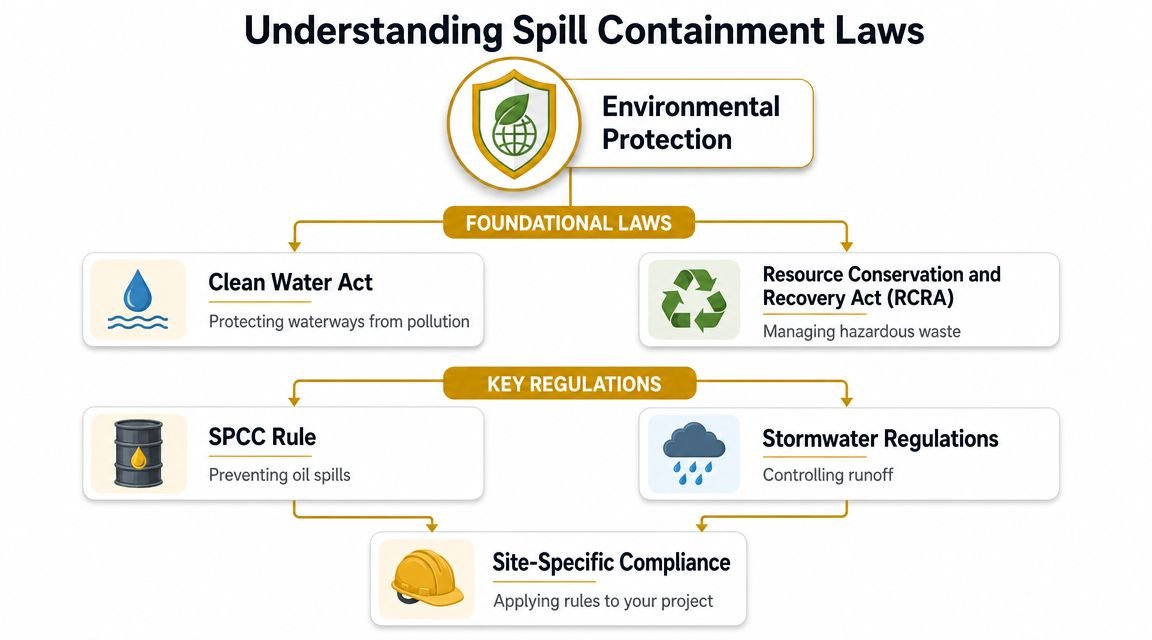
Spill containment laws are built to keep polluted water and materials out of soil, storm drains, and nearby waterways. On a construction site, that usually ties back to stormwater compliance and the commitments in the SWPPP. If the site stores, uses, or generates material that can be carried off by rain or runoff, the site has to control it.
Concrete washout is where the rule makes immediate sense. Wash water carries high-pH slurry and cement fines. Once that material leaves the containment area, it stops being a housekeeping issue and becomes an environmental one. It can reach inlet protection, track across pavement, or leave a visible discharge that is hard to explain to an inspector.
What regulators actually check
Inspectors usually start with a simple question. Will this setup still contain material under real job conditions?
For hazardous waste container storage areas covered by EPA rules at 40 CFR 264.175, secondary containment must hold the greater of 10 percent of the total volume of containers or 100 percent of the largest container. The containment system also has to prevent releases through cracks, gaps, or surfaces that allow liquids to pass through.
The specific rule set on your project may differ. SPCC, SWPPP requirements, local stormwater permits, owner standards, and hazardous waste rules do not all apply the same way on every site. But the field expectation stays pretty consistent. Containment has to hold the material, stay intact in rain, and remain usable enough that crews use it.
That last point gets missed all the time. A washout area can satisfy a checklist on day one and still fail by day three if it is undersized, hard to access, or too flimsy for repeated use. Paper compliance says the site has containment. On-site reality answers whether the containment still works after a pump washout, a rain event, and a rushed cleanup at the end of the shift.
Ask the field question first: if this fills up, gets hit with rain, or takes rough use from the crew, does everything stay inside?
The contractor's takeaway
For day-to-day site management, spill containment laws come down to three practical checks:
- Keep the pollutant contained. Nothing should leave the designated area and reach soil, pavement runoff, or drainage features.
- Use a containment system that holds up in the field. Dirt berms, ripped plastic, and broken asphalt usually fail under repeated use.
- Match the setup to how the crew works. If the washout is inconvenient, crews will improvise, and improvised containment is where violations start.
This is why turnkey rental solutions keep showing up on better-run sites, especially for concrete washout. They close the gap between what the plan requires and what the crew can realistically use every day. The legal standard still matters, but the practical win is simpler. A container that is sized right, placed right, and maintained right is a lot easier to defend than a homemade setup that looked acceptable until the first hard rain.
How to Correctly Size Your Containment System
A crew finishes a long pour, the washout box is already half full of slurry, then an overnight storm hits. By morning, the site still has containment on paper, but the container has no real reserve left. That is how sizing errors turn into runoff, cleanup costs, and hard questions during an inspection.
The rule that trips people up
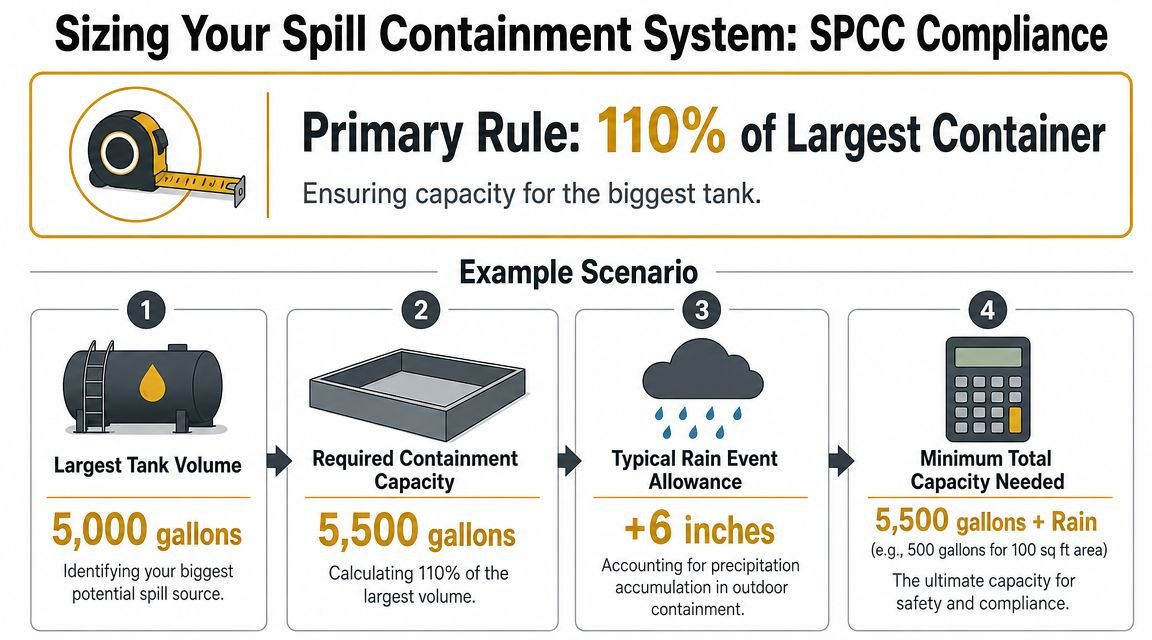
Under the EPA's SPCC framework, secondary containment must hold at least 10% of the total volume of the primary containers or 100% of the volume of the largest container, whichever is greater, as explained in the EPA's secondary containment requirement for each container under SPCC.
The practical point is simple. Size for the release you may have to contain, not the amount you hope will be there on a normal day.
How to run the sizing check
Use two numbers and let the larger one decide the minimum containment volume:
- Option one: calculate 10% of the total volume of all primary containers
- Option two: calculate 100% of the largest single container
- Use whichever number is greater
That sounds straightforward, but crews still get burned by one shortcut. They size around average use instead of maximum exposure.
For example, if a site stores four 55-gallon drums, total capacity is 220 gallons. Ten percent of that total is 22 gallons. The largest single container is 55 gallons, so the minimum containment volume is 55 gallons.
That example matters because it reflects how inspectors and regulators look at risk. If one drum can fail, the containment has to catch one drum.
If your containment cannot hold the full contents of the biggest single source it protects, the system is undersized.
What contractors miss on concrete washout
Concrete washout is where paper compliance and field reality split fast.
A SWPPP may show one washout location and a box with enough listed capacity to satisfy the plan. On site, that same box loses usable volume every day as hardened material builds up, rinse water accumulates, and rain takes the freeboard. Add one pump truck cleanup or a crew using the wrong container because it is closer, and the original sizing is no longer the sizing you have.
That is why washout sizing has to account for operating conditions, not just manufacturer capacity.
Ask these field questions before the pour starts:
- What is the largest single input this washout must handle?
- How much usable volume will be lost to solids before service or swap-out?
- Will rainfall reduce available capacity between inspections?
- Is the container placed where crews will use it, or will they improvise somewhere else?
Those questions matter more than a neat number on a submittal.
Common sizing mistakes that lead to violations
A lot of failures start before the first load hits the containment.
| Common mistake | What goes wrong on site |
|---|---|
| Sizing to average daily use | The system gets overwhelmed during a heavy pour or cleanup spike |
| Ignoring solids buildup | Hardened slurry eats up capacity and leaves less room than the crew assumes |
| Forgetting rainwater | Outdoor containment loses reserve volume fast after a storm |
| Using nominal container capacity | The listed size looks adequate, but real usable capacity is lower in the field |
| Placing containment for convenience on paper | Crews avoid it, overfill one unit, or create an unauthorized washout spot |
The practical standard to use
For general contractors, the safer approach is to size for peak conditions and then add room for the way the site operates. That means accounting for buildup, weather, delayed service, and crew behavior.
This is one reason turnkey rental washout systems work better than homemade setups on active jobs. The container size, pickup schedule, and placement can be matched to production instead of guesswork. That closes the gap between a plan that looks compliant and a containment system that still works on day five after rain, slurry buildup, and real crew traffic.
Common Containment Methods and Their Pitfalls
Most field failures don't come from misunderstanding the idea of containment. They come from trusting weak methods in rough conditions.
Contractors use DIY setups because they're fast, familiar, and seem cheap. A lined dirt pit. Hay bales and plastic. A timber frame with a tarp draped inside. These can look acceptable for a few hours. The problem is they don't stay acceptable once traffic, weather, slurry, and actual production hit them at the same time.
Where makeshift systems break down
A plastic-lined pit sounds simple until the liner gets punctured by rebar, torn by a skid steer bucket, or pulled loose by repeated washout. Once that liner is compromised, you don't have containment. You have hidden seepage and a mess spreading under the surface.
Hay bales and wattles have their place for erosion and sediment control, but crews often ask them to do work they weren't meant to do. Saturation changes performance fast. Material escapes underneath, between seams, or over low spots. The setup still looks like containment from a distance, which makes it even more dangerous because people assume the problem is handled.
The labor cost nobody budgets
DIY containment also eats labor in ways that don't show up on the first material ticket.
- Setup takes longer than expected: Somebody has to build, line, brace, and mark the area.
- Maintenance never stops: Edges slump, liners shift, debris accumulates, and the area needs constant attention.
- Removal gets ugly: Hardened material and contaminated residue are harder to clean out from improvised pits than from purpose-built containers.
That's the trade-off many teams miss. They save on equipment up front, then pay for it in labor, lost time, and cleanup headaches.
A containment method that needs babysitting all day is usually the most expensive option on the site.
What works better in real conditions
Reliable containment has a few traits in common. It's physically durable. It's impervious enough to hold liquid where it belongs. It's visible, stable, and easy for crews to use correctly without extra coaching every hour.
That doesn't mean every site needs the same setup. It does mean flimsy materials and improvised edges are a bad match for concrete operations. The more active the site, the worse those systems perform. On high-pressure days, people default to the easiest usable option. If the containment area is awkward, undersized, or already half-failed, crews will work around it. That's when paper compliance breaks for good.
Inspection and Recordkeeping Best Practices
A compliant setup on Monday can become a violation by Wednesday if nobody checks it.
Inspectors usually don't need long to spot trouble. They look for overflow marks, leaks, damaged containment, poor housekeeping, and obvious disconnects between the SWPPP and what's happening on the ground. If the washout area is full, unmarked, or being used incorrectly, the site starts losing credibility fast.
What to inspect during active work
Keep inspections simple enough that your field team will perform them.
A practical routine should cover:
- Condition of the containment area: Check for tears, cracks, gaps, or deformation.
- Remaining capacity: Don't wait until the system is nearly full to act.
- Site drainage around the area: Make sure runoff isn't carrying material away.
- Access and signage: Crews need to know where the approved washout is.
- Evidence of misuse: Tools, trash, and non-approved waste in the container are warning signs.
What records actually matter
You don't need fancy software to stay organized. A clean logbook or a simple digital form can do the job if the entries are consistent.
Keep records that answer basic inspection questions:
| Record type | Why it matters |
|---|---|
| Washout inspection log | Shows the area was checked routinely |
| Corrective action notes | Proves issues were addressed, not ignored |
| Disposal or haul-off documentation | Confirms material was removed properly |
| Crew communication notes | Helps show workers were directed to use the right area |
How to keep logs useful
Bad records usually fail for one of two reasons. They're too vague, or they're filled out after the fact.
Use plain entries. Note what was checked, what condition it was in, and what action was taken if there was a problem. If the washout pan was nearing capacity and service was requested, write that down. If a liner was damaged and replaced, document it while it's fresh.
The best inspection log reads like field notes, not office fiction.
Training matters too. Crews don't need a long lecture. They need clear direction on where washout goes, who to notify if the area is full, and what not to dump into containment. A short reminder in the morning huddle often does more than a thick binder no one opens.
Your On-Site Spill Compliance Checklist
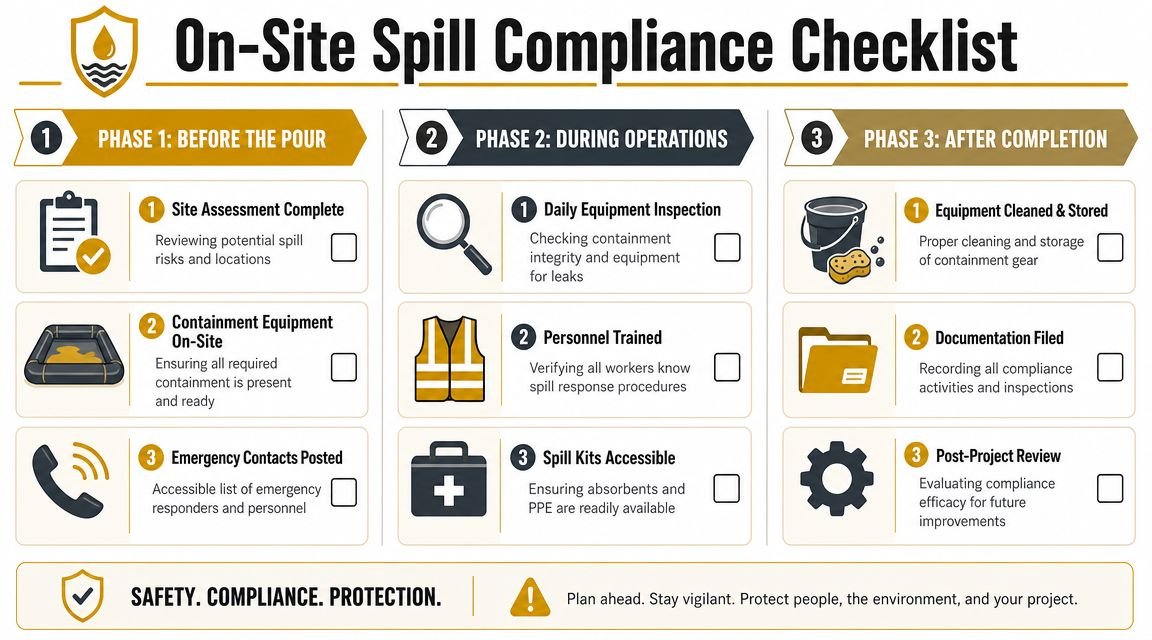
Use this checklist before every pour and during any operation that creates wash water, slurry, fuel risk, or liquid waste. The point isn't to create more paperwork. The point is to catch preventable failures before they become cleanup jobs.
Before the pour
- Confirm the location: Place containment away from storm drains, inlets, and low spots where runoff concentrates.
- Check access: Make sure pump crews, finishers, and truck operators can use the area without crossing active hazards.
- Inspect the container or lined area: Look for cracks, tears, weak corners, soft ground, or anything that could cause leakage.
- Match the setup to the day's work: If the pour is bigger or the crew count is higher, don't rely on the same undersized washout used on a smaller job.
- Post the expectation: Tell every crew where approved washout and liquid waste go before work begins.
During operations
This phase is where most failures happen because production pressure takes over.
- Watch fill level early: Don't assume there's plenty of room just because the shift started recently.
- Keep the area clean enough to use: If the washout is cluttered or hard to reach, crews will improvise somewhere else.
- Correct misuse immediately: If someone dumps outside the designated area once, others will copy it.
- Protect the perimeter: Keep equipment traffic from damaging the containment edge or structure.
After the pour
Cleanup is part of compliance, not a separate issue.
- Stop overflow before shutdown: Don't leave a nearly full washout area overnight and hope weather cooperates.
- Schedule removal promptly: Hardened residue and standing liquid only create a bigger disposal problem later.
- Walk the surrounding ground: Look for splatter, track-out, or escaped material that needs attention.
- Update the record: Note condition, service need, and any corrective steps taken that day.
A crew that follows a short checklist like this usually runs a cleaner site because the standard is visible and repeatable. That matters when inspectors arrive, but it also matters when the project team is trying to keep work moving without distractions.
How Modern Rentals Simplify Compliance
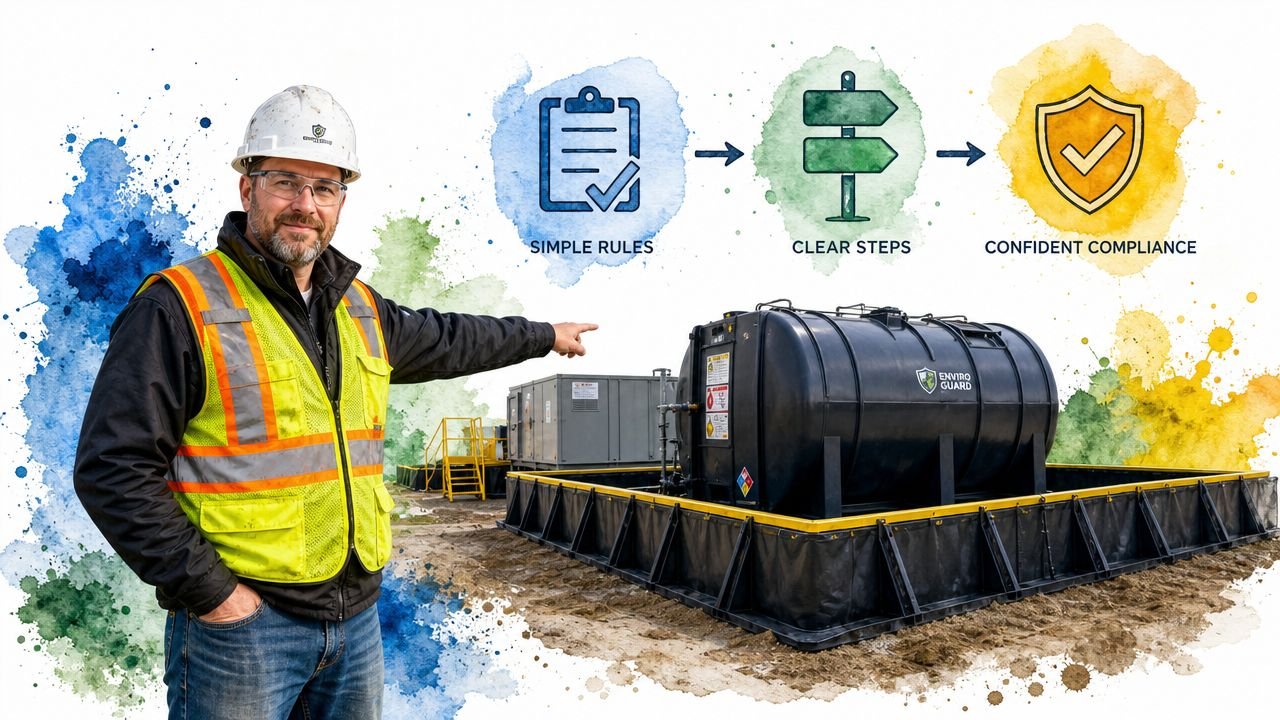
The biggest difference between old-school containment and modern rental equipment is consistency. A purpose-built washout pan or containment unit gives the crew a clear, durable place to put the mess from the start. That removes a lot of the guesswork that causes field failures.
Why rentals close the gap between plan and practice
Turnkey containment rentals work because they address the common weak points all at once.
A heavy-duty steel washout pan is easier to place, easier to identify, and far less likely to fail than a field-built pit. It's also a lot easier for crews to respect. When the containment area looks intentional, workers use it as intended. When it looks temporary or half-finished, they treat it the same way.
Modern rental solutions also help with the parts contractors often underestimate:
- Delivery and placement: The equipment shows up ready to use.
- Known containment capacity: You're not guessing what a tarp-lined depression can hold.
- Leak resistance: Steel pans don't rely on fragile plastic staying perfect all day.
- Pickup and disposal coordination: The end of the job is cleaner and more predictable.
Where they make the most sense
Rental containment is especially useful on sites where crews need fast setup, short-term use, and dependable compliance without tying up labor building something temporary.
That includes:
- Large pours with repeated truck washout
- Urban sites with storm drains nearby
- Renovation projects with tight staging areas
- Sites under active SWPPP scrutiny
- Jobs where the superintendent can't spare labor to maintain improvised containment
The point isn't that every site needs the same product. The point is that purpose-built rental equipment solves the actual problem better than paper-only planning does. It helps the site match the plan, which is what inspectors, owners, and environmental staff want to see.
When contractors upgrade from improvised washout areas to turnkey containment, compliance usually becomes easier because the field setup stops fighting the job.
If you need a practical concrete washout solution that's built for real job site use, Reborn Rentals offers purpose-built washout containment with straightforward scheduling, delivery coordination, and equipment options that help crews keep sites cleaner and easier to manage. For contractors who want less improvisation and more control on pour day, it's a strong place to start.