Spill Containment Tray with Drain: A Contractor’s Guide
Liquid waste gets away from crews fast. One minute it's a few drips under a pump, a rinse bucket by the saw, or slurry building up near a washout area. A few hours later, you've got slick walking surfaces, stained concrete, tracking through work zones, and someone asking who's responsible for cleanup before inspection.
That's why a spill containment tray with drain matters. Not because it looks organized, but because it gives you control over the full life of the waste. You catch it where it starts, keep it off the ground, and deal with it on your terms instead of during a scramble at the end of the shift.
Most crews understand the “catch the spill” part. The piece that gets missed is everything after that. Which drain setup fits the job. When a tray should be emptied. How full is too full. Whether a grate helps or just creates a cleanup headache. Those are the decisions that separate a clean site from a repeat mess.
Keeping Your Job Site Clean and Compliant
On a live job, liquid waste rarely shows up in one neat category. You've got oil drips under parked equipment, wash water from tools, residue under chemical containers, and muddy runoff from maintenance work. If there's no capture point, crews improvise. They use cardboard, a random pan, or absorbents after the fact. That's how small messes turn into daily rework.

A tray with a drain gives you a dedicated place for that liquid to go. It turns waste handling into a planned operation instead of a cleanup response. You're not just catching drips. You're deciding where liquid accumulates, how it gets emptied, and who handles it.
What control looks like on site
A good setup usually follows a simple pattern:
- Put containment at the source: Place the tray where leaks, washout, or drips happen. Don't rely on workers to carry messy containers across the site.
- Assign one disposal path: The drain should feed a controlled emptying process, not a guess.
- Keep the area visible: If a tray is out of sight, it gets overfilled or ignored.
- Inspect before the mess spreads: A tray only helps if someone checks liquid level, residue buildup, and drain condition.
Practical rule: If liquid can reach the floor before it reaches containment, the tray is in the wrong place.
Why this matters beyond housekeeping
A clean site moves better. Workers aren't stepping around slick patches or dragging residue into finished areas. Equipment staging stays tighter. Cleanup takes minutes instead of eating part of the day. More important, containment shows that the site is being managed with intent.
That matters when owners, inspectors, or consultants walk the project. A loose spill says nobody owns the process. A containment setup with a defined drain and disposal routine says the opposite.
What Exactly Is a Spill Containment Tray with a Drain
A spill containment tray with drain is a secondary containment device. That means it sits under or around the primary source of liquid, such as a drum, bucket, machine, or washout point, and catches leaks, drips, and spills before they reach the floor, soil, or drains. One example product describes this kind of tray as engineered for containment and managed discharge, with a 20-liter sump capacity, 80 kg load capacity, and a built-in drain key and plug in a compact workstation format, according to the Udyogi workstation tray technical sheet.
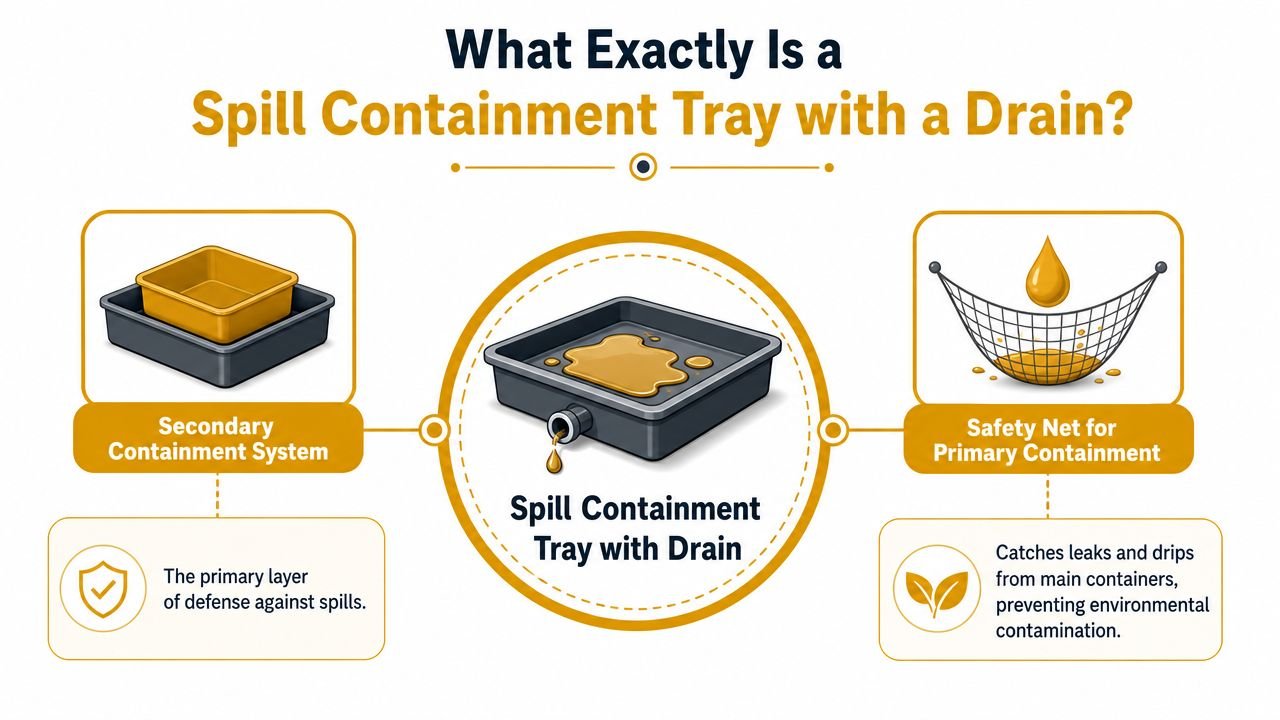
This functions as a backup catch basin beneath primary operations. The bucket, drum, tool station, or equipment reservoir serves as the initial containment. The tray is present for any unplanned leaks.
The difference between a tray and a basic pan
A basic pan catches liquid. That's useful, but limited. Once it fills up, someone has to lift it, tilt it, or scoop from it. That's awkward when the liquid is dirty, hazardous, or heavy.
A tray with a drain adds controlled discharge. That's the part many buyers underestimate. The drain means the collected liquid can be routed out in a managed way instead of being dumped, sloshed, or manually bailed.
That doesn't make the tray a free-flow device. It makes it a controllable one. The point is predictability.
Where the drain actually earns its keep
The drain matters most when the tray is part of a repeated workflow. Good examples include:
- Equipment parking areas: Catch drips under hydraulic or fuel systems, then empty the tray through a planned waste-transfer process.
- Chemical or maintenance stations: Keep leaks contained without forcing workers to handle a messy tray by hand.
- Washout or rinse points: Collect liquid where it's generated and empty on a schedule instead of waiting for overflow.
Secondary containment is the safety net. The drain is the part that lets you clear that safety net without making a second mess.
What this tool is not
It isn't a substitute for good primary containers. If a machine, tote, or bucket is failing, the tray only limits the damage. It also isn't a transport container. Once liquid is captured, the tray should be treated as a stationary containment point until it's properly emptied.
That's the mindset that keeps crews out of trouble. Don't buy a tray because it has a fitting. Buy it because the drain supports a disposal process your team can follow.
Mastering Drain Controls and Safe Liquid Disposal
A lot of product listings talk about the drain like it's the whole answer. It isn't. The drain is only useful if your crew knows how to empty the tray without creating a new spill at the worst possible moment.
That's where sites usually get sloppy. The tray did its job. Then someone cracks a plug with no receiving container ready, no absorbents nearby, and no plan for residue or splash.
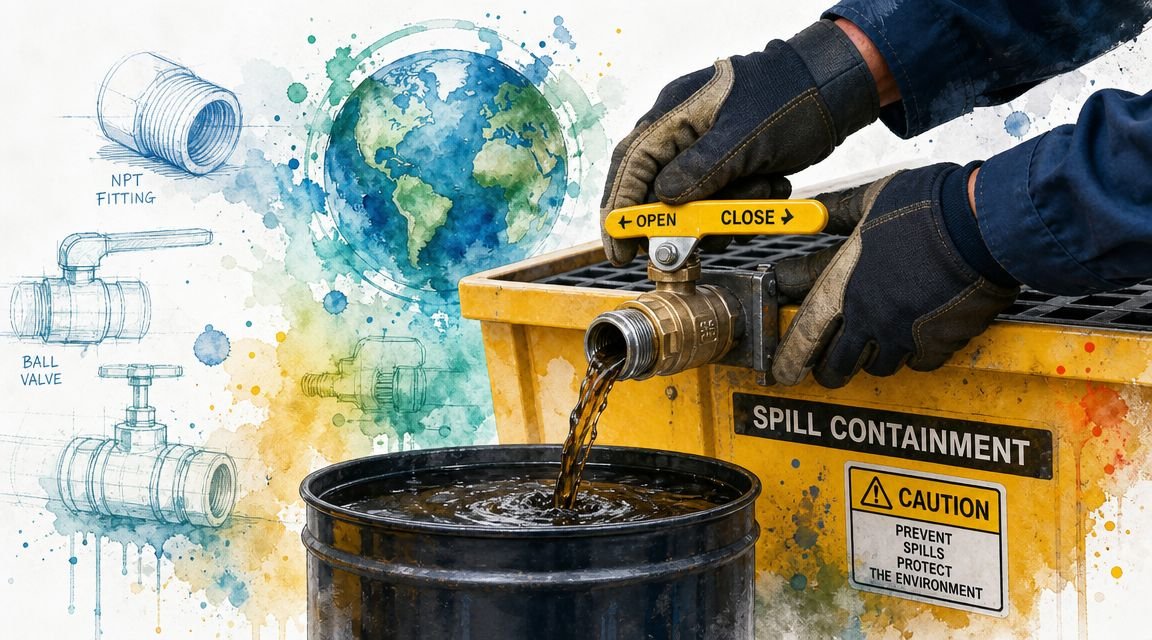
Independent spill-control training content highlighted by a drip pan and spill tray product roundup treats draining as a higher-risk task requiring isolation, PPE, and absorbent materials. That same review points out a common gap in the market: product pages often mention drain fittings such as a 1-inch NPT but don't explain when it's appropriate to drain collected liquid versus absorb it and manage it as waste.
Drain type matters less than drain procedure
You'll see plugs, threaded outlets, and valve-style controls in the field. The right choice depends on how often you empty the tray, what liquid is being collected, and how controlled the transfer has to be.
What matters more is whether the drain setup matches the work:
- Simple plug setups work when emptying is occasional and supervised.
- Threaded outlets make sense when you need to attach a controlled discharge path.
- Valve arrangements help when crews need better on-off control during transfer.
A bad setup is one that encourages shortcuts. If opening the drain is awkward, workers will delay emptying. If it drains too fast, they'll overshoot the receiving container or splash the area.
A field-ready draining routine
Before anyone opens the drain, lock down the task mentally like a transfer operation, not a housekeeping chore.
- Isolate the area. Keep foot traffic and equipment away while the tray is being emptied.
- Wear the right PPE. Match gloves, eye protection, and other protection to the liquid involved.
- Stage the receiving container first. Don't open a drain and then go looking for a drum or waste pail.
- Lay out absorbent material around the transfer point. This catches drips, hose residue, and small misses.
- Open slowly and watch the flow. Fast dumping creates splash and loss of control.
- Close, check, and wipe down. The job isn't finished when liquid stops moving. Check the outlet, threads, plug area, and tray underside for residual drips.
Drain slowly enough that you can stop the flow cleanly. If the liquid outruns your ability to control it, the setup is wrong.
Drain versus absorb and remove
The decision to drain requires careful judgment. Some collected liquids are straightforward to transfer into a proper waste container. Others are thick, contaminated, or mixed with solids, and draining them may create more problems than it solves.
Use the drain when the liquid will flow in a controlled way and you have a proper receiving path. Switch to absorbent removal or container swap-out when the material is sludgy, unstable, or likely to foul the outlet.
That decision doesn't come from a catalog. It comes from understanding the waste stream and how your crew cleans up at the end of the shift.
Calculating Sump Capacity and Load Limits
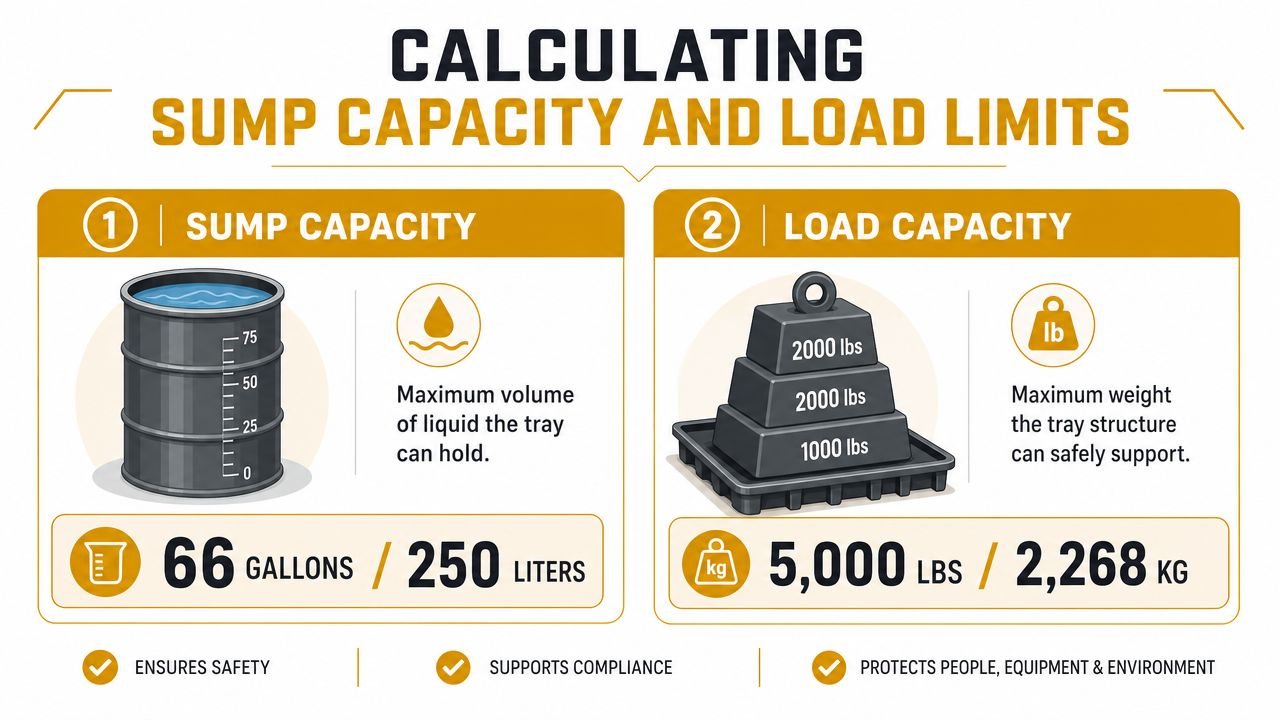
The two numbers that matter most on any tray are sump capacity and load capacity. Crews mix them up all the time. One tells you how much liquid the tray can contain. The other tells you how much weight the structure can safely support.
If you ignore either one, you can end up with a tray that looks fine during setup and fails when the job gets messy.
Read the tray like a superintendent, not a shopper
A tray might hold enough liquid but still be the wrong choice if the equipment, drum, or loaded container on top exceeds the structural rating. The reverse is also true. A tray can support the load and still be undersized for the spill volume you're trying to manage.
That's why both numbers need to be reviewed together during selection.
| Capacity term | What it means on site | What goes wrong when it's ignored |
|---|---|---|
| Sump capacity | How much spilled or drained liquid the tray can hold before overflow | Liquid reaches the floor, soil, or nearby drains |
| Load capacity | How much weight the tray can safely support from the container or equipment above it | Tray deformation, cracking, instability, or unsafe support |
Why headspace matters
Crews often treat the published sump number like a working fill line. It isn't. You need headspace so liquid doesn't slosh out, especially if someone bumps the tray, the surface isn't level, or residue changes the flow pattern.
A polypropylene spill tray listing from U.S. Plastic gives a useful real-world example. With 2 gallons collected, the liquid level sits about 1/2 inch below the top edge, and the tray can hold about 2 quarts more before overflow. The same listing says it should not be moved when filled that far, and notes that softening begins at 180°F. That's a clear reminder that fill level, handling, and temperature are tied together.
Field note: A tray near full capacity is containment, not transportation.
A practical sizing method
You don't need fancy math to make a good decision. You need a disciplined estimate.
Use this thought process:
- Identify the largest likely release: Focus on the biggest container, leak source, or washout volume that could hit the tray.
- Add headspace for slosh and uneven surfaces: Don't plan to run the tray to the edge.
- Check the supported weight separately: Include the container, contents, and any tool or frame resting on the tray.
- Account for residue behavior: Thin liquid acts differently from oily film, slurry, or solids-loaded waste.
Moving a tray is where people get into trouble
Once liquid collects, the tray becomes unstable to move even if it looked easy to carry when empty. Slosh shifts weight. Full corners flex. Hot material can change how plastic behaves. The right move is simple. Empty first, then relocate.
That's one of the most common mistakes on temporary sites. Someone treats a containment tray like a tote. It isn't built for that role.
Meeting SWPPP Requirements and Avoiding Fines
A tray doesn't make a site compliant by itself. What it does is support the kind of control a SWPPP expects. If your project has any chance of liquid waste reaching soil, stormwater flow paths, or inlets, secondary containment belongs in the conversation.
For contractors, that usually comes down to one practical question. Can you show that wash water, drips, and liquid residue are being captured before they leave the work area? A spill containment tray with drain helps answer yes, because it creates a defined containment point and a defined removal process.
Why inspectors care about containment
Inspectors don't just look at whether there was a spill. They look at whether the site had a workable system to prevent migration and handle waste responsibly. A tray under the source shows planning. A tray with a drain, used correctly, shows the crew has thought through removal as well as capture.
That matters in common situations such as:
- Concrete-related work: Washout water and slurry need a controlled place to go.
- Equipment staging: Drips from parked machinery can't be allowed to spread across paved or unpaved areas.
- Material storage: Buckets, jugs, and service fluids need backup containment in case the primary container leaks.
BMP thinking on a real site
In SWPPP language, this is a best management practice. On the ground, it's simpler than that. You're keeping polluted liquid from reaching places it shouldn't.
The biggest value isn't the hardware. It's the discipline the hardware supports:
- crews know where to drain and where not to drain
- liquid waste stays in one controlled zone
- cleanup is faster because the mess is concentrated
- site leadership can inspect one process instead of chasing random drips
A site avoids trouble when containment is built into the workflow, not added after the first mess.
If your washout, maintenance, or storage areas still rely on “we'll clean it if something spills,” that's not a system. It's a delay waiting to happen.
Contractor Selection Guide Rent vs Purchase
Choosing the right tray starts with the job, not the catalog. Short-duration work, recurring maintenance, heavy slurry, light drips, indoor chemical handling, and equipment parking all create different demands. The tray that works well for one setup can be a nuisance on another.
The first decision is often rent versus purchase. If the need is temporary, tied to one project phase, or driven by a specific containment requirement, renting usually keeps the yard from filling up with gear that sits between jobs. Buying makes more sense when the same containment problem follows your crew from site to site and you've got a standard way of cleaning, storing, and reusing the tray.
Grated versus smooth tray
The other big choice is the surface design. A comparison of containment tray styles points to the key tradeoff: grated trays keep items above pooled liquid, while smooth no-grate trays are easier to clean, especially when solids or messy residue are involved.
That sounds simple, but it affects daily labor.
A grated tray usually works better when the goal is to keep containers, tools, or small equipment out of the liquid collecting below. A smooth tray is often easier when the waste stream includes sludge, slurry, heavy residue, or material that needs to be shoveled, scraped, or washed out.
Selection checklist
| Consideration | What to Look For | Pro Tip |
|---|---|---|
| Job duration | Short-term, seasonal, or one-off use versus repeated use across many projects | Rent when the need is temporary or site-specific |
| Waste type | Free-flowing liquid, oily residue, slurry, or solids-loaded waste | The messier the residue, the more valuable a smooth tray becomes |
| Drain workflow | Plug, threaded outlet, or valve-style control that matches your disposal routine | If crews need frequent emptying, don't pick a drain that encourages shortcuts |
| Surface style | Grated top for separation from pooled liquid, or no-grate for easier washout and scraping | Choose based on cleanup labor, not just product photos |
| Site mobility | Whether the tray will stay in one spot or need repositioning between tasks | Treat any filled tray as stationary until emptied |
| Inspection access | Ability to see liquid level, residue buildup, and outlet condition quickly | Hidden sumps get neglected fast |
| Storage after use | Yard space, cleaning ability, and whether the tray will be ready for the next job | Buying only pays off if your team maintains what it owns |
A plain-language decision test
If your crew is dealing with routine drips under equipment or containers, a grated setup often keeps work cleaner. If you're handling concrete residue, sludge, or anything that cakes up, smooth-bottom containment is usually easier to service.
If you don't know how often the tray will be used after this job, don't assume ownership is the smart move. The cheaper decision up front can become the more expensive one when storage, cleaning, and replacement get ignored.
Frequently Asked Questions
Can a spill containment tray with drain be used for any liquid
Not automatically. The tray material, drain components, and cleanup method all need to match the liquid involved. Before putting a tray into service, confirm that the construction is suitable for the waste stream and that your crew has a safe disposal path. Compatibility matters just as much as size.
Should crews leave the drain open during use
In normal containment use, no. The tray should function as containment first. If the outlet is left open without a controlled receiving setup, you've defeated the purpose of secondary containment and created a path for uncontrolled release.
What's the best way to clean dried concrete or heavy residue from a tray
Clean it before buildup hardens into a removal job. For wet or fresh residue, remove waste promptly and keep the tray on a regular service interval. For hardened material, crews usually need mechanical cleanup methods appropriate to the tray surface and the residue involved. Smooth-bottom trays are often easier to scrape and wash than grated designs when solids are part of the waste.
What's the difference between a spill tray and a spill pallet
A spill tray is usually the lower-profile, task-level containment option used under equipment, containers, or workstations. A spill pallet is generally a larger containment platform for bigger storage applications. The selection comes down to footprint, supported load, expected spill volume, and how the area is used day to day.
Can workers move the tray after it collects liquid
They shouldn't treat it like a transport vessel. Once liquid is captured, the safer practice is to empty it before relocation. Moving a filled tray raises the risk of slosh loss, tipping, or structural stress.
Is a drain always better than no drain
Not always. A drain is valuable when the liquid can be emptied in a controlled way into a proper receiving container. If the waste is thick, contaminated, or mixed with solids, a no-drain design or a different cleanup method may be easier to manage. The best tray is the one your crew can service safely and consistently.
If you need dependable washout and containment equipment for a concrete job, Reborn Rentals makes the rental process straightforward. Their lineup is built for contractors who need practical containment, clear pricing, and fast coordination for delivery, scheduling, and site logistics.