Master Stormwater Pollution Prevention: Construction Guide
You're on a live job, trucks are moving, the grade is half-finished, and then the sky turns dark. The first hard rain doesn't care that the crew is short-handed, the inlet protection is still sitting on a pallet, or the concrete washout area got pushed “until after lunch.” Water starts finding every low spot on the site. Mud heads for the curb. Slurry starts creeping where it shouldn't.
That's when stormwater pollution prevention stops being a permit requirement and becomes a field problem.
A lot of contractors already have a SWPPP. The binder exists. The map exists. The permit box is checked. What gets people in trouble is the gap between the document and the dirt. The site changes daily. Stockpiles move. Access routes shift. Subs set up where they can. If the controls don't move with the work, the plan falls behind fast.
Why Your SWPPP is More Than Just Paperwork

By the time rain starts running across a jobsite, you are out of planning time.
Water will pick up loose soil, track through material storage, hit concrete residue, and head for the fastest exit off the property. If the crew has not already set the site up for that runoff, the SWPPP in the trailer is just paper. A useful Stormwater Pollution Prevention Plan, or SWPPP, works in the field. It tells the superintendent, foremen, and subs what has to be protected, where runoff will move, and which controls need to be in place before the weather or the work shifts.
The EPA lays out the basics in its guidance on developing a stormwater pollution prevention plan. Identify pollutant sources. Map drainage. Choose control measures. That part is straightforward. The hard part is keeping the plan tied to daily operations when haul routes change, grading opens new flow paths, and one concrete pour can create washout problems if nobody owns the setup.
That is where good sites separate themselves from problem sites.
A SWPPP usually fails in the same few ways. The document is complete, but the controls stay where the original map put them while the job moves on. Someone relocates a stockpile and no one adds perimeter protection. A crew starts saw cutting or chute washdown in the closest open area instead of the approved washout. An inspector notes the issue, but nobody confirms the fix and updates the record.
The common thread is not bad paperwork. It is drift between the plan and the way the site is being run.
On permitted construction sites, the SWPPP is part compliance document and part field management tool. It should account for pollutant sources, drainage patterns, site conditions, and the control measures tied to each activity. On a busy job, that means more than checking a box for sediment control. It means planning for the pollutants that show up in real work. Mud from stabilized entrances that are no longer stabilized. Trash around laydown areas. Fuel and hydraulic drips in equipment zones. Concrete washout water and slurry, which can create a fast violation when crews do what is convenient instead of what was designated.
A practical rule I use is simple. If the superintendent cannot explain the stormwater setup in two minutes at the tailgate, the site is not ready.
Crews that stay out of trouble treat stormwater the same way they treat access, deliveries, utility conflicts, and inspections. It gets assigned. It gets checked. It gets adjusted when the site changes. That approach takes more effort up front, but it is a lot cheaper than a cleanup, a notice of violation, or a meeting where everyone is trying to explain why the plan said one thing and the site looked like another.
Conducting a Practical Site Assessment
Rain hits before the site is ready more often than people admit. The crew has trenches open, a stockpile at the low end, a storm drain just off the curb, and concrete work starting after lunch. If nobody has walked the drainage path with those real conditions in mind, the SWPPP is already behind the job.
A practical site assessment starts in the field, not at the trailer table. Walk the site like runoff is active today. Start at the disturbed areas and work downhill. Stop at every place water will slow down, spread out, or leave the property. On most jobs, the trouble spots are easy to miss on paper and obvious on foot.
Three questions keep the assessment useful:
- What on this site can turn into a pollutant?
- How will water reach it?
- Where does that water go once it picks it up?
That sounds simple because it is. The hard part is applying it to the way the site is being used that week.
Here's what deserves attention first:
- Exposed soil: Rough grade, trench spoils, perimeter cuts, open slopes, and any area left inactive without cover.
- Storage and waste areas: Stockpiles, pallet staging, dumpsters, scrap piles, bagged materials, and loose trash that will move in wind or water.
- Traffic and equipment zones: Stabilized entrances that are breaking down, haul roads, fueling spots, maintenance areas, and places where mud gets tracked.
- Concrete operations: Pump setup, chute washdown, saw cutting, form cleaning, mortar mixing, and anywhere slurry or high-pH wash water can end up on bare ground.
- Dewatering points: Excavations, trench boxes, foundations, and planned discharge locations that can carry sediment off site fast.
Concrete work deserves its own look because it causes some of the fastest violations on active jobs. Crews will use the closest convenient spot unless the approved washout is obvious, usable, and close enough to daily work. A site assessment should catch that before the first truck arrives, not after dried slurry shows up in the gutter.
The site map has to match field reality. If the drawing shows one washout, one stockpile, and one access point, but the job is running with two active phases and three entry routes, the map is already stale. Update it so the foreman, operator, and inspector are looking at the same site.
A useful map should show:
| Field question | What the map should show |
|---|---|
| Where does runoff move? | Slopes, flow arrows, low points, drainage paths, off-site discharge points |
| What creates pollution? | Stockpiles, concrete washout, fueling, cutting, staging, waste areas |
| What protects each source? | BMP locations, type of control, and the area each control is meant to protect |
| When do controls need to be in place? | Installation timing tied to grading, utilities, paving, and concrete phases |
| How will crews reach and maintain them? | Access routes, truck movement, maintenance paths, and areas likely to get damaged |
If a superintendent cannot point to the map and explain those items in a couple of minutes, the assessment is not finished.
One field habit helps more than anything else. Ask the foreman, the grading lead, and the concrete crew the same question separately: Where would dirty water leave the site today? If they point to different locations, or if one of them points to a place that is not protected, you just found the gap between the SWPPP document and daily operations.
Walk the perimeter last. By the time runoff reaches the edge, the source problem has already been missed.
Selecting the Right Best Management Practices
Friday afternoon. The grading crew is trying to finish a slope, the concrete truck wants a washout location now, and rain is in the forecast. That is when BMP selection stops being a line item in the SWPPP and turns into a field decision with real cost behind it.
Good BMP selection starts with one question: what are you trying to keep out of runoff today? On a busy site, the answer changes by phase, crew, and weather. If the SWPPP lists controls but does not match the actual work on the ground, crews fall back to convenience. That is how you end up with extra perimeter devices and no real control at the source.
As noted earlier, a workable plan assigns a control to each pollution-producing activity and uses layers instead of relying on one device to fix everything. In practice, that means pairing soil stabilization with sediment capture, then backing both up with housekeeping and defined work areas for things like fueling, saw cutting, and concrete washout.
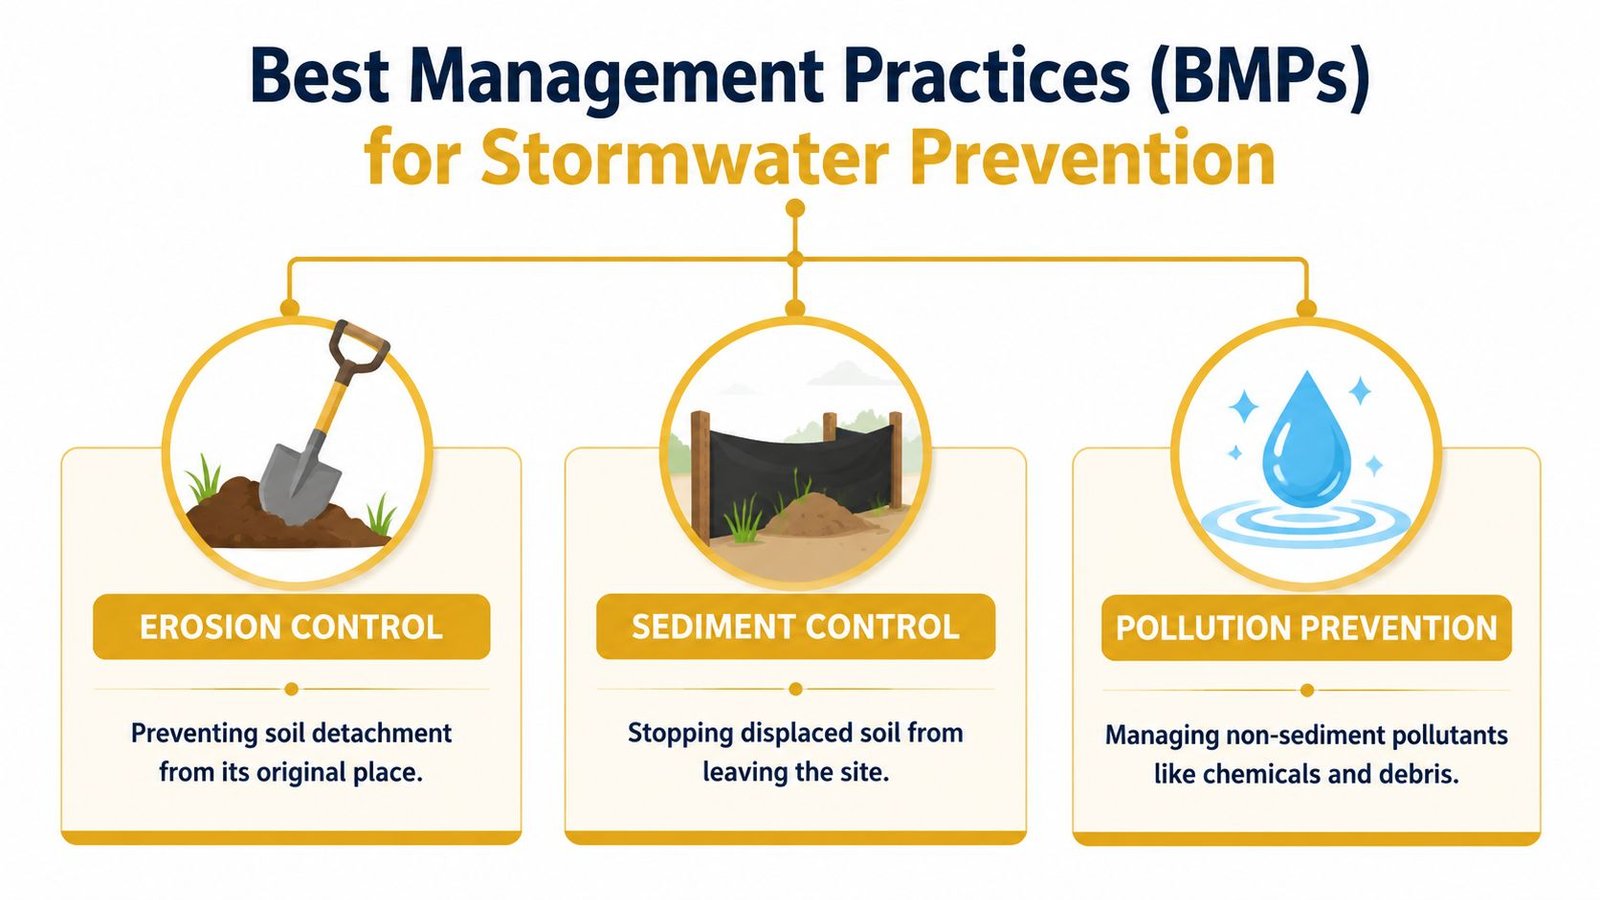
Erosion control keeps soil in place
The cheapest sediment to manage is the sediment that never moved.
If you keep soil covered, slowed, or stabilized, every downstream control lasts longer and needs less maintenance. That usually gets better results than trying to catch muddy water at the fence line after the site is already shedding sediment.
Common choices include:
- Mulch and cover: Good for inactive areas, stockpiles, and bare ground that will sit long enough to crust over and start eroding.
- Blankets and surface stabilization: Useful on slopes, channels, and any disturbed area where runoff can build speed.
- Phasing and sequencing: Limit disturbance to what the crew can finish and protect. It takes more coordination, but it cuts maintenance and lowers the chance of perimeter failures.
The trade-off is schedule pressure. Crews like open room to move. Stormwater compliance usually improves when the disturbed footprint stays tight. That tension is real, and the superintendent has to manage it.
Sediment control catches what gets loose
Sediment controls are still necessary. They just work best as backup.
Silt fence, wattles, inlet protection, check devices, traps, and basins all have a place, but only if they match the way water is moving across the site. Put a sheet-flow control in concentrated flow and it blows out. Put inlet protection on every structure without fixing the slope above it and the labor bill shows up fast.
Use them with a purpose:
- Perimeter controls where runoff leaves disturbed ground as sheet flow
- Inlet protection where storm structures are likely to receive sediment-laden runoff
- Check controls where flow is concentrated and needs to be slowed before it cuts
- Trap or basin controls where drainage area and runoff volume justify the space and upkeep
A simple field test helps. If crews are cleaning the same inlet bag every storm, replacing torn fence every week, or chasing bypasses at the low corner, the fix is usually upstream.
Source control is what keeps a site out of trouble
Experienced teams win on source control because it deals with the pollutants perimeter BMPs were never meant to handle well. Concrete slurry, washwater, fuel, trash, paint, stucco residue, cutting slurry, and loose fines all need their own containment and work rules.
That is the gap between the SWPPP binder and daily operations. The document might say "protect materials" or "manage waste." The field version needs to say where the pallet goes, where the saw cutting happens, who services the washout, and what area stays clear of drainage.
For day-to-day operations, source control usually looks like this:
- Housekeeping that happens daily: Trash picked up, scrap contained, and loose material kept out of travel lanes and flow paths
- Protected storage: Fine materials, liquids, and chemicals kept under cover or inside containment
- Defined work zones: Fueling, mixing, cutting, and washout set up away from low points and drainage routes
- Crew instructions with a location attached: "Use the washout pan behind the pump" gets results. Generic reminders do not.
The sites that stay compliant are usually not the ones with the most controls. They are the ones where crews know exactly where waste, washwater, and messy work belong.
Concrete washout deserves its own plan
Concrete washout causes avoidable violations because the work moves fast and the waste shows up immediately. If the designated spot is too far away, blocked, undersized, or full, drivers and finish crews will improvise. They are trying to keep production moving.
A usable washout setup needs three things:
| Need | What works in the field |
|---|---|
| Containment | A dedicated, clearly marked washout pan or container |
| Access | Placement where trucks and crews can reach it without cutting across active work |
| Follow-through | Routine checks so it doesn't overflow, get buried, or turn unusable |
For many projects, rented containment is a practical option because it gives the site a defined washout location without building a pit, lining it, cleaning it out, and dealing with storage after the job. Reborn Rentals offers washout pans for that purpose.
Placement matters as much as the container. Put the washout near the pour, outside drainage paths, and where a ready-mix driver can find it without a long explanation. If crews have to choose between production and compliance, make compliance the easy choice.
Deploying and Maintaining Site Controls
Friday afternoon, the grading crew opens up a new area, a storm rolls through that night, and by Monday you have muddy track-out at the entrance, a blown wattle at the low corner, and wash water showing up where it should not. The SWPPP may have listed the right controls, but the site still failed because nobody put them in place at the right time and kept them working.
That is the gap that gets jobs in trouble. The plan sets the requirement. Field execution decides whether runoff stays contained or becomes a violation.
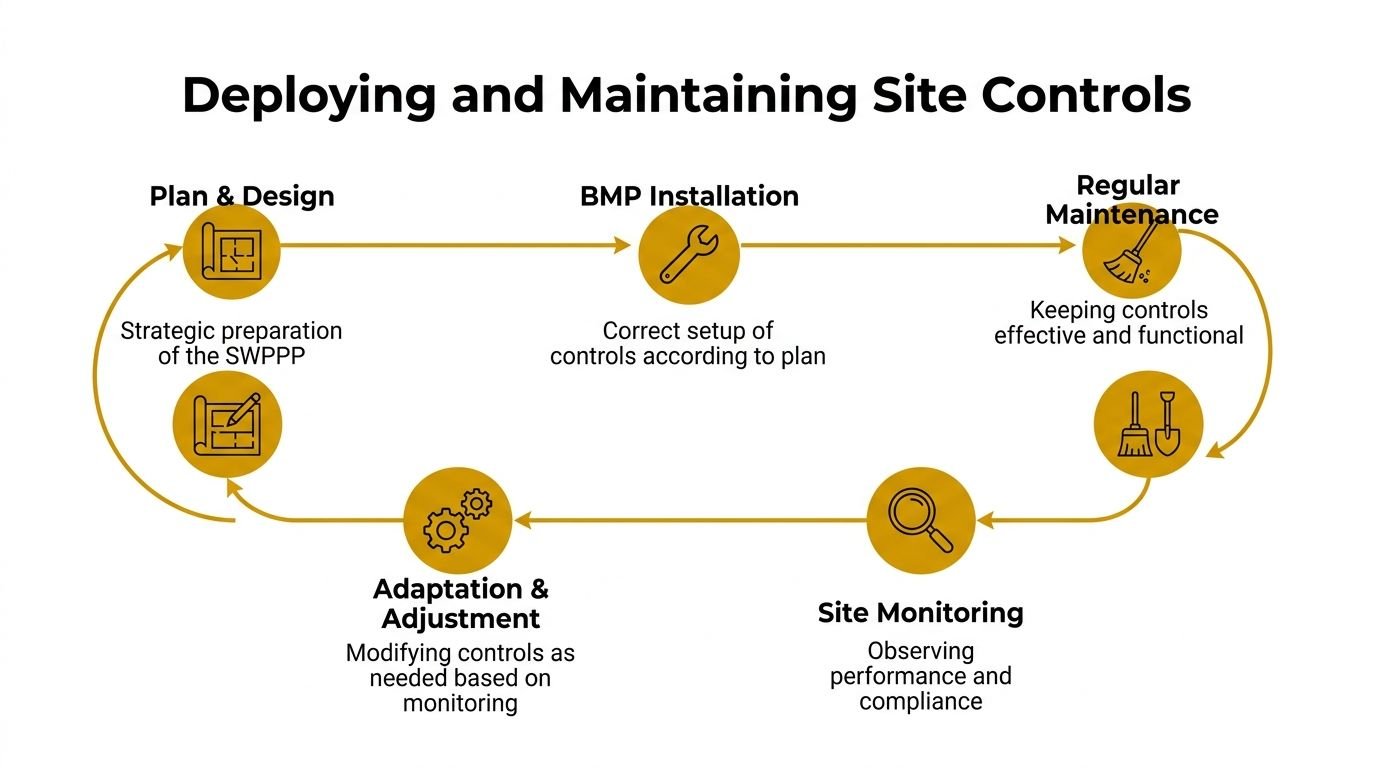
Install controls before the phase changes
Good sites do not wait for rain to expose the weak spots. They install controls ahead of disturbance, and they move them as the job moves. That sounds simple. On an active project, it takes planning, labor, and somebody in charge of making it happen.
Use a field sequence that matches how work unfolds:
- Start with perimeter and access controls. Get the stabilized entrance in, install sediment controls at the downslope edge, and protect inlets that can receive runoff from current work.
- Set up pollutant-generating areas before those trades start. That includes fueling, trash, material storage, saw cutting, slurry management, and concrete washout.
- Tie BMP moves to the look-ahead schedule. If the earthwork crew shifts to the east side next week, the controls for that area should already be on the board and assigned.
- Leave room to maintain what you install. A control buried behind materials or blocked by equipment usually stays damaged longer than it should.
That last point matters more than people admit. A perfectly selected BMP is useless if no skid steer, vac truck, or laborer can reach it once the site gets crowded.
Install for real conditions, not plan-sheet conditions
A lot of BMP failures are predictable because the installation never matched the flow, traffic, or grade in the field.
Common misses include:
- Silt fence installed without a proper trench or key-in. Water cuts underneath and carries sediment past the line.
- Inlet protection placed at the wrong structure. The water enters a nearby inlet and bypasses the protection entirely.
- Wattles used in concentrated flow. They shift, undercut, or blow out after the first hard runoff event.
- Concrete washout placed in a drainage low spot. Stormwater fills the container or mixes with slurry and creates a larger cleanup problem.
- Dewatering discharge sent onto bare, unstabilized soil. One problem gets replaced with erosion and sediment transport somewhere else.
I have seen crews say a control is installed because the materials are on the ground. That is not the standard. A BMP is installed when runoff meets it where expected, it holds up under site traffic, and the crew can still maintain it after deliveries, grading, and weather.
Maintenance needs labor, equipment, and ownership
Every control on the plan creates follow-up work. If the superintendent does not budget time and manpower for that work, the site slowly slips out of compliance.
Keep the maintenance routine practical:
- Remove sediment before capacity is gone. Waiting too long turns a functioning control into a bypass point.
- Fix damaged controls the same day when possible. Torn fence, crushed inlet protection, and displaced berms rarely improve on their own.
- Keep source-control areas usable. Washout pans, dumpsters, and material cover stations need to stay accessible or crews will improvise.
- Adjust controls after site changes. New slopes, stockpile moves, utility cuts, and access changes can redirect runoff immediately.
The trade-off is straightforward. Maintenance takes labor now, but cleanup, agency attention, and schedule disruption cost more later.
Concrete washout is a good example. A pan can be in the right spot on Monday and become a problem by Thursday if it is full, blocked by stored material, or stranded after the pour sequence shifts. On busy sites, that means someone needs washout on a regular check list, not just in the SWPPP binder.
Put names on tasks. Assign perimeter checks, inlet checks, washout checks, and corrective work to specific people. That is how the SWPPP stays connected to daily operations instead of turning into paperwork that only matters after a complaint or inspection.
Inspection and Documentation that Protects You
Inspection and documentation are what save you when there's a question about compliance. They also save you before that, because regular inspection is how crews catch drift early. A torn perimeter line, a full washout pan, or a new runoff path is much cheaper to fix when someone sees it right away.
The trick is making inspections simple enough that they happen.
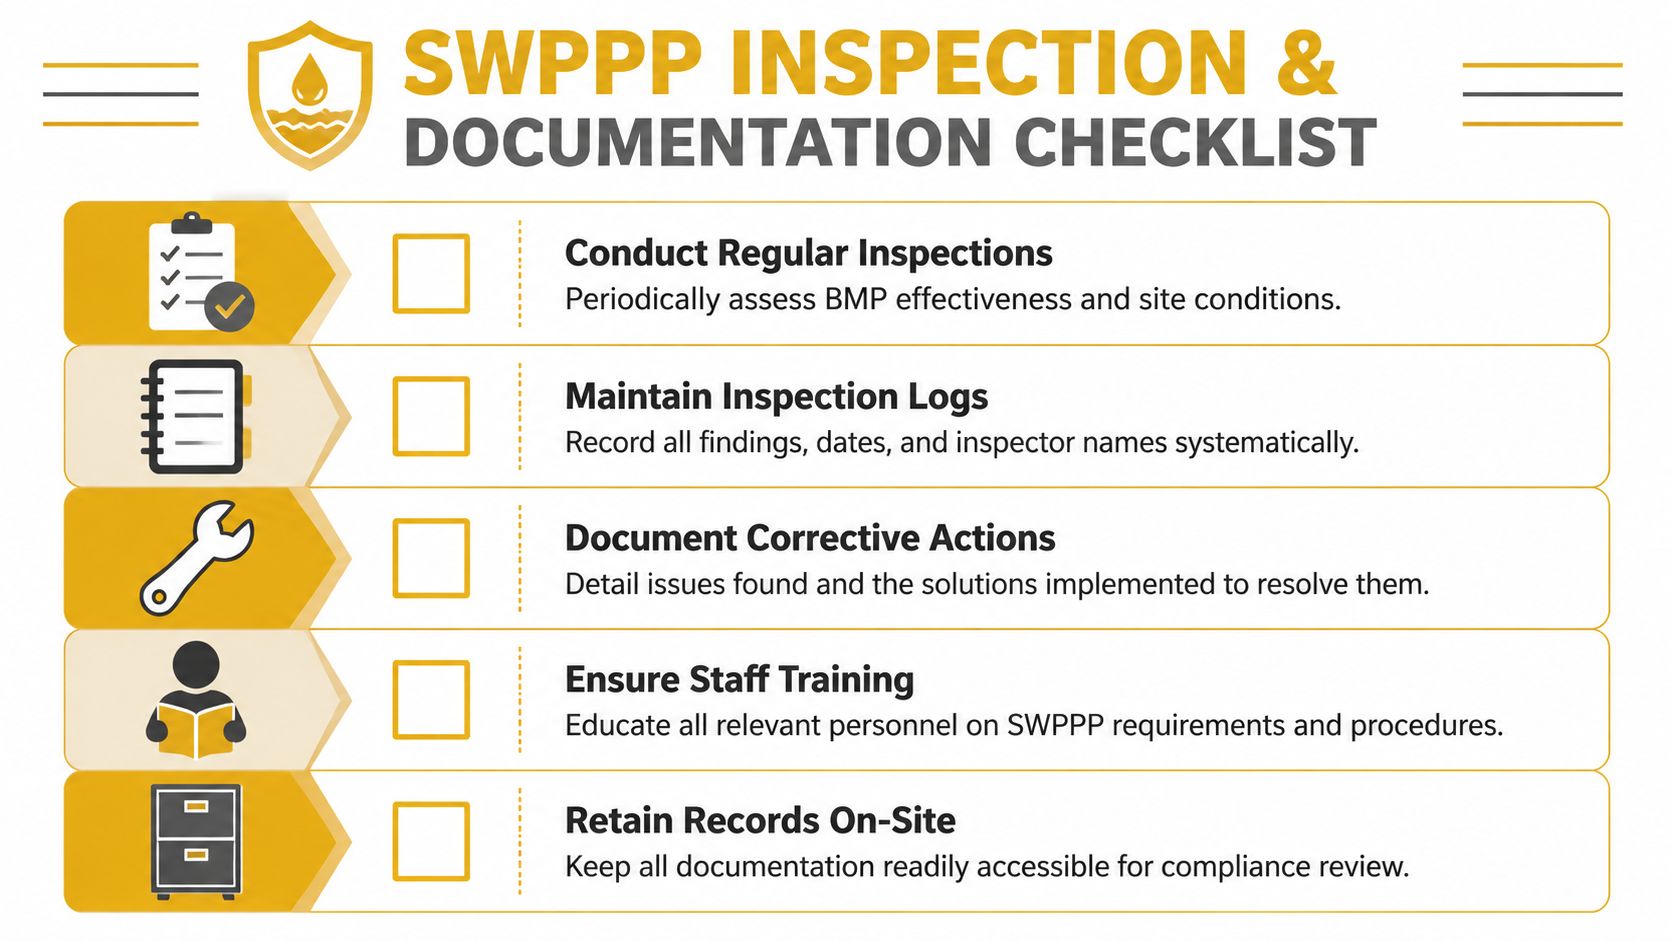
What a good inspection covers
A useful inspection is not a box-checking exercise. It should answer four things clearly:
| Inspection question | What to record |
|---|---|
| What did you look at? | BMPs, disturbed areas, outlets, material zones, washout, dewatering areas |
| What did you find? | Working, damaged, missing, overloaded, bypassed, or not installed |
| What needs to happen? | Repair, replace, clean out, relocate, stabilize, retrain |
| Who is doing it and when? | Responsible person and completion target |
That's enough structure for a foreman to use on a phone or tablet without turning the process into office work.
Use photos like evidence, not decoration
A photo log helps only if the pictures tell a story. Random site pictures don't do much. Targeted photos do.
Take photos that show:
- The overall condition: Wide shot of the area and flow path
- The actual issue: Close shot of the torn fence, sediment buildup, missing protection, or improper washout condition
- The context: Nearby inlet, curb line, slope, or discharge point
- The correction: Same angle after the repair or cleanup
Name the photos in a way that means something later. “North inlet after cleanup” is useful. “IMG_4821” is not.
If you can't tell from the record what was wrong, what was done, and whether it was fixed, the documentation won't help much.
Keep the log short enough to survive the real workday
The best inspection log is one your field team will complete. A simple format works better than a long form nobody wants to open.
A solid repeatable log can include:
- Date and time
- Inspector name
- Weather and site condition
- Areas inspected
- Deficiencies observed
- Immediate action taken
- Follow-up required
- Photo references
- Sign-off
You also want a habit of recording corrections, not just problems. A lot of sites document the deficiency and forget to close the loop. That's where records go weak.
Train the people who see the problems first
The superintendent, foreman, pump operator, grading lead, and labor crew often spot the issue before any consultant or inspector does. Give them simple triggers to act on.
For example:
- runoff cutting a new path
- washout area becoming hard to access
- stockpile protection blown off
- sediment reaching a curb line or inlet
- dewatering discharge causing erosion or muddy discharge
When crews know what matters, stormwater pollution prevention stops living in the SWPPP binder and starts showing up in field decisions.
Building a Culture of Proactive Prevention
The contractors who handle stormwater well usually do the same five things every time. They assess the site thoroughly, build a plan around real pollutant sources, install controls before the work starts, inspect like conditions are always changing, and maintain the controls instead of assuming they'll hold forever.
That's not paperwork discipline. That's site discipline.
Cleaner sites usually run better sites
A strong stormwater program tends to improve other parts of the project too. Material storage gets tighter. Access stays cleaner. Concrete operations get more organized. Waste handling becomes clearer. Crews spend less time arguing about where things should go because the site has defined zones and expectations.
That kind of order shows up to owners, inspectors, neighbors, and subs. It also reduces the scramble that happens when a storm rolls in and nobody's sure what's protected and what isn't.
Static plans are losing ground
Rainfall risk isn't as predictable as many legacy plans assume. Recent climate assessments report that the hydrological cycle is intensifying, with heavier precipitation events becoming more frequent in many regions. That raises the chance that standard sediment and washout controls get overwhelmed during short, intense storms, which is why more contractors are shifting toward dynamic, site-adaptive planning tied to weather risk and construction phasing, as discussed in this overview of stormwater pollution prevention under changing weather pressure.
That change matters on small jobs too. Short-duration sites, urban infill work, and repair projects can produce the same runoff headaches as larger sites if the controls are late, undersized, or poorly maintained.
Professionalism shows up in the mud
Anyone can print a SWPPP. The difference is whether the site can take a storm without turning into a violation.
If you want stormwater pollution prevention to work, keep it simple and active. Know where pollutants are generated. Control them close to the source. Give crews clear places to wash out, stage material, and maintain equipment. Inspect often enough to catch drift. Document fixes while they're fresh.
That's what keeps a site compliant. It also makes the job look like it's being run by people who know what they're doing.
If your project needs a straightforward way to contain concrete washwater and slurry, Reborn Rentals offers rentable washout pans and containers with clear pricing, delivery coordination, and specs crews can review before the pour. For contractors, site managers, and consultants trying to keep concrete operations aligned with the SWPPP, that kind of ready-to-deploy containment can make daily compliance a lot easier.