
SWPPP Best Management Practices for Construction Sites
The first concrete truck is backing toward the pour, the pump crew is setting up, and the driver asks where to wash out. If nobody can point to a designated spot, the site has a problem before the concrete work even starts. A washout pan in the wrong place, a silt fence crossed by vehicle traffic, or an inlet left unprotected can all turn routine work into stormwater trouble.
SWPPP best management practices are the practical controls that connect a written stormwater plan to the way people, materials, and water move across a jobsite. They work when crews can find them, understand them, and keep them functioning through changing site conditions.
What SWPPP Best Management Practices Actually Do on a Site
A Stormwater Pollution Prevention Plan (SWPPP) is the site-specific document that identifies where stormwater may pick up pollutants and what the project will do to prevent them from leaving the site. It ties together erosion control, sediment control, waste handling, and stabilization. The purpose isn't to collect a list of equipment. It's to help the superintendent turn the site's risks into controls crews can use during actual work.
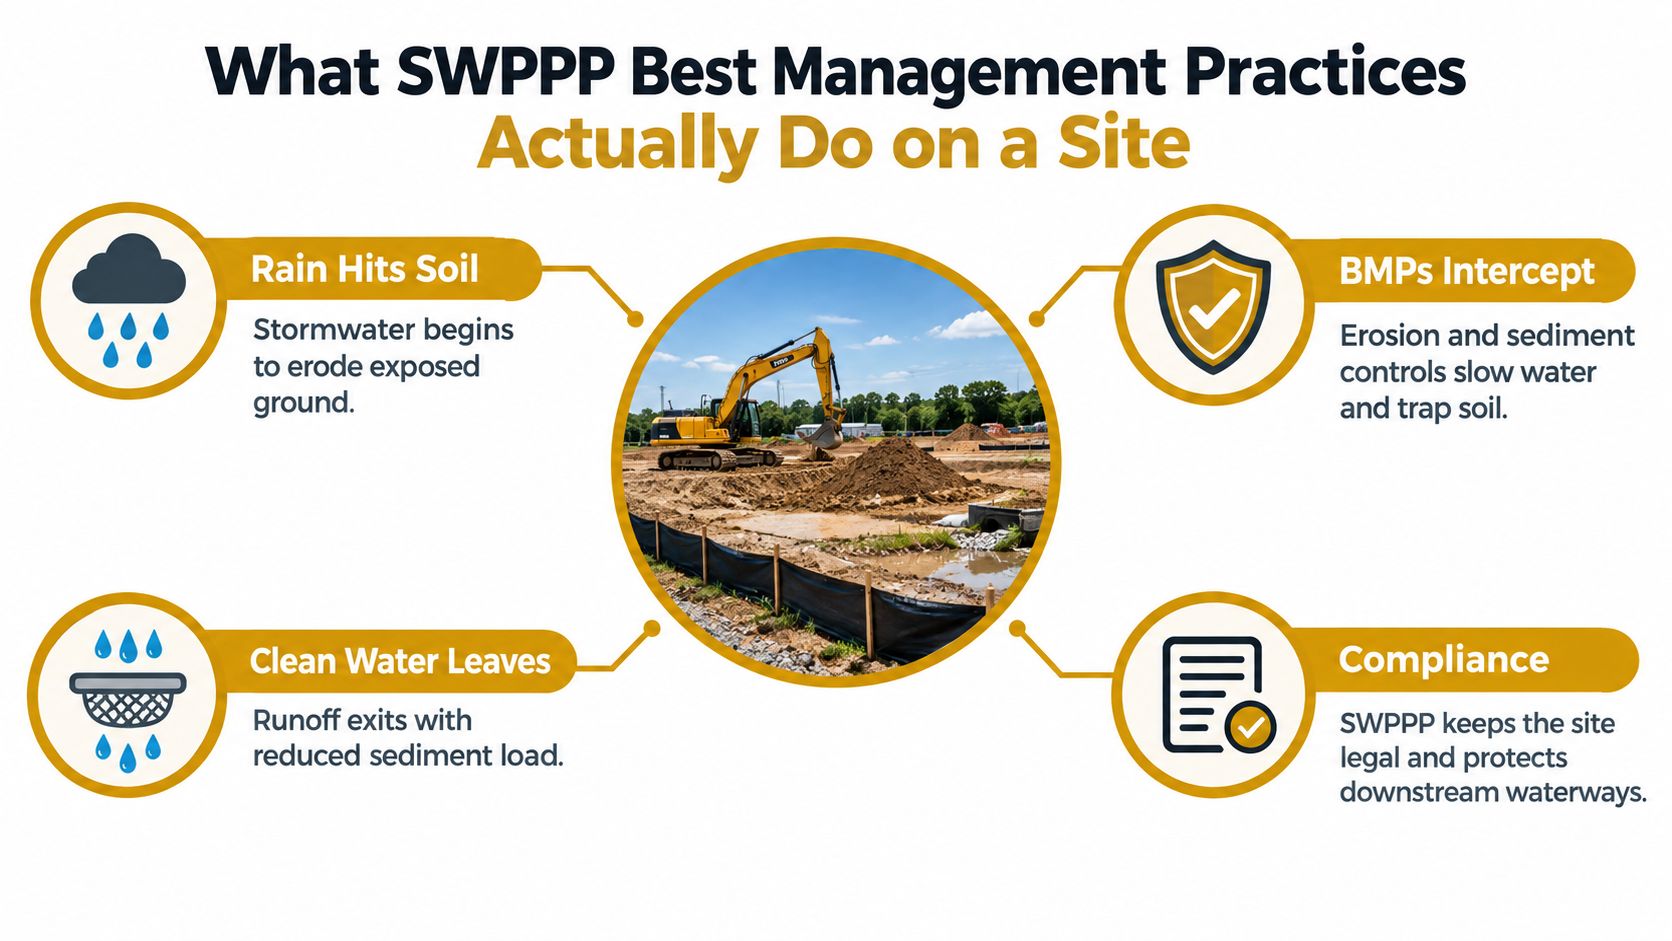
A BMP, or best management practice, is a control or work practice used to prevent or reduce pollution. That can mean a physical barrier, such as inlet protection, or an operating rule, such as collecting concrete wash water in a leak-proof container. Some permits also use the term Best Conventional Pollutant Control Technology for a regulatory category of required pollutant controls. In plain language, a BMP is the tool or practice crews use; the permit framework defines the standards operators must meet.
Four jobs, one coordinated plan
A working SWPPP addresses four connected problems:
- Keep soil on the site. Erosion controls reduce how much exposed soil rain can loosen and carry.
- Keep pollutants out of storm drains. Sediment controls and inlet protection intercept dirty runoff before it can travel offsite.
- Contain waste and materials. Designated storage and washout areas prevent construction products from reaching soil or drainage.
- Stabilize disturbed ground. Temporary or permanent cover helps protect soil while work is underway and after grading is complete.
These measures aren't optional housekeeping. Under the construction stormwater framework, permitted projects must create and implement a site-specific plan with erosion and sediment controls, pollution-prevention measures, and stabilization practices. The EPA overview of the Clean Water Act and NPDES framework traces how these requirements developed and established the SWPPP as a central compliance instrument.
Field rule: If a crew member can't tell where a control belongs, what it protects, or who maintains it, the plan hasn't made it onto the ground yet.
The first-truck washout question is a simple test. A site with a clearly marked, accessible washout location can direct the driver there. A site without one may end up with cementitious water poured onto bare soil or into a drain. That's why the SWPPP and its BMPs need to guide daily decisions, not just sit in a binder in the trailer.
The Regulatory Background Crews Should Understand
Construction stormwater permits grew out of the Clean Water Act's National Pollutant Discharge Elimination System (NPDES). EPA's NPDES construction stormwater program describes the program and its requirements. EPA established the first phase of construction requirements on November 16, 1990, for activities disturbing 5 acres or more. The first construction general permit for non-authorized states followed on September 9, 1992, with coverage required beginning October 1, 1992.
What the phases changed for a crew
EPA issued an updated construction general permit in 1998 (EPA construction stormwater permits). The permit issued on July 1, 2003, expanded Phase II coverage to smaller construction sites disturbing less than 5 acres. For a superintendent, the practical lesson is straightforward: a job's appearance does not determine whether coverage is required. Operators need to check the permit requirements for the project, including the applicable acreage threshold and any state or local rules.
EPA administers NPDES permits in some jurisdictions. Authorized states administer their own programs, and their permits may set specific requirements. Confirm which permit governs the site before crews rely on procedures used elsewhere.
A plan that crews can follow
A written SWPPP describes the site and shows where controls belong. It identifies the planned measures for erosion, sediment, waste, and stabilization, and explains how the team will install and maintain them. During an inspection, the plan should be usable as a map for comparing documented controls with field conditions.
Concrete washout shows why a mapped location matters. “Provide washout” gives a driver no route or destination. If the designated area is hard to find or blocks truck movement, a driver may choose a convenient patch of ground instead. Marking an accessible location and making sure crews know where it is turns a permit requirement into a workable site practice.
The same gap appears when a SWPPP shows inlet protection that crews remove for access and fail to replace. The plan records the intended approach; the installed controls show whether the team is carrying it out. Both must stay aligned as work and traffic patterns change.
The Four BMP Categories That Run a Construction Site
A delivery truck backs through the work zone while grading continues nearby. If the washout area is tucked behind stored materials, the driver may not find it, even if it appears on the SWPPP map. BMPs work only when their purpose and location make sense to the people using the site. A silt fence catches sediment in shallow sheet flow; it does not stabilize an exposed slope. A mulch blanket covers soil, but it cannot contain a concrete spill.
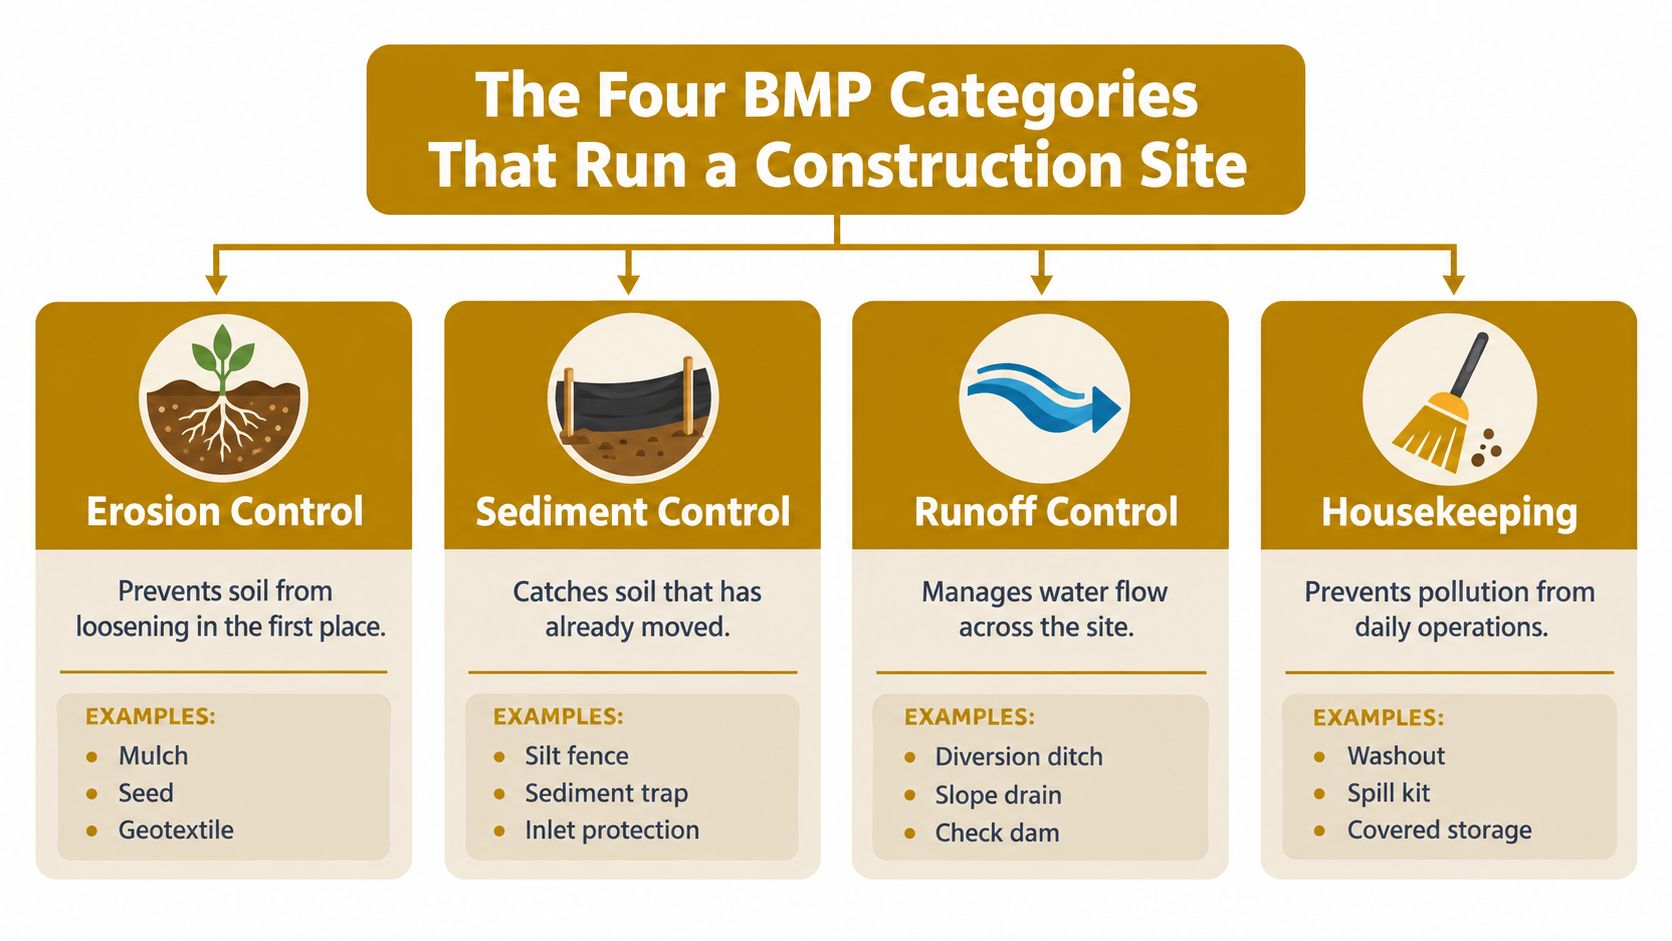
Erosion control keeps soil in place
Erosion controls protect exposed ground before rain or runoff carries soil away. Mulch, temporary seeding, erosion-control blankets, and geotextiles cover soil or hold it together. They suit disturbed slopes, stockpiles, and areas that will sit idle between work stages.
Timing matters on a live site. A crew may grade a slope, then move on to utility work or another task. If the ground stays bare while the next step is delayed, rain can wash loose soil away before the planned cover is installed.
Sediment control catches what moves
Silt fences, wattles, sediment traps, basins, and inlet protection slow or collect sediment that escapes erosion controls. Placement must suit the flow: a fence designed for shallow sheet flow can fail where runoff concentrates, and an inlet protector can clog if crews leave accumulated sediment in place.
Waste management and stabilization address different risks
Waste and material management addresses pollutants created by daily work, including fuels, paints, fertilizers, trash, and concrete washout. Concrete washout is a practical test of whether a BMP is usable: the area needs to be easy for drivers to reach, clearly identified, and checked so material stays contained. A sign is of little use if trucks cannot reach the basin or crews do not know where it is.
Store paints and fuels on an impervious surface with secondary containment, and brief crews on the spill kit location before the first delivery arrives.
Stabilization protects the ground as the work area changes and the project nears completion. Temporary cover can protect soil while crews move from earthwork to utilities or paving. Permanent stabilization is part of closeout, once the area is ready to remain in its finished condition.
Reading the Site Before You Place a Single BMP
Before a crew installs controls, the superintendent should walk the site with the drainage map in hand. Start uphill and follow where water would travel during a storm. Note slopes, low points, existing vegetation, disturbed soil, stockpiles, storm drains, and nearby waterways or other sensitive locations.

Trace the water, then mark the controls
A site map should show where runoff starts, how it moves, and where it could leave the project. Mark inlets, drainage paths, slope breaks, discharge points, and areas where water could collect. Then match each risk with a control that suits the flow.
A silt fence may fit a downslope edge where water spreads out. It's a poor choice where a swale funnels fast-moving water through one narrow path. An inlet protector belongs at the storm drain it safeguards, but the crew also needs a way to keep sediment from piling up against it and blocking drainage.
Field question: If it rains while the site is in its current phase, where will the first muddy water go?
The answer can change as grading, utility installation, and paving progress. A control that fits the early earthwork phase may need to move when the crew cuts a new trench or opens a different access route. Phasing work helps the team install controls alongside the area being disturbed rather than exposing a large work zone and expecting perimeter measures to manage every runoff path.
Give the foreman a usable map
The plan should be clear enough for a foreman to brief a crew without translating technical notes on the fly. Walk through the site and check that the map reflects actual conditions, including:
- Drainage and slope: Note flow paths, steep areas, low points, and places where water concentrates.
- Inlets and receiving areas: Mark storm drains, ditches, and nearby waterways or other sensitive locations.
- Work and traffic routes: Show entrances, delivery paths, concrete-pour areas, staging, and stockpiles.
- Vegetation and disturbed ground: Identify what remains protected and what needs temporary or permanent stabilization.
A printed plan can't account for every change in work sequence. The superintendent should update the site map when field conditions shift, then tell crews what changed and which controls they need to protect.
Choosing the Right BMP for the Job
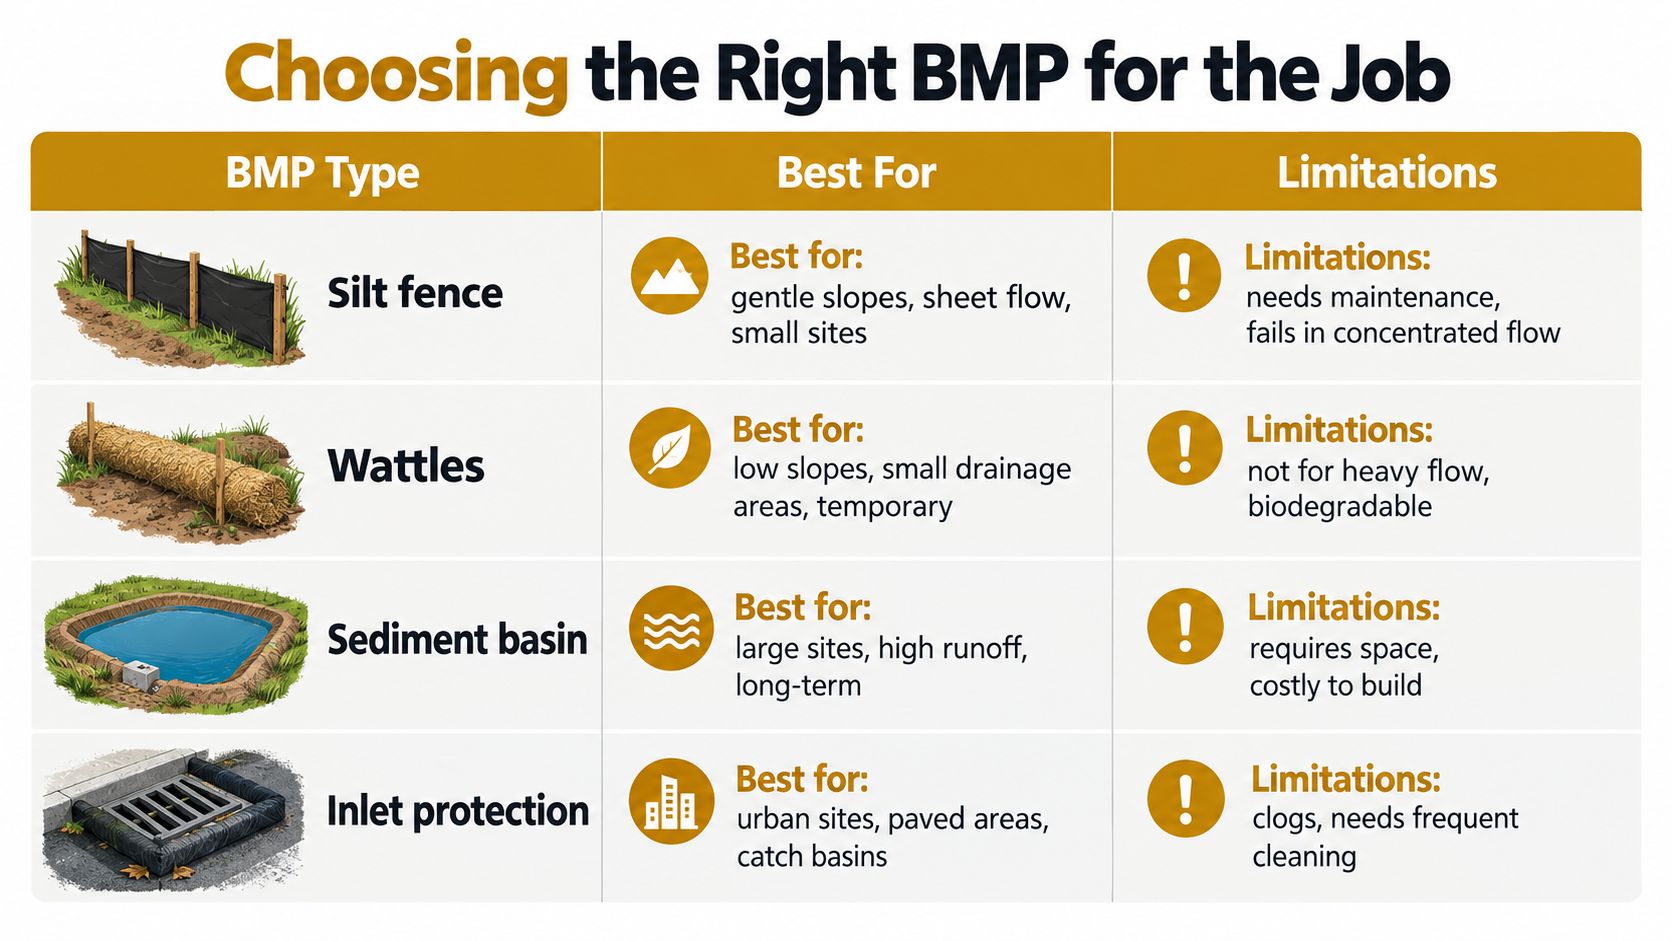
A control can look right on a plan and still fail on a busy site. A delivery route may cut through inlet protection, runoff may concentrate where the ground slopes, or crews may place a washout where trucks cannot reach it easily. Choose BMPs by following the water and the work: note where runoff flows, whether it spreads or concentrates, how much soil is exposed, and whether crews can inspect and maintain the controls.
Match the control to the flow
| BMP Family | Best Use | Slope / Drainage Note | Main Failure Mode |
|---|---|---|---|
| Silt fence | Sediment control along suitable site edges | Works best with shallow, dispersed sheet flow | Concentrated runoff, damage, or accumulated sediment left in place |
| Wattles | Temporary control on smaller, gently sloped areas | Place to interrupt shallow flow, not channel heavy runoff | Displacement, overtopping, or poor contact with the ground |
| Sediment basin | Managing sediment on sites with suitable space and runoff patterns | Needs deliberate placement and a maintained outlet | Poor maintenance or a basin that doesn't suit the drainage area |
| Inlet protection | Reducing sediment entry at storm drains | Install at vulnerable inlets and keep nearby flow manageable | Clogging, bypass, or damage from traffic |
| Perimeter berm | Directing or slowing runoff near an activity or boundary | Shape it for the actual drainage route | Breaks, low spots, or water redirected toward an unprotected area |
Use the table as a field guide alongside the project's permit and approved SWPPP. For a small concrete pour, crews need a clearly marked, reachable washout location and protection for nearby drainage. On a larger site, several controls may need to work together, such as slope stabilization, perimeter sediment measures, and inlet protection. A single device cannot manage every flow path or activity.
Placement and access determine whether the plan works in practice. If a truck route crosses an inlet control, the crew may damage it during deliveries. If a washout sits far from the pour, drivers may choose a more convenient spot. Put controls where they intercept the expected flow without blocking routine work, and communicate their locations to the people operating trucks and equipment.
Check whether the control is performing
Installation is the start, not proof that a BMP is working. After rain or a change in site activity, check for sediment bypassing barriers, clogged inlet protection, accumulated material, and damage from traffic. For example, inlet protection that collects sediment during grading may need attention before it restricts drainage or sends runoff around the device.
Concrete washout makes the same point: a container only contains material if trucks can reach it, crews know where it is, and someone checks its condition. Treat access, clear communication, and inspection as part of selecting the BMP, not as afterthoughts.
Choose a control that fits the drainage area, slope, soil, and work sequence. If water bypasses it, sediment accumulates, or it interferes with drainage, adjust the setup and tell the crew what changed.
Concrete Washout as a Case Study in BMP Discipline
A concrete truck arrives, and the driver needs to wash its chute before leaving. If the designated washout is difficult to reach or the crew cannot identify it, the driver may use an open patch of ground instead. That is how a BMP can fail through poor siting and communication, even when the plan names the right control.
The goal is to collect and retain washout water and solids in leak-proof containment, then recycle the collected material where practicable. The EPA concrete washout fact sheet describes the need for convenient truck access and careful placement away from drainage paths and sensitive water-quality locations.
Place and communicate the facility
Locate the facility near the pour when practical, but outside ditches and drainage paths, where leaks could reach a storm drain. Keep it at least 50 feet from storm drains and waterways where feasible, as the specified siting guidance recommends. A leak-proof pan or container needs enough capacity and freeboard for the work and the precipitation the site anticipates.
Show the washout location on the site map and mark it with signs drivers can read as they approach. Before the first truck arrives, tell the pump operator, concrete subcontractor, and drivers where to go. A location that is easy to find and reach is more likely to be used. Reborn Rentals provides concrete washout pans and containers for construction and renovation projects, giving crews an option for designated containment instead of improvised ground disposal.
Inspect, manage capacity, and close out
Check the facility daily and after heavy rainfall for leaks, damaged liners or sidewalls, and fill levels. At 75 percent capacity, arrange to vacuum or otherwise manage the liquid before overflow. Before a major storm, lower the liquid level or cover the unit to reduce the risk of rainfall-driven overflow. These handling practices follow the EPA operational guidance cited above.
Record the condition and capacity check in the SWPPP log. When work ends, manage the liquid and remove hardened cementitious solids for recycling where practicable. The operating standard is clear: no visible discharge, no ground contact, and a documented path for removal. Match the containment design and handling procedures to the approved plan and the requirements governing the project.
Inspections, Maintenance, and the Records That Close a Project
A BMP that's installed but damaged, buried, or bypassed isn't doing its job. During an inspection, check whether each control matches the SWPPP, whether runoff is moving as intended, and whether sediment or waste has accumulated enough to interfere with performance. Look at the ground around the BMP as well as the device itself. Water often reveals a failure path the site map doesn't show.
Make the log useful in the field
Follow the inspection schedule in the permit and approved SWPPP. The schedule must fit the site's applicable requirements and conditions, including changes in work and weather. Each record should help the next person understand what was inspected, what was wrong, and what the crew did about it.
Log the location and condition of each BMP, any deficiencies, maintenance or repair completed, and items that still need follow-up. If a silt fence has a gap or an inlet has collected sediment, document the fix rather than marking the control as present. Keep the written record consistent with what a crew member or inspector can see onsite.
A useful log doesn't just say “checked.” It tells the next person what the crew found and what changed.
Close out what the project no longer needs
As work finishes, stabilize exposed areas and follow the permit's closeout requirements for any remaining temporary controls. Remove controls only when the project's requirements allow it and the ground is ready for that change. Keep the SWPPP, inspection records, and maintenance documentation organized so the team can show how controls were maintained through completion.
A Practical BMP Readiness Checklist
Before the pre-pour meeting ends, have the foreman confirm that:
- The site map is current and shows drainage, inlets, work areas, and BMP locations.
- Perimeter controls and inlet protection are installed where the plan calls for them.
- The stabilized entrance is clear and isn't tracking mud onto public roads.
- The washout is accessible and signed, with containment ready before trucks arrive.
- Materials and waste are managed away from drainage paths.
- Stabilization and inspection responsibilities are assigned, including who checks the site after rain.
These checks turn a SWPPP from a binder into a daily work routine. Make the control locations part of the crew briefing, give each BMP a responsible owner, and update the plan when the site changes.
For a concrete pour or renovation, arrange a designated washout pan or container before the first truck arrives, then confirm the location, capacity, and delivery details with the rental provider. Visit Reborn Rentals to review available concrete washout containment options and plan the equipment for your site.