Concrete Truck Washout: A Contractor’s Guide for 2026
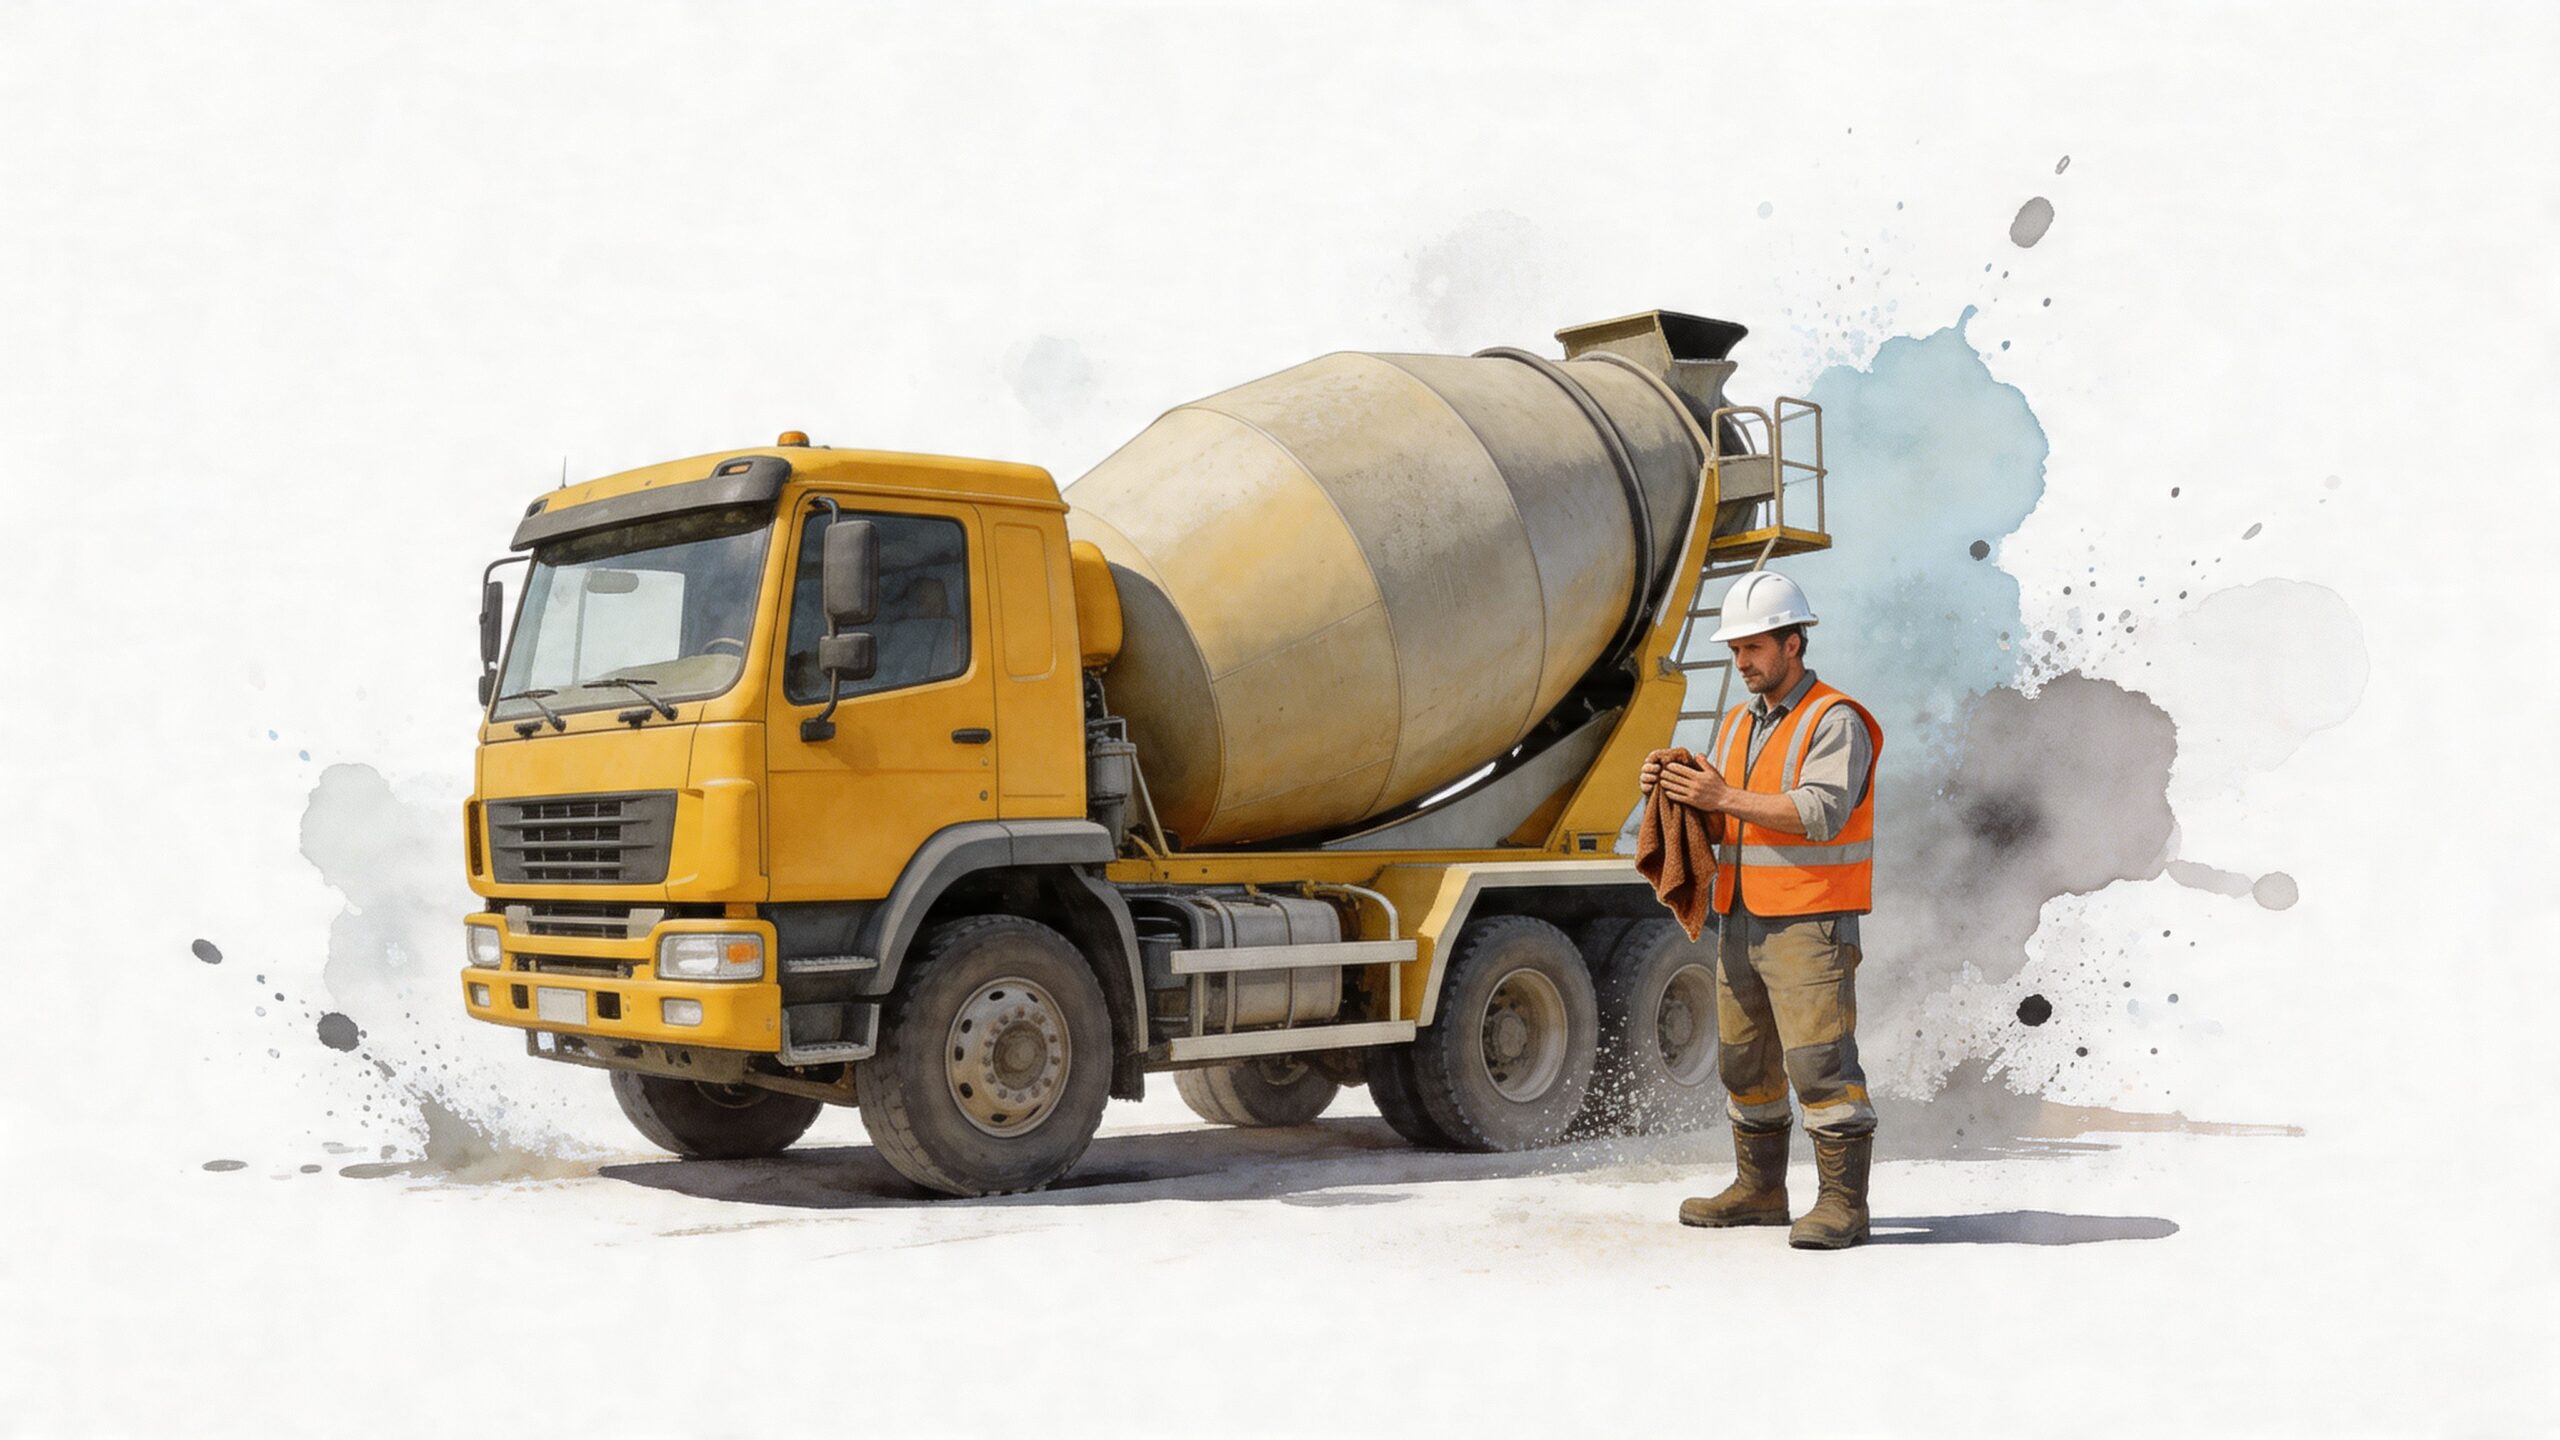
The pour went well. The pump stayed ahead of the set, the finishers kept pace, and the inspector signed off on placement. Then the trucks start asking the same question they always ask at the end of a run: where’s washout?
That’s the moment a clean site can turn sloppy fast. If there’s no clear plan, drivers rinse where it’s convenient, laborers improvise with scraps and plastic, and by the end of the shift you’ve got gray slurry, hardened chunks, stained pavement, and a problem that won’t disappear when the crew goes home.
Concrete truck washout is one of those tasks that looks small right up until it creates a compliance issue. It’s also one of the easiest parts of a concrete operation to control if you treat it like part of the pour instead of an afterthought.
The Final Step of Every Concrete Pour
Every superintendent knows the rhythm. Trucks line up, the pump operator wants steady feed, the foreman is watching slump and timing, and everyone is focused on getting mud in place before the window closes. During the pour, people are looking forward. At the end, they’re tired, trying to break down, and thinking about the next task.
That’s exactly why washout gets missed.
The concrete is already in the forms, so some crews mentally treat cleanup like housekeeping. It isn’t. The last few minutes of a pour decide whether the site stays controlled or turns into a headache for the project manager, the SWPPP lead, and whoever has to answer questions when someone notices gray runoff near a drain.
What usually goes wrong
The failure points are predictable because they happen on all kinds of jobs.
- No designated location: Drivers ask where to wash out, and nobody gives one clear answer.
- Bad access: The containment area exists on paper, but trucks can’t reach it without backing through active work.
- Improvised equipment: Somebody drags out a torn liner, a shallow pit, or a few buckets and hopes for the best.
- No owner assigned: Everyone assumes someone else is monitoring it.
A lot of site messes start this way. One shortcut gets copied by the next truck, and now the shortcut is the process.
Practical rule: If the washout location isn’t marked, accessible, and discussed before the first truck arrives, the site doesn’t really have a washout plan.
Why experienced crews stay strict
Good crews treat washout like rebar cover or traffic control. It’s basic discipline. You don’t wait until the chute is dripping to decide where it goes.
A clean washout setup does more than avoid ugly stains. It keeps drivers moving, keeps laborers from chasing slurry with shovels, and keeps management out of the kind of preventable trouble that starts with, “We only needed a quick rinse.”
That last rinse is part of the concrete operation. Run it that way.
What Is Concrete Washout and Why It Matters
The pour is done, the crew is ready to move on, and a driver asks the question that exposes whether the site is prepared. “Where do you want the washout?” If the answer is vague, the problem starts right there.
Concrete washout is the leftover water, slurry, cement fines, and hardened residue that come off mixer chutes, pump hoppers, buggies, tools, and finishing equipment during cleanup. Crews sometimes treat it like dirty rinse water. It is not. The slurry is highly alkaline, and the solids do not stay put once they get loose.
The chemistry is what turns a housekeeping issue into a compliance issue. The National Ready Mixed Concrete Association explains that concrete wash water is typically highly alkaline, often in the pH range that can damage vegetation and harm surface waters if discharged improperly. On a job site, that means one sloppy rinse can become stained pavement, burned landscaping, a stormwater write-up, or all three.
The material also changes character as it sits. Wet slurry flows anywhere the grade takes it. A few hours later, the water flashes off and leaves behind a hard crust that has to be chipped, scraped, or hauled out. That is why washout gets expensive fast. You are not just cleaning water. You are dealing with a caustic waste stream that turns into concrete in the wrong place.
There is also a waste-classification piece that gets missed. Washout slurry is not automatically hazardous waste under RCRA just because it has a high pH or contains trace metals from cement. The classification depends on the actual waste and, if needed, testing against hazardous waste criteria. The EPA hazardous waste characteristics overview lays out the framework contractors need to understand before making assumptions about disposal. That matters when a project manager is lining up hauling, landfill acceptance, or a washout rental, because the container, hauling plan, and disposal outlet all need to match the waste profile the site is generating.
That is the practical side many articles skip. Compliance is tied to logistics. If the site is pouring enough concrete to generate repeated chute washout, pump washout, and tool cleanup over several days, a token pit or undersized box usually fails for the same reason a dumpster overflows. The volume was wrong from the start.
A properly sized rental container solves two problems at once. It gives drivers a clear target, and it gives the project team a defined waste stream to manage. That is why rental decisions belong in pre-pour planning, right alongside truck access and pump setup. Booking the right size early, placing it where trucks can reach it without crossing active work, and knowing who is responsible for swap-out or pickup does more for compliance than any last-minute lecture on site cleanliness.
Good project managers treat washout as part of the concrete operation, not the cleanup after it. That approach keeps the site cleaner, reduces labor wasted on scraping up avoidable messes, and puts the job in a much better position if an inspector asks how washout is being handled.
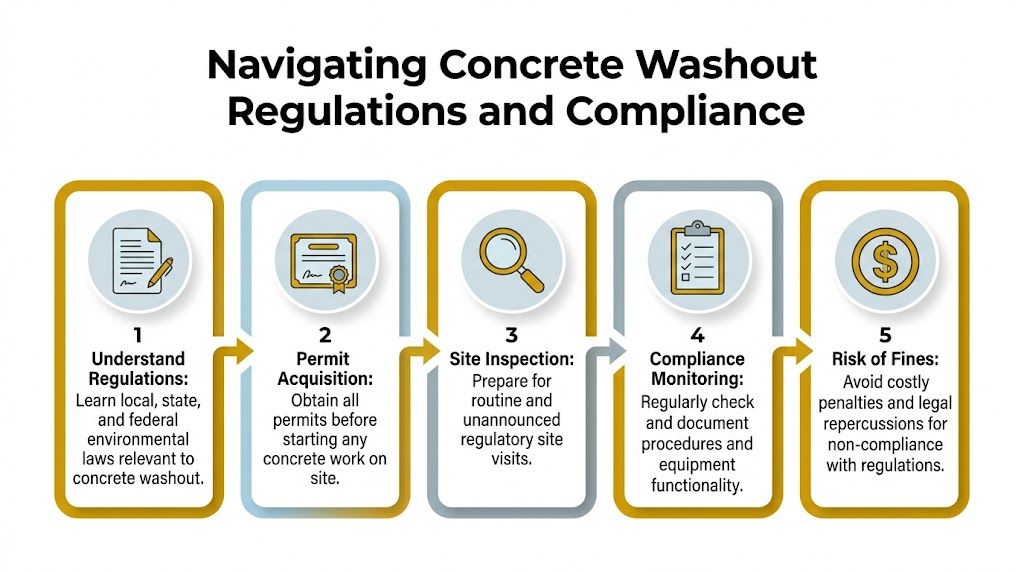
Navigating Concrete Washout Regulations and Compliance
A pour can be running clean all morning, then one driver rinses out near a curb inlet and the whole job has a problem. That is how washout violations happen on real sites. Not because nobody cared, but because the crew treated washout like cleanup instead of part of the concrete operation.
Handling concrete washout compliance means looking past stormwater rules alone. Truck washout touches permit conditions, day-to-day housekeeping, and waste management at the same time. Miss one leg of that stool and the setup can still fail.
The first check is the project permit and the site’s pollution prevention requirements. On many jobs, the washout location needs to be identified, maintained, and kept from reaching drains, ditches, or receiving water. Inspectors are not solving a mystery when they walk a site. They look for plain signs of trouble. No defined containment. Overflow stains. Tire tracks dragging slurry across the haul road. Missing signs. Washout placed where the next rain can move it offsite.
What compliance looks like in the field
A compliant washout area is usually uneventful. Drivers can find it fast, use it without backing into a mess, and leave without tracking slurry across the project. That is what good compliance looks like on a busy day.
Site inspectors and SWPPP managers usually want to see:
- A designated washout location: One clear spot, marked so drivers do not guess.
- Containment that holds both liquid and solids: Something that still works after repeated use.
- Sensible placement: Away from inlets, low spots, and routes where runoff can carry material off.
- Routine maintenance: The washout area is still usable, not full, broken down, or crusted over.
- Clear ownership: Someone on the project is responsible for inspection, service calls, and cleanup.
That last item causes plenty of trouble. On weak sites, the concrete supplier assumes the GC is handling it, the GC assumes the concrete sub is handling it, and laborers are left chasing gray residue after the fact. A rented washout container only helps if someone is assigned to monitor fill level, book pickup, and keep the access path open. Compliance and rental logistics are tied together. If swap-out timing is vague, overflow is only a matter of time.
The RCRA issue many teams miss
Washout is not only a stormwater concern. It can also raise a hazardous waste question under RCRA.
EPA guidance explains that a waste may be hazardous for corrosivity if its pH is 12.5 or higher, and concrete washout water can reach that range. EPA also states that the hazardous waste determination must be made at the point of generation in the EPA concrete washout guidance.
On the ground, that matters more than some project managers expect. The point of generation is where the washwater leaves the drum, chute, pump hopper, or tools. If that material meets the corrosivity threshold, the job cannot treat it casually just because it is common on concrete sites. Storage, hauling, neutralization, and disposal all need to match what the waste is.
That is where rental planning stops being clerical work. If the job may need testing, neutralization, or a specific disposal outlet, the container type, service interval, and hauling plan should be set before the pour schedule ramps up. Booking the cheapest option without checking disposal acceptance is like ordering too few dumpsters for demolition. The problem shows up later, and it always costs more then.
Field judgment: If nobody has asked whether the washout slurry needs a hazardous waste determination, the site may be carrying a disposal risk that was never included in the budget.
What to do with that information
This does not mean every project needs a lab program and a stack of new paperwork. It means the team should know the decision points before the first truck starts rinsing out.
A practical process looks like this:
- Confirm who the generator is. Do not leave that question hanging between the GC, concrete subcontractor, pump crew, and supplier.
- Identify the point of generation. The determination needs to match where the washwater is created.
- Decide whether pH testing is warranted. Some jobs need a documented answer, especially where oversight is tight or disposal outlets ask questions.
- Check disposal acceptance before booking service. A rental box is only part of the plan. The hauler and disposal facility need to accept the material the site is producing.
- Know that EPA discusses the ENU option. An Elementary Neutralization Unit may allow on-site pH adjustment without full RCRA permitting under the conditions described in EPA guidance.
What an inspector remembers
Inspectors remember patterns. A site with a marked, maintained washout area and a clear service plan looks controlled. A site with gray slurry near inlets, hardened piles beside the pump, and drivers rinsing out wherever they stop looks unmanaged.
That is why compliance is an operations issue first. Set up containment that people will use, place it where trucks can reach it, and service it before it is full. If the rental logistics are right, compliance gets easier. If the logistics are sloppy, the violations usually follow.
Choosing Your Washout Containment Solution
Crews usually end up choosing between three categories of containment. One is the old-school makeshift pit. One is a light temporary berm or lined area. The third is a purpose-built steel pan or container. All three can hold washout under the right conditions. They do not carry the same risk.
The mistake is judging them only by what they cost to set down on the ground that day. The essential comparison is reliability during an active job, with tired crews, changing weather, and trucks that want to get in and out.
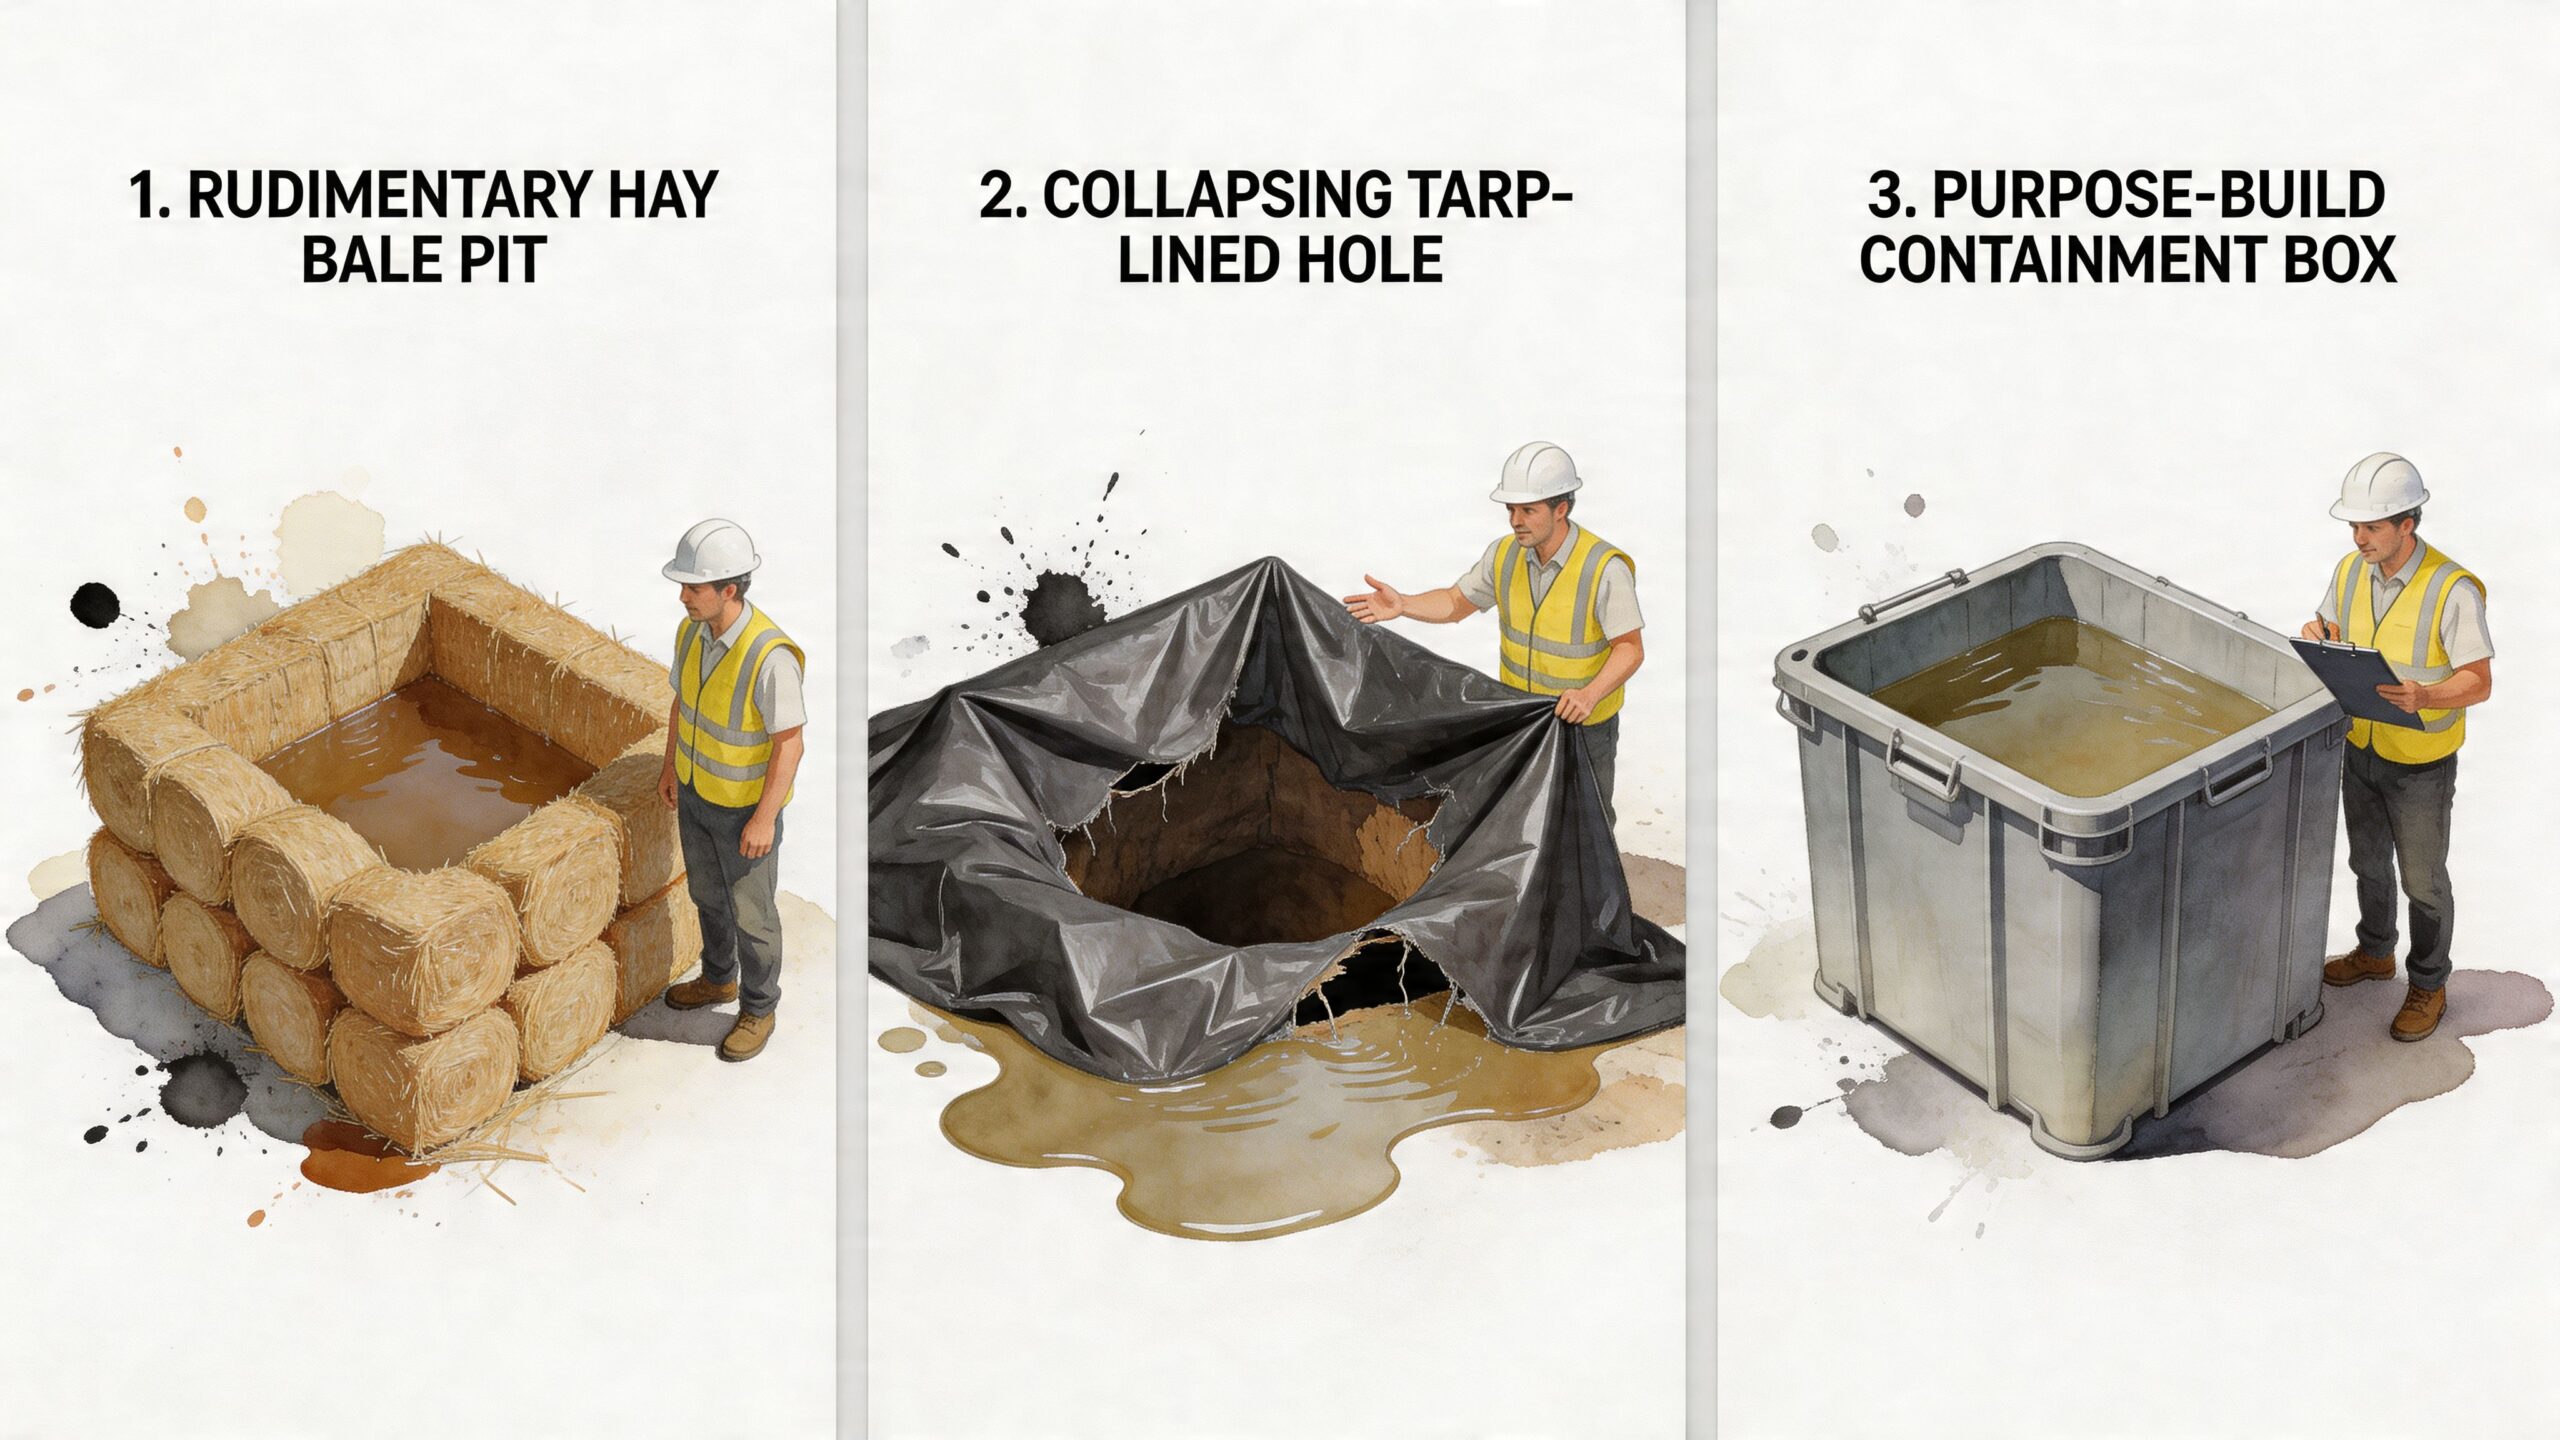
The DIY pit
Some sites still scrape a shallow area, line it if they remember, and call it washout. On open dirt jobs with plenty of space and steady supervision, crews sometimes get away with it.
The trade-off is control. Earthen setups are vulnerable to bad grading, torn liners, sloppy edges, and rain. They also tend to look temporary because they are temporary. Once the pit deforms or fills with hardened chunks, drivers stop trusting it and start looking for easier options.
The light berm or plastic-lined setup
This is the middle ground many jobs try first. It’s faster than digging and cleaner than a bare pit. It can work for a short run if the liner stays intact and access is simple.
The weakness is durability. Thin materials fail in predictable ways. A tire clips the edge, a loader brushes it, a laborer punctures it with hardened debris, or the whole thing gets ignored until it’s too full to use. A containment method that depends on everyone being careful all the time usually loses that bet.
The steel pan or engineered container
A steel pan is the most forgiving option because it is built for the abuse a job site gives everything. Drivers can see it, crews can direct trucks to it, and the boundaries are obvious. It doesn’t depend on a liner staying flat in mud or on an earthen edge holding shape.
That matters on renovation work and tight urban sites even more than on greenfield jobs.
According to the Seattle-area BMP guidance for concrete washout, contractors on small-scale projects often resort to 5-gallon buckets, even though a single chute wash can be 50 to 100 gallons. That gap is exactly why portable washout pans make sense for parking lot work, retrofit pours, sidewalk repairs, and interior-adjacent exterior concrete where a full roll-off setup would be overkill.
Side-by-side reality check
| Method | What works | What usually fails |
|---|---|---|
| DIY pit | Cheap if space is abundant and the ground is suitable | Shape loss, poor access, runoff risk, inconsistent use |
| Plastic-lined berm | Quick to deploy for short duration work | Tears, collapse, overflow, crews stop trusting it |
| Steel pan | Clear containment, durable, easier driver compliance | Requires delivery planning and pickup scheduling |
The best washout solution is the one drivers will actually use at the end of a long day without needing instructions repeated three times.
The cost question contractors actually mean
When a PM asks which option is cheapest, what they usually mean is which one creates the least total hassle. That answer is rarely the improvised setup.
A steel pan or container typically wins because it reduces labor spent building temporary containment, lowers the odds of failure, and gives the site a professional answer when an inspector asks where washout is managed. It also works across job types. Big slab, curb work, small renovation, pump cleanup. Same basic process.
Makeshift methods can still have a place on certain sites, but they ask more from the field than most jobs can consistently give. If your system only works when the crew has extra time, perfect weather, and plenty of room, it’s not a strong system.
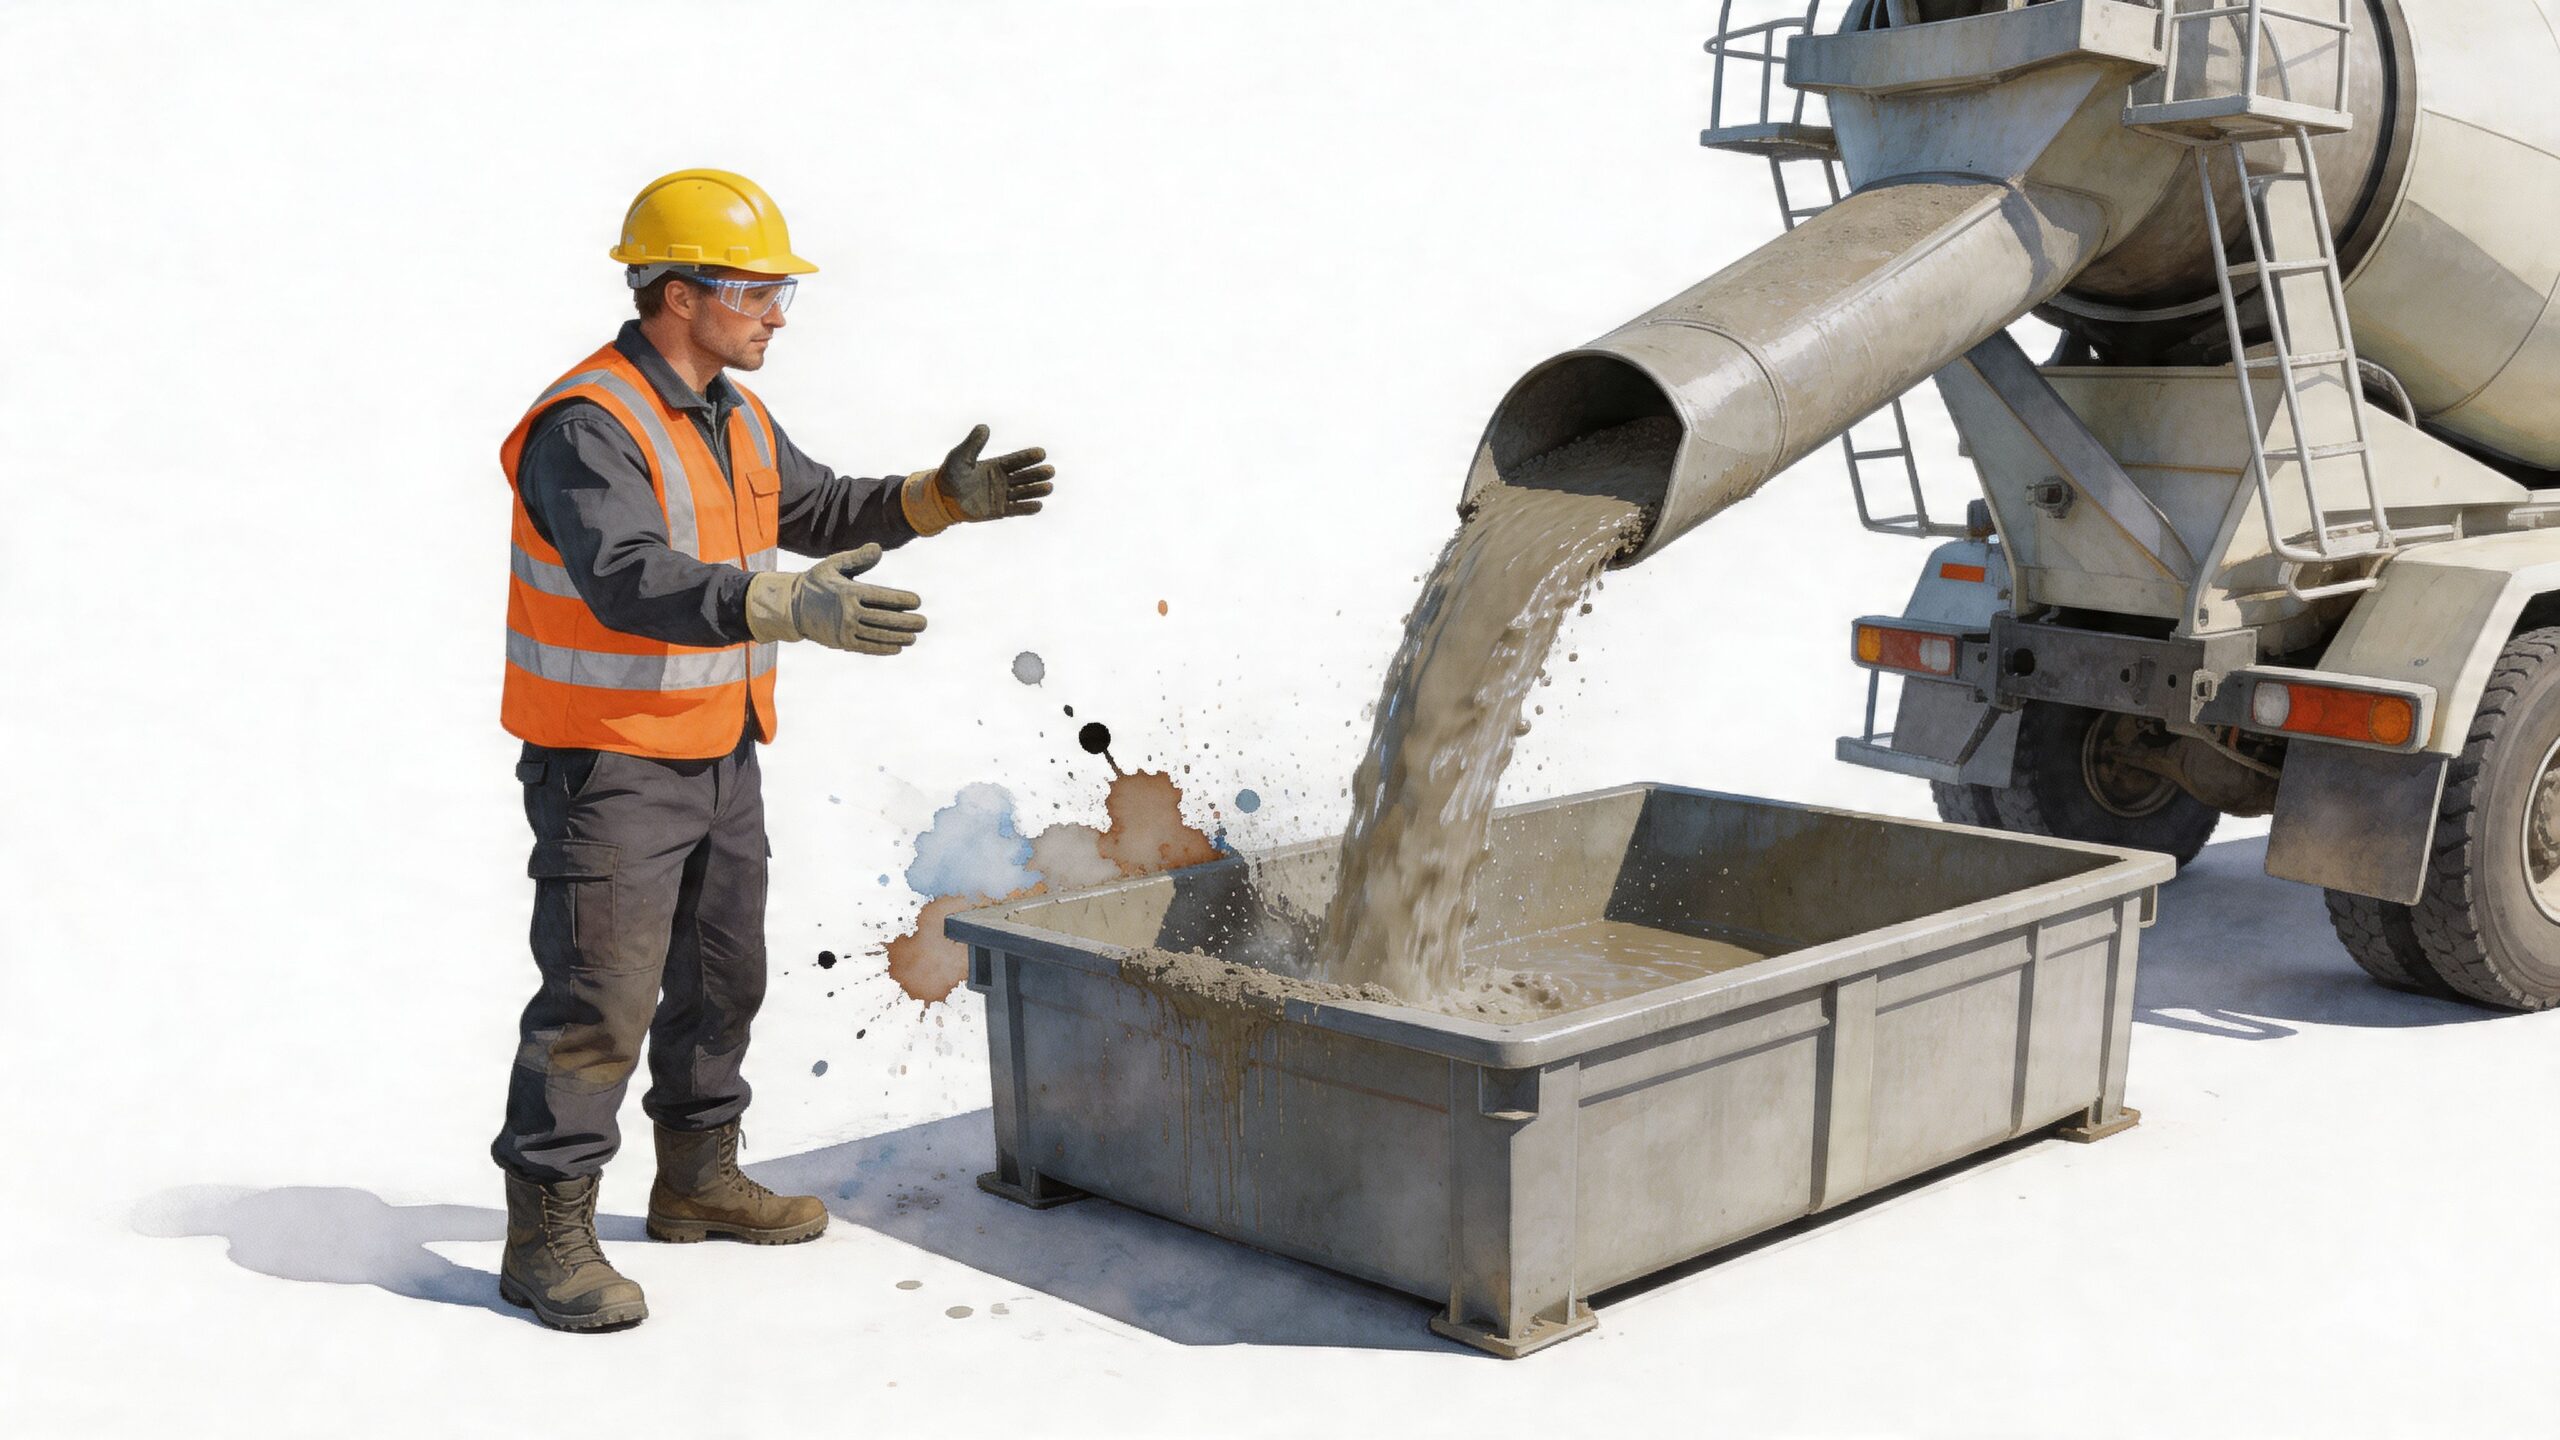
Sizing and Placing Your Washout Container Correctly
Most washout problems come from two bad decisions. The container is too small, or it’s in the wrong place. Sometimes it’s both.
Sizing isn’t complicated, but it has to be done before the first truck hits the gate. Placement is the same. If a washout pan is technically on site but awkward to reach, drivers will avoid it when the line is moving.
Start with pour volume, then leave buffer
A standard washout container should be able to handle slurry from a 350-cubic-yard pour, and best practice is to use only 50% of the container’s volume so there’s room for rainwater and operating margin, according to the concrete washout container specification sheet.
That buffer matters. The washout area shouldn’t be run right to the brim like a dumpster at the end of a demolition job. Once slurry gets near the top edge, one storm or one sloppy rinse can turn containment into overflow.
A practical sizing table
Use the pan size to match the work, not just the truck count.
| Daily Concrete Pour (Cubic Yards) | Estimated Washout Volume (Gallons) | Recommended Reborn Rentals Pan |
|---|---|---|
| Small pours and short-duration concrete work | Lower volume, but still enough to overwhelm buckets or ad hoc tubs | 72" x 72" x 14" pan, approximately 310 gallons |
| Pours exceeding 100 cubic yards | Higher washout demand and more margin needed for active truck traffic | 72" x 72" x 24" pan, approximately 441 gallons |
The key is not pretending a tiny containment area can absorb a full day of rinsing. On jobs with pump trucks, multiple mixers, or repeat cleanup cycles, size up early instead of waiting for field conditions to prove you wrong.
Put it where trucks can actually use it
The same specification guidance calls for placement on level ground and at least 50 feet from drains. That’s not a paperwork detail. It’s basic site control.
A good washout location has these traits:
- Accessible approach: The driver doesn’t need a spotter and a miracle to line up.
- Clear separation from drains: If there’s a spill or splash, it still has distance before reaching an inlet.
- Stable surface: Level ground keeps the container working the way it was designed to work.
- No conflict with staging: Don’t place washout where pallets, rebar, or parked equipment will block it by noon.
If a driver has to choose between using the washout pan correctly and keeping the operation moving, the operation usually wins. Set the pan where those goals align.
Common placement mistakes
A few errors show up constantly.
One is hiding the washout in the far corner of the site because “that’s out of the way.” Out of the way usually means out of use. Another is putting it near the drain because that area is already low and muddy. That’s exactly where washout doesn’t belong.
The best placements are visible, reachable, and boring. A truck pulls up, rinses, and leaves. No backing drama. No crossing active pedestrian routes. No chance slurry runs downhill into a storm structure.
Think about service access too
The container also needs room for delivery, repositioning if needed, and pickup. Project managers often plan for truck access during the pour and forget about service access afterward. That creates avoidable scrambling when the pan needs attention.
Good placement solves two problems at once. It makes drivers use the washout correctly, and it makes site logistics easier from day one through final removal.
Managing the Washout Lifecycle From Delivery to Disposal
A good concrete truck washout plan has a full lifecycle. It starts before the first rinse and ends only when the material is removed or processed correctly. Jobs get into trouble when they treat containment as a drop-off item instead of an active process.
The strongest sites assign ownership. One person doesn’t have to do every task, but one person should know the pan location, expected use, service timing, and who to contact if conditions change.
Delivery day and startup
When the washout unit arrives, inspect the placement right away. Don’t assume the marked spot on a plan still makes sense after fencing, stockpiles, or crane pads have shifted the site layout.
Before concrete starts, make sure:
- The crew knows the exact location
- Drivers can see the approach
- Laborers understand it’s the only approved washout point
- Someone is checking capacity during the pour
This takes a few minutes at the morning huddle and saves a lot of chasing later.
During active use
The site has to manage behavior, not just equipment. Drivers should be directed to rinse into the containment area every time, not “just this once” on the edge because they’re in a hurry.
The pan also needs monitoring. Best practice from specification guidance is to trigger cleaning at 75% full, which keeps you ahead of overflows and hardened buildup that discourages use. Once a washout container looks neglected, field discipline drops fast.
A few operational habits help:
- Scrape solids cleanly into the container.
- Keep surrounding ground free of splash and chunks.
- Correct misuse immediately. The first bad rinse becomes the pattern.
- Schedule service before capacity becomes urgent.
Clean washout areas stay clean because crews can tell somebody is paying attention.
Booking and communication
Rental logistics matter more than many PMs expect. The best rental process is simple enough that a superintendent, project engineer, or office coordinator can book quickly, set dates, and confirm the site details without a long back-and-forth.
Clear pricing helps too. So do straightforward notes about delivery conditions, rough terrain, and rush requests. On active jobs, communication channels matter just as much as the equipment. If the site can confirm availability, delivery timing, and pickup through the channels the team already uses, the washout plan is much more likely to stay on track.
End of use and responsible disposal
Containment is only half the value. The other half is that contained material can be handled properly after it leaves the site. According to the University of Florida life cycle assessment for Diligent, recycling 63,823 tons of concrete washout generated 5,649 tCO2 equivalent in greenhouse gas savings.
That’s the practical upside of doing this right. Proper containment gives downstream processors a usable waste stream instead of a site contamination problem. Hardened material can be managed for recycling, and the project avoids turning recoverable concrete residue into scattered landfill-bound mess.
What good lifecycle management looks like
It’s simple. The pan arrives where the trucks can use it. The crew is told exactly what to do. Capacity is watched before it becomes a problem. Pickup or service is arranged without panic. The site finishes the pour without gray puddles, surprise cleanup, or compliance drama.
That’s what a professional concrete operation should look like.
Frequently Asked Questions About Washout Rentals
How does rental pricing usually work
Most washout rentals are straightforward if the provider is organized. You’ll typically see a daily rate tied to the pan or container, then separate charges may apply for delivery or special site conditions. Some providers also spell out added costs for rough terrain or rush scheduling, which is the right way to do it because it lets the PM budget accurately instead of finding out later.
If you’re comparing quotes, don’t just compare the daily number. Compare what’s included, how delivery is handled, and whether pickup and disposal logistics are clearly explained.
What size should I rent for a smaller job
For a small renovation, retrofit, or one-to-two-truck pour, the main mistake is underestimating washout volume and relying on buckets or random tubs. Even small jobs need real containment. Portable pans make more sense than oversized bins when access is tight and the footprint needs to stay compact.
If the job includes repeated chute rinsing, pump cleanup, or multiple trades using the same area, move up in size instead of trying to stretch a marginal setup.
What if the pan fills faster than expected
Act early. Don’t wait until the end of the shift and hope nobody notices. Stop adding to an overloaded pan, protect the surrounding area from splash or runoff, and contact the rental provider for service, swap-out, or pickup options.
On site, this is no different from managing any other controlled container. Once you’ve lost freeboard, your margin is gone.
Who is responsible for disposal
That depends on the rental arrangement and the project setup, so ask before booking. A professional provider should explain what happens to the waste, what the site is responsible for during the rental period, and how pickup is scheduled.
You also want clarity on what cannot go into the pan. Concrete washout is one waste stream. It should not become the job site’s catch-all container for paint, solvents, trash, or other chemicals.
Can I use the washout pan for other materials
Don’t do that unless the provider explicitly allows it. Mixing unrelated waste into concrete truck washout creates disposal and compliance problems fast. It can also turn a routine pickup into a disputed load.
Keep the container dedicated to concrete-related slurry and solids. That protects the site and keeps the waste stream manageable.
What should I have ready before booking
Have the basics ready so the order is accurate the first time:
- Project address: Include any gate, loading, or staging instructions.
- Expected rental dates: Match them to the pour schedule, not just the contract dates.
- Site conditions: Mention slope, restricted access, or rough terrain up front.
- Pan size preference: Base it on the actual work, not the smallest item available.
- Point of contact: One person should be reachable for delivery and pickup coordination.
What makes a rental process easier on real jobs
The best providers remove friction. Clear online booking, transparent pricing, documented fees, and multiple communication channels matter because pours move fast and schedules change. If your team can confirm dates, location, and service needs without a chain of confusing calls, the washout plan is much more likely to hold together in the field.
If you need a dependable washout setup for a slab, retrofit, paving job, or short-duration concrete work, Reborn Rentals gives crews a practical way to book durable containment with clear upfront pricing, delivery coordination, and support through the channels contractors use. It’s a simple way to keep concrete truck washout organized, compliant, and off your problem list.