Concrete Washout Area: EPA Compliance & Best Practices
A lot of crews don’t think about the concrete washout area until the pour is already underway. The truck is finishing up, the chute still has slurry in it, the pump crew needs to clean out, and somebody points to a random corner of the site and says, “Use that spot.” That’s how stains end up on finished flatwork, runoff starts moving toward an inlet, and an easy day turns into cleanup, arguments, and paperwork.
The job isn’t just placing concrete. The job is controlling everything that comes with it after placement. A proper washout setup keeps the site moving, keeps the inspector off your back, and keeps a routine cleanup task from turning into a compliance problem.
The Hidden Costs of an Unplanned Concrete Washout
The mess usually starts small. A little slurry under the chute. A laborer grabs a shovel and tries to berm off an area with whatever fill is nearby. The pump hose gets rinsed where it shouldn’t. Then someone notices the gray water tracking across the site toward a low spot or finished pavement.
That’s not a housekeeping issue. It’s a management failure.
Concrete waste is a big stream on its own. In 2018, the U.S. generated about 600 million tons of construction and demolition debris, with concrete accounting for about 145 million tons, according to BigRentz’s construction waste statistics summary. On a single project, your washout may feel minor. Across thousands of jobs, poor washout control becomes a real environmental and disposal problem.
What goes wrong in the field
When there’s no designated washout area, crews improvise. Improvised solutions usually create the same set of problems:
- Surface damage: Fresh drives, curbs, sidewalks, and asphalt get stained or etched.
- Lost time: The foreman stops productive work to solve a preventable cleanup issue.
- Inspector attention: A visible washout mess is one of the fastest ways to invite closer scrutiny.
- Trade conflict: Concrete crews, pump operators, and site supers start blaming each other for a problem that should have been planned before the truck arrived.
A concrete washout area isn’t paperwork. It’s a control point for labor, compliance, and cleanup.
Why planning pays
A designated washout area does three things well. It gives the driver and pump crew a clear place to go. It keeps slurry contained. It gives the site team a defensible answer when an owner, inspector, or SWPPP consultant asks how wash water is being managed.
That’s why experienced supers don’t leave washout to chance. If the pour is planned, the washout should already be staked, accessible, and ready before the first truck backs in.
Understanding Your Legal and Environmental Obligations
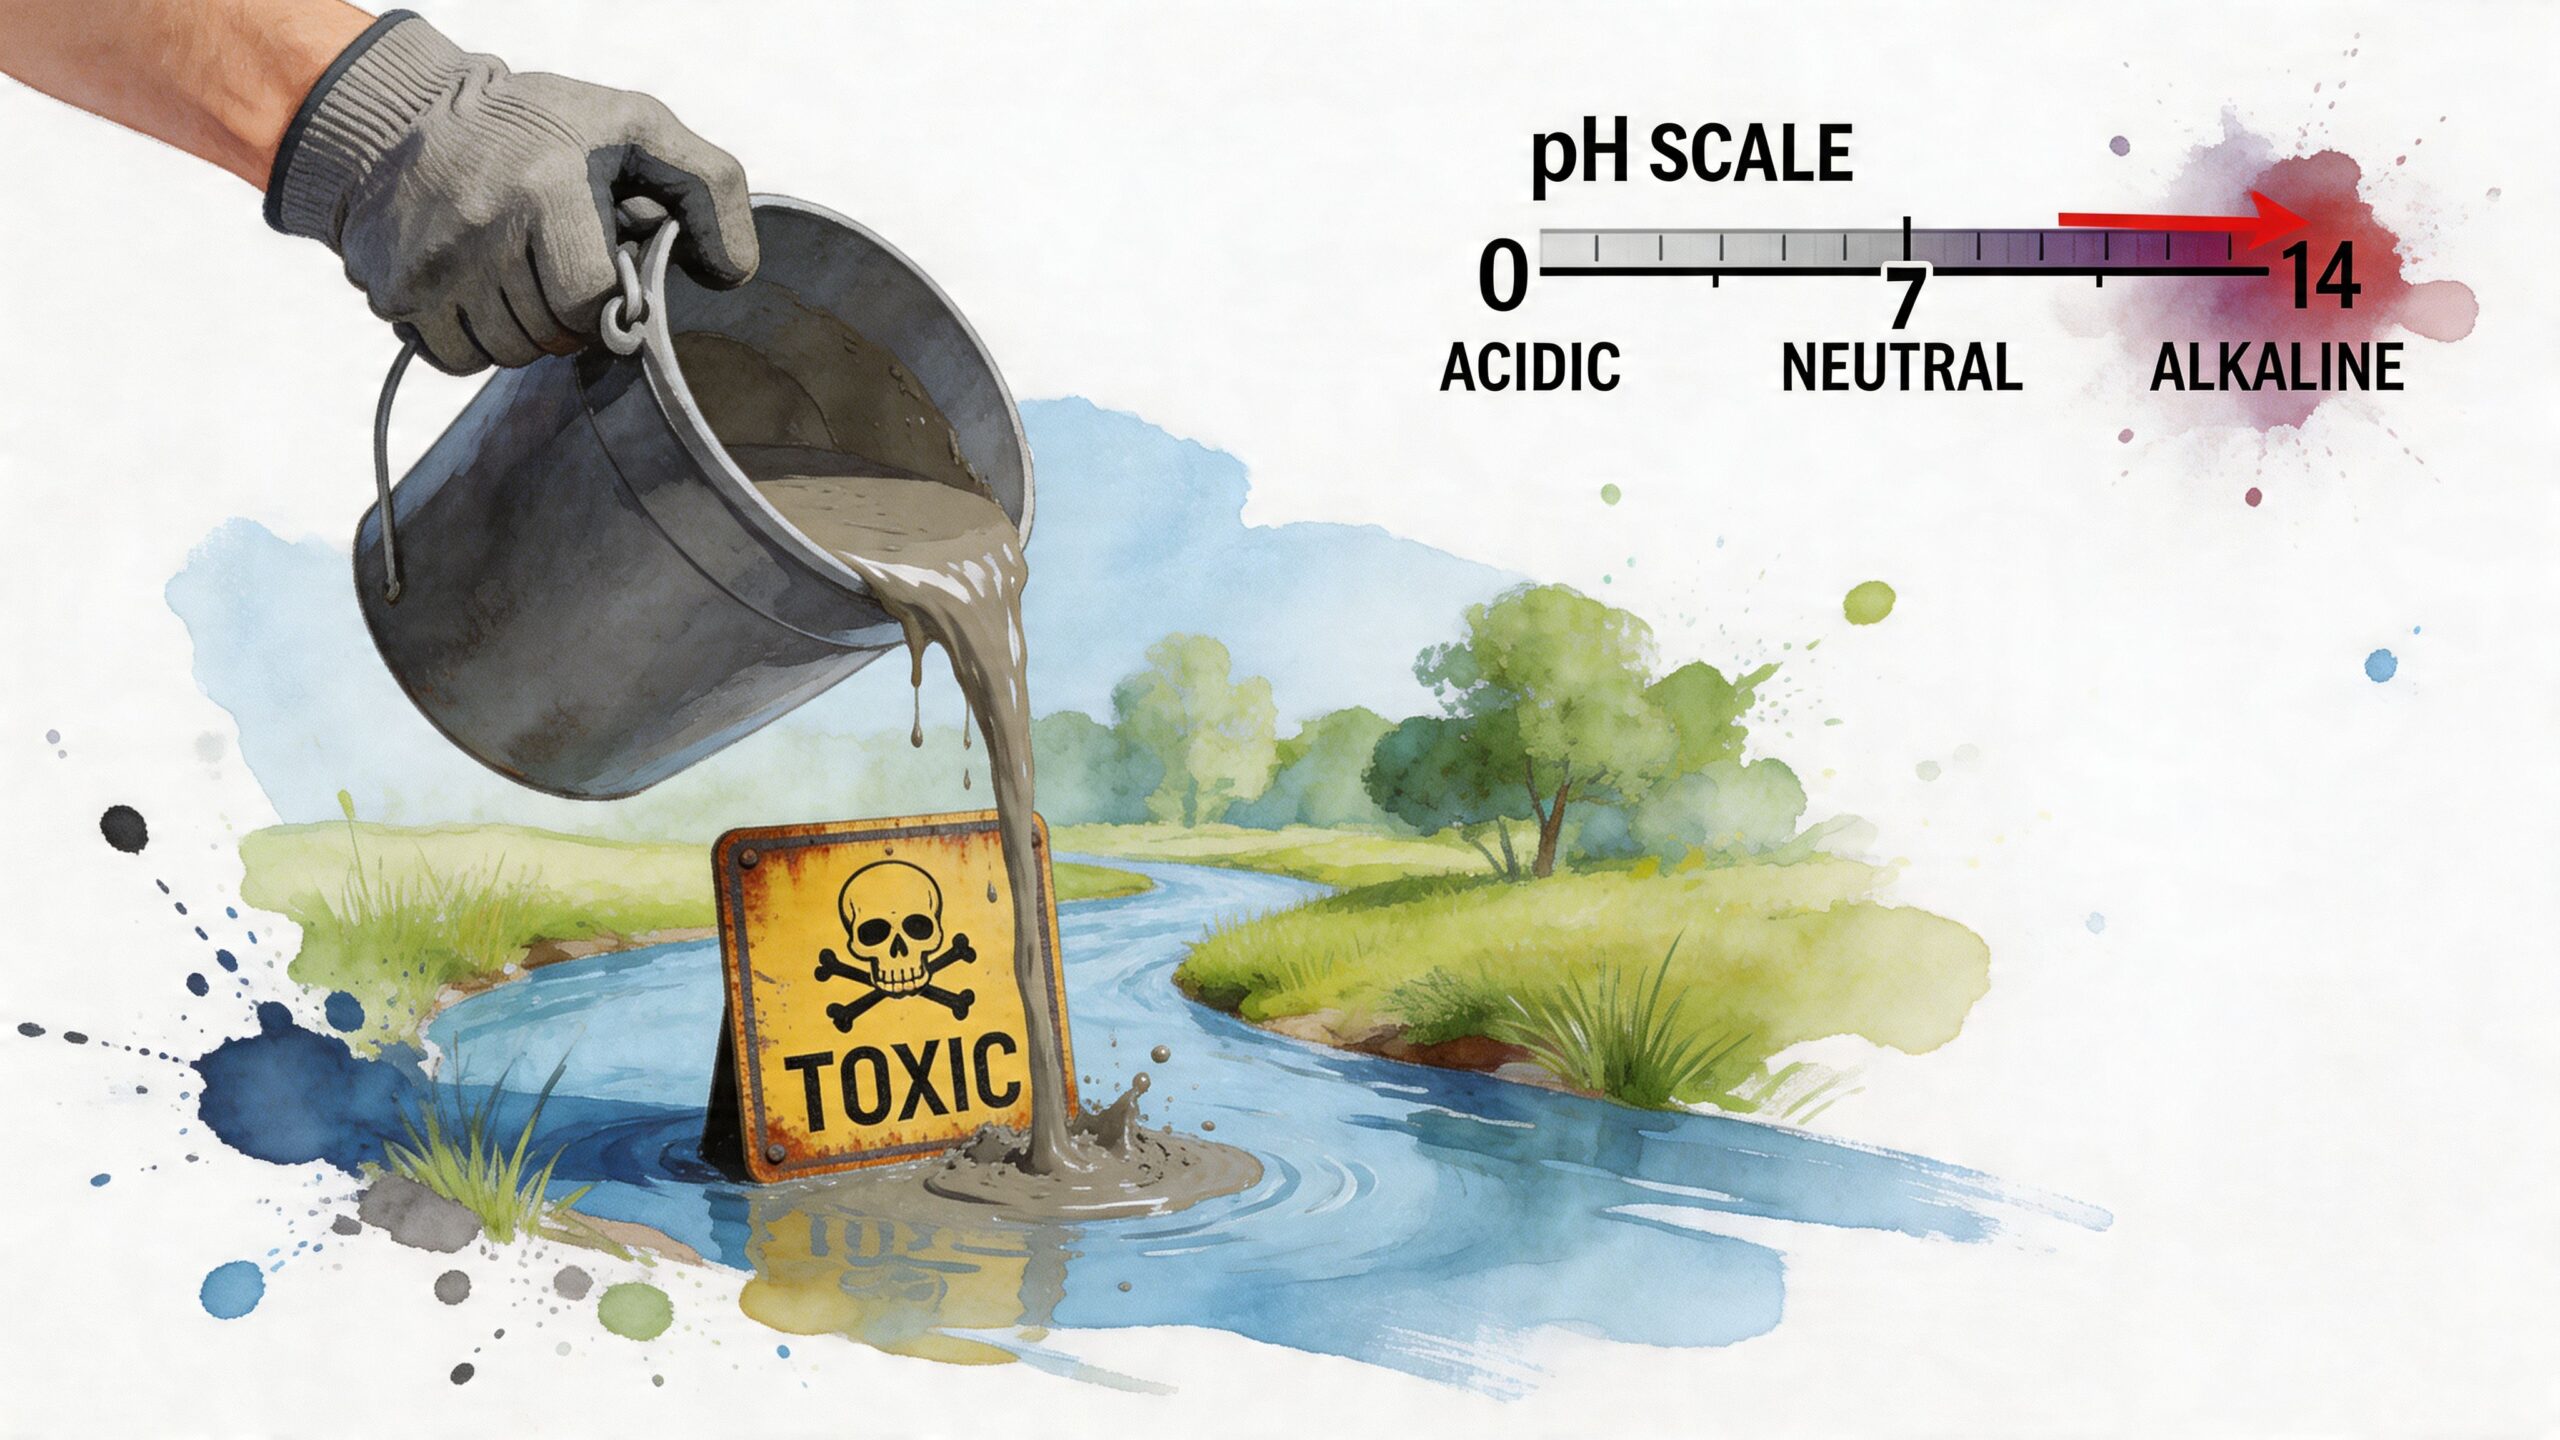
Concrete wash water looks harmless if you’ve seen it every day for years. It isn’t. It’s a highly alkaline slurry, and that chemistry is exactly why regulators care where it goes and how you contain it.
Concrete washout areas are used to hold wash water from mixer chutes, tools, wheelbarrows, and pump equipment. The water typically has a pH of 11 to 12.5, which is high enough to damage vegetation, disrupt aquatic life, and create permit issues if it reaches stormwater systems, according to the EPA concrete washout guidance.
The rule that matters first
If you remember one compliance requirement, make it this one. The washout area needs a minimum 50-foot setback from storm drains, open ditches, and water bodies under the EPA guidance linked above.
That distance is the first filter for your site walk. If a location is convenient but too close to an inlet or drainage path, it’s the wrong location. Convenience doesn’t beat compliance.
What the law cares about in practical terms
The law isn’t focused on whether your crew meant well. It’s focused on whether polluted water can leave the containment area and reach the storm system or surface water. Direct discharge can push receiving water above quality limits, and the EPA guidance notes exposure to fines of up to $37,500 per day under the Clean Water Act when violations occur.
On site, that translates into a few fixed requirements:
- Contain all solids and liquids: Don’t rely on bare ground and hope.
- Keep washout away from stormwater paths: If rain can carry it, you need a better location or better containment.
- Use a defined area with signage: Crews need one approved place, not several unofficial ones.
- Inspect the setup: A compliant location on paper can still fail if the liner tears or access gets blocked.
Why inspectors react fast to washout issues
Washout problems are visible. Gray slurry near an inlet, tracked residue leaving the pour area, or a pit that’s overtopping after rain tells an inspector the site team may be loose on stormwater control generally. That can trigger wider review of the SWPPP, housekeeping, perimeter controls, and maintenance logs.
Practical rule: Treat concrete wash water the way you’d treat any other regulated site waste. If you wouldn’t dump it next to an inlet in front of an inspector, don’t let your crew do it when nobody is watching.
What compliant crews actually do
The best sites don’t make this complicated. They mark the location before the pour, brief the driver and pump operator, and make sure the area is reachable without crossing sensitive finished surfaces. They also assign one person to check it during and after the work instead of assuming “the concrete guys handled it.”
A concrete washout area works when it’s planned like any other temporary control. It fails when it’s treated as an afterthought.
Sizing and Placing Your Washout Area for Success
A washout area that’s compliant but too small will fail in the field. A washout area that’s big enough but placed poorly will create operational headaches all day. Good setup comes from getting both right before the first pour.
A useful sizing benchmark is 1 cubic yard of washout capacity for every 70 cubic yards of concrete poured, based on the container specification guidance from ConcreteWashout.com. The same guidance notes that prefabricated containers with a minimum 5 cubic yard capacity are often specified for pours up to 350 cubic yards in a single day.
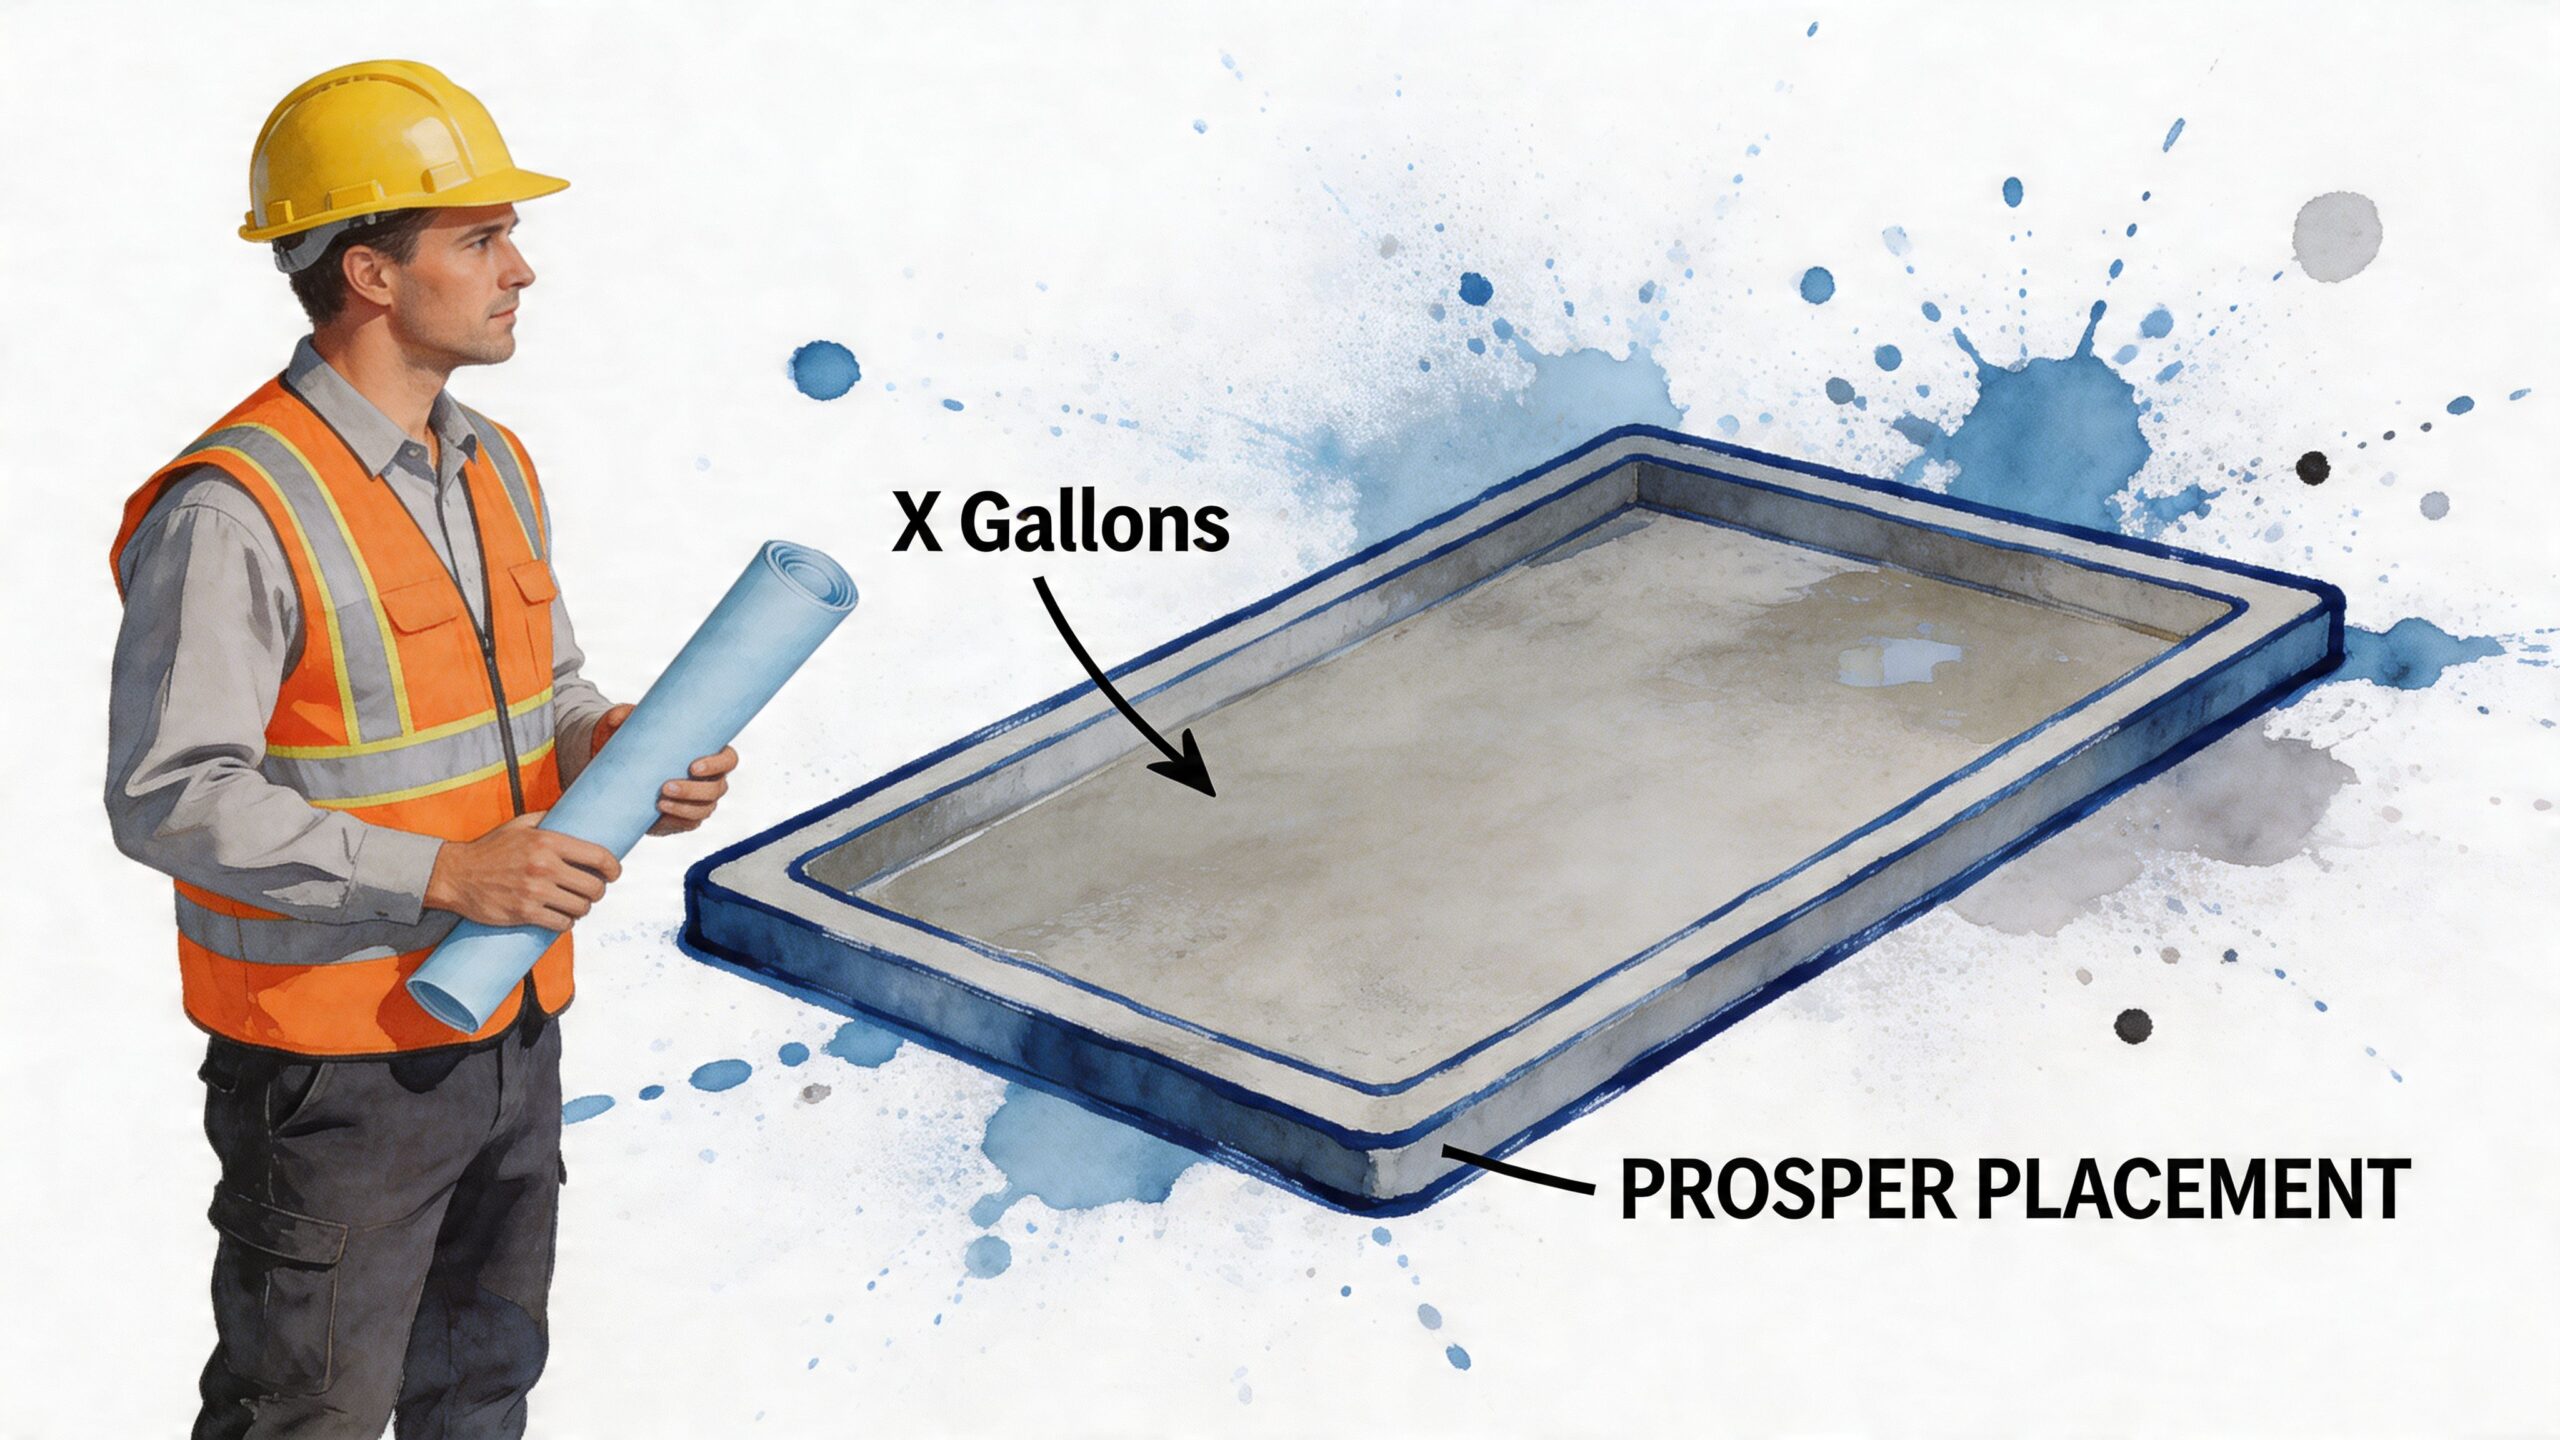
Start with pour volume
The first question isn’t pit or pan. It’s volume. How much truck chute washout, pump cleanup, tool cleaning, and incidental slurry are you realistically going to generate on that shift?
If you undersize, crews will overtop the container, use the ground beside it, or start rinsing in unauthorized areas. None of those outcomes are acceptable.
Use this planning sequence:
- Confirm the total pour volume for the day.
- Apply the 1-to-70 sizing benchmark from the specification above.
- Add margin for pump washout and crew behavior.
- Check whether the selected unit or pit can handle the actual workflow, not just the theoretical number.
Placement is about access and containment
A concrete washout area has to be close enough that crews will use it, but not so close that it creates site risk. That balance is where a lot of projects get sloppy.
Good placement usually means:
- Near the pour zone: If it’s too far away, crews improvise.
- Outside traffic pinch points: Don’t put it where forklifts, skid steers, or delivery trucks need to turn tightly.
- On stable ground: Soft or uneven ground leads to spills, leaning containers, and access trouble.
- Reachable by the concrete truck or pump crew: If the driver can’t get to it cleanly, the plan will break down.
- Away from finished surfaces: Keep slurry and tire tracking off completed work.
A quick field checklist
Use this before each pour:
| Check | Why it matters |
|---|---|
| Capacity matches the pour | Prevents overflow and off-book washout |
| Location is compliant | Reduces runoff and inspection risk |
| Truck access is clear | Keeps cleanup fast and controlled |
| Ground is level and firm | Prevents shifting and accidental release |
| Crew knows the location | Stops unauthorized rinsing elsewhere |
Put the washout area where the work naturally ends, not where the site map had empty space.
Pits and prefabricated units behave differently
An excavated pit gives flexibility if you have room and favorable site conditions. A prefabricated container gives more predictable containment and cleaner edges, especially on tighter or more developed sites. The right choice depends on duration, available labor, access, and how much tolerance the project has for mess.
What doesn’t work is placing a washout area based only on where excavation is easy. Easy digging doesn’t matter if the location forces trucks across finished grades or sends overflow toward drainage structures.
DIY Pit vs Professional Rental A Cost and Risk Analysis
This is the decision most guides skip. They tell you how to build a concrete washout area, but not when building one is a bad business decision.
On paper, a DIY pit looks cheaper. In the field, the actual answer depends on job duration, available labor, disposal logistics, and how much risk your site can carry. If you’re running a short renovation, a retrofit in a tight footprint, or any job where the owner notices every stain and every delay, the math often changes fast.
What a DIY pit really costs
The obvious cost is excavation. The less obvious costs are the ones that usually get ignored during precon.
According to EarthWorks Environmental’s washout cost discussion, an on-site excavated pit can carry labor costs of about $500 to $1,500, liner material costs of about $200 to $400, and disposal or hauling costs of $1,000 or more after the project. That same discussion compares those costs to renting a durable 72' x 72' x 24" pan at $25 per day, which totals about $750 for a 30-day project.
Those numbers matter because excavation isn’t the only line item. A pit also brings:
- Crew time for setup and berming
- Ongoing maintenance after rain
- Cleanup at closeout
- Risk of liner damage
- Potential rework if the chosen spot interferes with other operations
What rental changes
A professional rental shifts the problem from field-built containment to delivered containment. That changes labor, accountability, and schedule pressure.
With a prefabricated unit, you know where the washout will go, what it can hold, and how it will leave the site. You don’t have to dedicate labor to digging, lining, shaping, and later demolishing a temporary pit. You also reduce the chance that the temporary solution becomes a permanent headache near the end of the job when everyone is trying to close out.
Side by side comparison
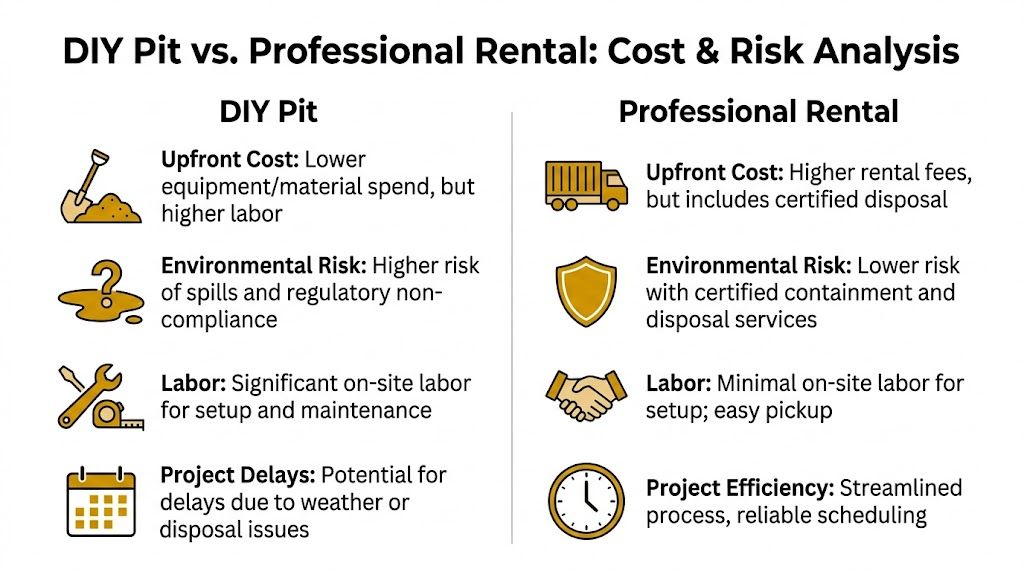
| Decision factor | DIY pit | Professional rental |
|---|---|---|
| Upfront cash view | Can look cheaper at first glance | Clear daily rental cost |
| Labor demand | Requires setup, monitoring, and closeout work | Lower field labor burden |
| Site disruption | Excavation and restoration affect the work area | Minimal disturbance to the site |
| Compliance confidence | Depends heavily on setup quality and maintenance | More controlled containment |
| Short-term project fit | Often poor on tight or fast jobs | Usually better for short durations |
When a pit makes sense
A pit can still be the right call. Large open sites with room to work, suitable soils, long durations, and dedicated staff to maintain stormwater controls can make a pit practical. If excavation is already mobilized and the closeout plan is clear, the economics may work.
But that only holds if the site can manage the pit properly from day one to final disposal. A cheap pit that overflows, tears a liner, or creates owner-facing cleanup isn’t cheap anymore.
If the project team is already stretched thin, don’t choose the option that creates more temporary work just because the first number looks smaller.
When rental usually wins
For short-term projects, small-to-medium jobs, occupied properties, urban renovations, and sites with limited room, rental usually has the stronger business case. The same EarthWorks analysis says rental solutions can yield 20% to 40% savings on small-to-medium jobs when hidden pit costs are included.
That doesn’t mean rental is always cheaper in every scenario. It means the comparison has to include the full job cost, not just the visible line item for a container or for excavation.
A simple ROI framework
Use this framework before deciding:
- If the project is short and access is tight, lean toward rental.
- If owner expectations are high and site appearance matters, lean toward rental.
- If the team has spare labor and open ground, a pit may be workable.
- If closeout is already compressed, avoid adding cured concrete removal to the endgame.
- If stormwater scrutiny is high, choose the option that gives cleaner containment and easier documentation.
The trade-off most people miss
The biggest difference isn’t just dollars. It’s management friction.
A pit often costs attention every week. A rental usually costs planning up front. Experienced site teams know which one they’d rather spend their time on.
Inspection Disposal and Closing Out Your Washout Area
A compliant setup on day one can still fail by day five if nobody checks it. Concrete washout management is a lifecycle task. You inspect before the pour, monitor during use, and close it out correctly at the end.
That matters most when the area is getting full, weather is coming in, or multiple crews are using the same container. The washout area that was fine on Monday can become a spill risk by Thursday afternoon.
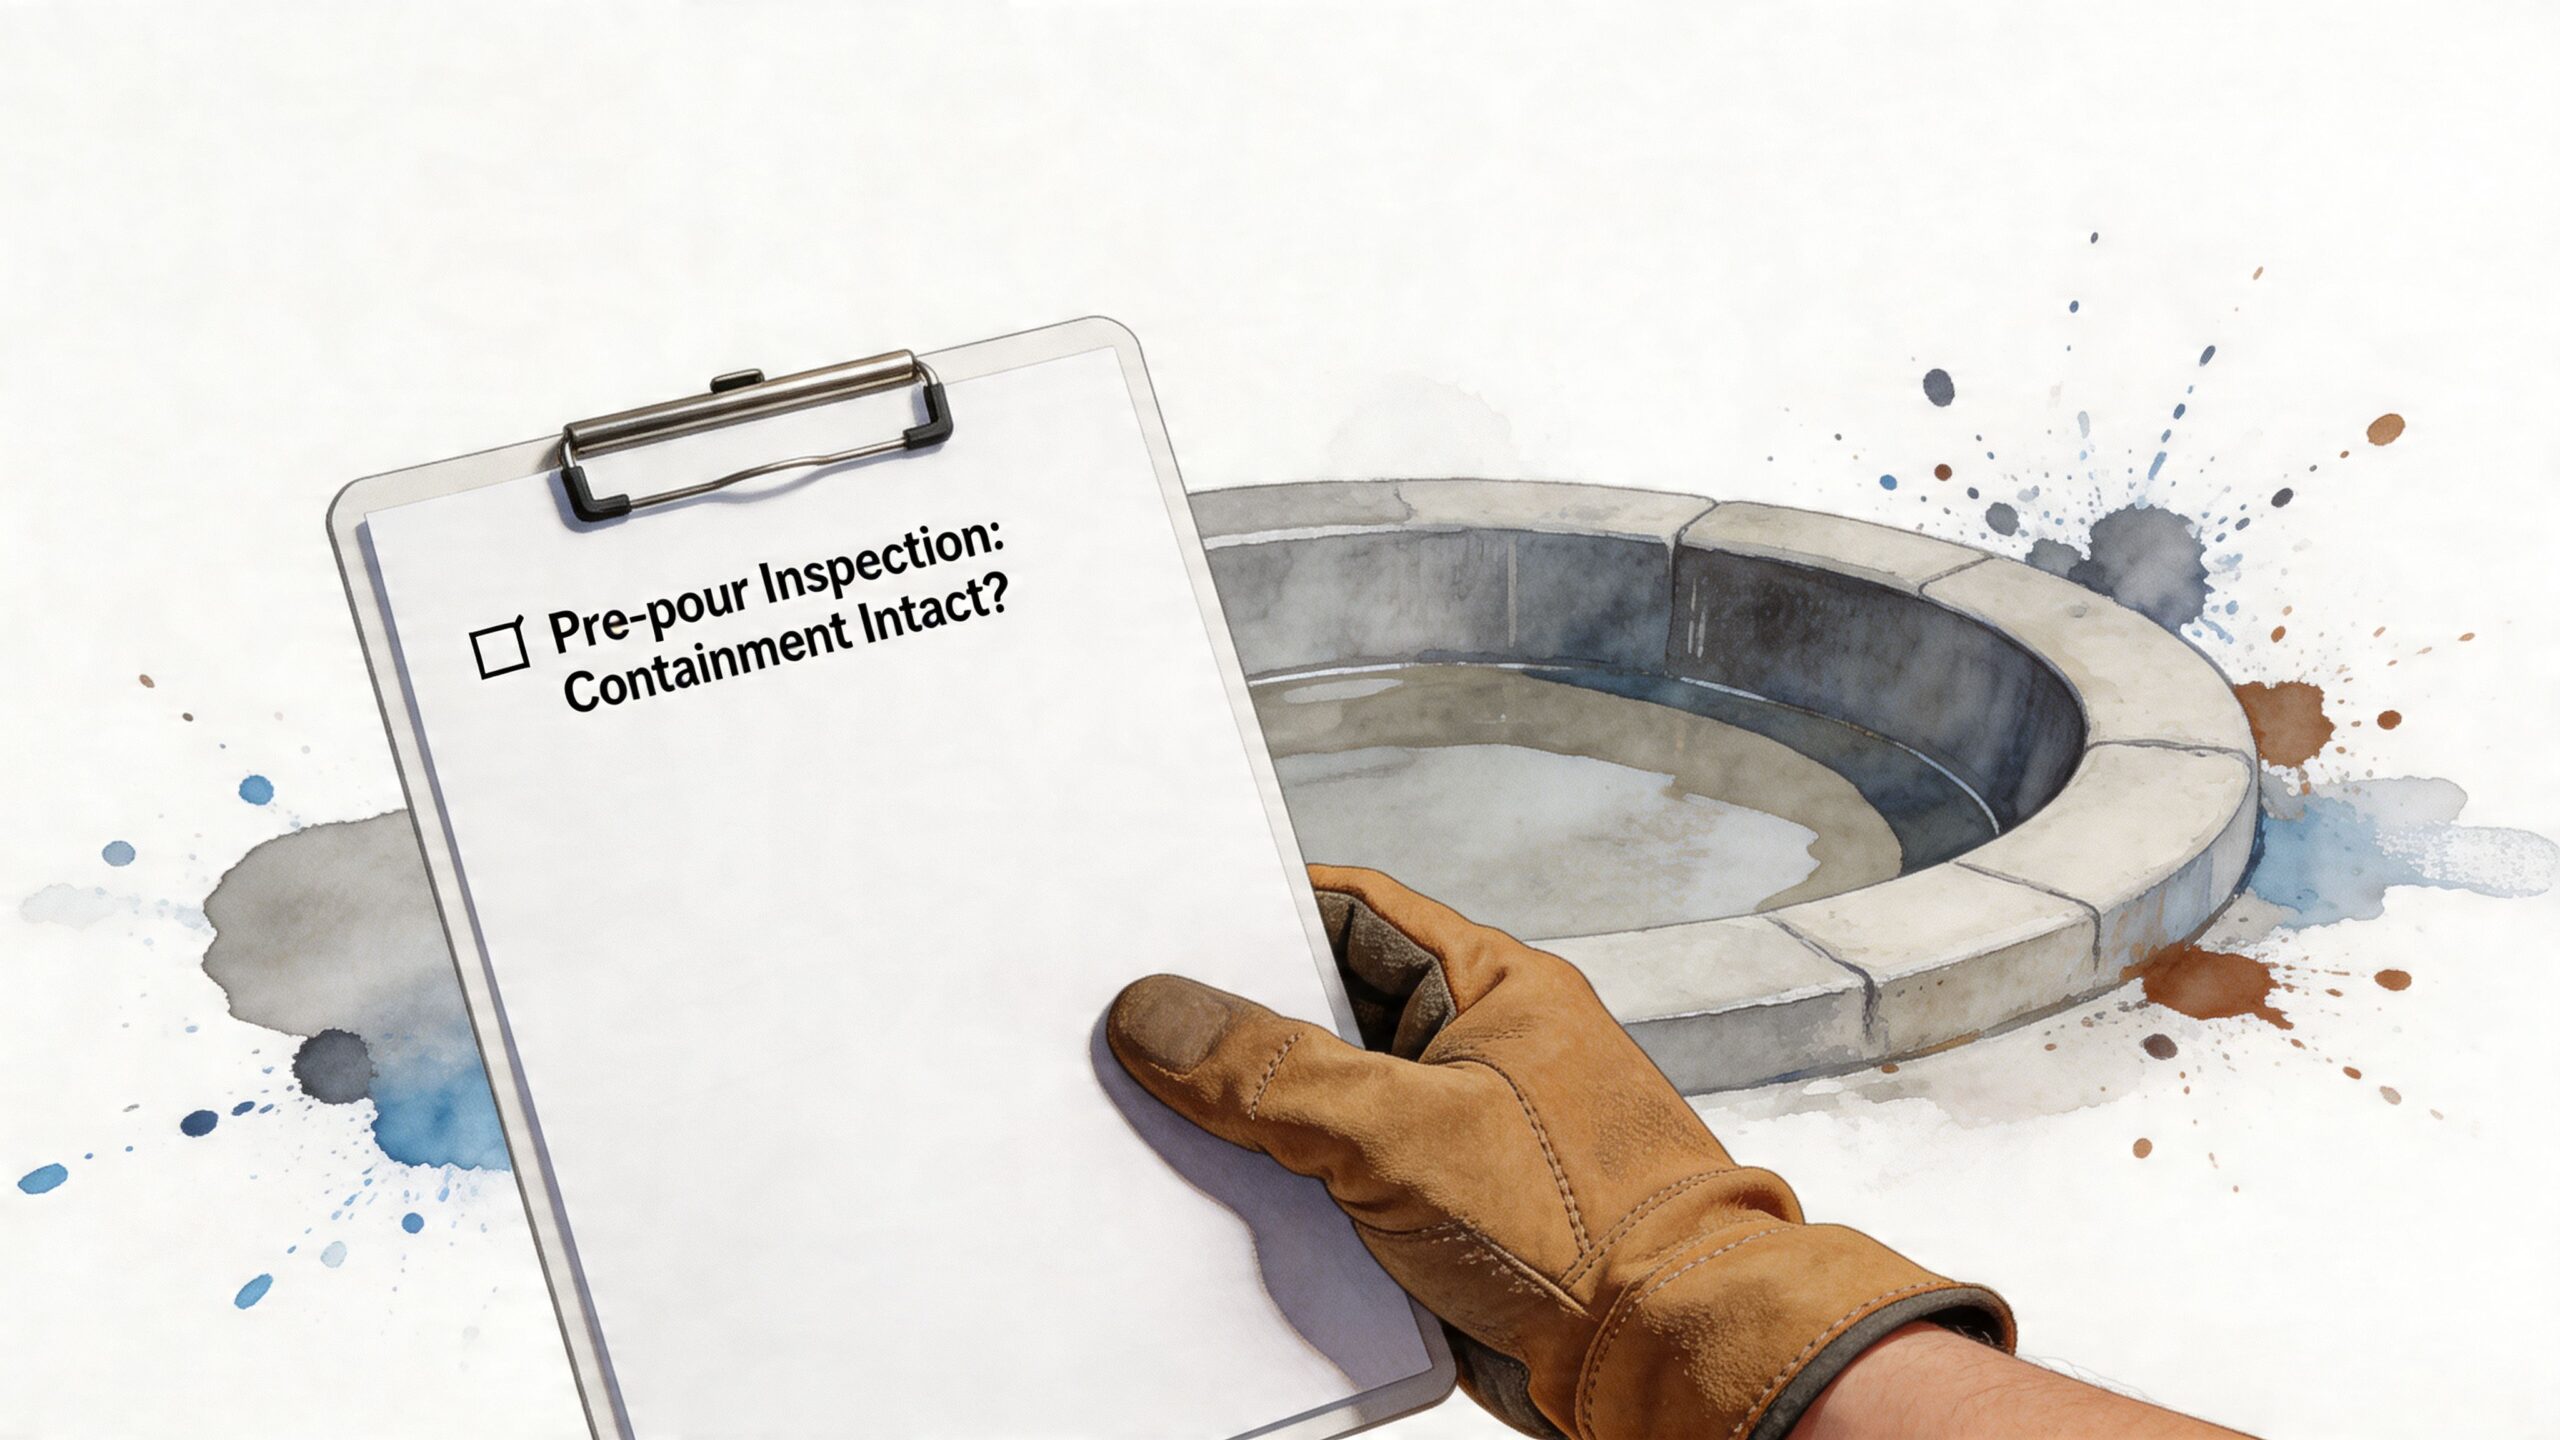
What to inspect before use
Before the first truck arrives, check the basics in person. Don’t assume yesterday’s setup is still good enough.
Look for:
- Containment condition: No punctures, tears, gaps, or weak spots
- Access: Drivers and pump crews can reach the washout area without crossing sensitive finished surfaces
- Ground conditions: No settling, leaning, rutting, or edge failure
- Signage and crew awareness: Everyone knows where washout is supposed to happen
- Available capacity: Enough room for the planned work, not just the first truck
What to watch during the job
Most failures happen because the washout area is left alone too long. The site needs someone responsible for checking it as the day progresses, especially before weather hits or before a second shift starts using it.
In practice, watch for rising liquid level, hardened buildup that reduces usable space, splashout around the perimeter, and crews rinsing beside the container instead of into it.
Field check: If the washout area is getting close to full, act before the next truck needs it. Waiting until there’s no room left is how spills start.
Disposal steps that actually work
For a rental container, the proper sequence is straightforward. According to Outpak’s concrete washout best practices, the process is:
- Allow the slurry to settle for 24 to 48 hours
- Pump off the liquid for treatment or reuse, with pH neutralized below 9
- Allow solids to cure for 7 to 28 days
- Break up and recycle the cured material as aggregate
That process matters because liquid and solids behave differently. Trying to handle both at once creates more mess, more haul weight, and more chance of uncontrolled discharge.
Closing out cleanly
At project closeout, crews get impatient. Don’t rush this step. Confirm the container or pit contents have been managed correctly, the remaining hardened material has a recycling or disposal path, and the area where the washout sat is free of residue.
Landfill costs can exceed $50 per ton according to the same Outpak guidance above, so proper separation and recycling isn’t just cleaner. It can also reduce disposal expense.
A practical closeout checklist
| Stage | What to do |
|---|---|
| Before final pickup | Verify no fresh washout is still being added |
| Liquid handling | Remove and treat or reuse liquid properly |
| Solid handling | Let material cure fully before breakup or haul-off |
| Site restoration | Clean staining, residue, and tracked slurry nearby |
| Documentation | Keep records that show the waste stream was managed correctly |
Good washout closeout is boring. That’s the point. No surprise mess, no last-minute labor scramble, and no inspector questions when the site is otherwise trying to wrap.
How to Arrange a Concrete Washout Rental
If you’ve decided a rental makes more sense than a field-built pit, the process should be simple. The quality of the rental experience comes down to whether you give the provider the right job information and whether the provider is clear about equipment, delivery, pickup, and any extra charges.
Crews usually get into trouble when they order too late, guess on size, or assume the driver can place the unit anywhere on site. A little coordination up front avoids most of that.
Know what you need before you call
Have these details ready:
- Project address and access conditions
- Expected pour activity
- How long the unit is needed
- Whether the site has rough terrain or restricted placement
- The preferred delivery window
- Who will receive the unit on site
If you can’t describe where the washout will sit and how trucks or crews will reach it, you’re not ready to order yet.
Ask the provider practical questions
The best rental conversations are operational, not generic. Ask about the unit dimensions, liquid capacity, load handling, delivery requirements, and what happens if your job runs longer than planned.
Also ask about:
- Delivery limitations: Can the unit be placed where you need it, or only at curbside or easy access points?
- Rough-terrain charges: Some jobs need extra handling.
- Express scheduling: Last-minute orders often change pricing or availability.
- Pickup process: What condition does the provider expect before removal?
- Disposal scope: Is the service equipment-only, or does it include managed waste handling?
Match the unit to the job, not the catalog
A smaller pan can be enough for light retrofit work if usage is controlled. A deeper or higher-capacity unit is better when multiple trades will rinse equipment into the same location or when the jobsite won’t tolerate an overflow event.
Don’t choose only by daily rate. Choose based on whether the unit matches the actual washout pattern on the site.
Fast ordering doesn’t fix bad scoping. The cheapest unit is expensive if it’s undersized and causes an overflow.
Build the rental into the schedule
Treat washout delivery like any other temporary site control. Order it early enough that it’s in place before concrete operations begin. Confirm who’s responsible for directing placement, and make sure the crew understands that the rental unit is the only approved washout location.
Good providers also make communication easy. Phone, email, messaging apps, and callback scheduling all help when site conditions change quickly. What matters is getting a response fast enough to adjust delivery dates, extend the rental, or coordinate pickup without slowing the job.
Review the terms before checkout
Read the pricing notes. Daily rental cost is only part of the total. Delivery, rough terrain, access difficulty, and express service can affect the final number. Clear terms are a good sign because they let you budget accurately instead of arguing about surcharges later.
A solid rental setup should give you three things: the right container, on the right date, with no confusion about what the service includes. If any of those points are fuzzy, sort them out before the order is placed.
Common Questions About Washout Area Management
The basics are easy. The edge cases are where crews get burned. These are the questions that usually come up when the site is busy, the weather changes, or the original plan starts to slip.
What should I do if the washout area starts overflowing during rain
Stop adding washout immediately and isolate the area. Keep trucks, laborers, and equipment from tracking slurry out of the spill zone. Protect nearby drains and call the person responsible for stormwater compliance on the project.
After that, remove liquid and material through the approved handling process for your site. Don’t cut a trench, don’t pump it onto the ground, and don’t try to “dilute” the problem with hose water.
Can I move a partially full washout container on site
You shouldn’t assume you can. A partially full unit is harder to handle because liquid shifts, solids add weight, and the center of gravity changes. Follow the container provider’s handling rules and don’t relocate a loaded unit casually with site equipment unless that move is clearly allowed and planned.
If the unit is in the wrong location, the better answer is usually to prevent that mistake during placement rather than trying to fix it once it’s in service.
Can I treat washout water myself and discharge it
You need to be careful. The liquid needs proper treatment and pH control before any lawful discharge option is even considered, and many jobs won’t allow field decisions on that point. If you don’t have clear project-specific approval and the right process, don’t do it.
The safer practice is to manage the liquid through approved treatment, reuse, or off-site handling rather than letting a field crew improvise disposal.
What are the business risks besides fines
Fines get attention, but they’re not the only problem. Poor washout control also creates owner complaints, rework, stained finished surfaces, schedule disruption, bad inspection history, and tension with neighboring trades. It can also damage your reputation with supers, GCs, and developers who expect clean control of routine site waste.
How often should the washout area be checked
Check it before the pour, during active use, after heavy rain, and near the end of each day when concrete work is ongoing. Frequency depends on site activity. If multiple trucks, a pump crew, and hand tools are all washing into one location, the inspection cadence needs to be tighter.
What’s the biggest mistake crews make
They wait too long to decide. By the time slurry is dripping off the chute, every option is worse. The best washout management happens before the first truck rolls in, when the location, access, containment method, and disposal plan are already settled.
Is a pit ever better than a rental
Yes, on the right job. Open space, longer duration, and a team that can maintain it properly may support a pit. But if the site is tight, the project is short, or closeout is already under pressure, a rental often removes enough labor and risk to justify itself.
If you need a washout solution that’s straightforward to order and easy to budget, Reborn Rentals offers specialized concrete washout containment for pours, renovations, and short-term site work. You can review available pan sizes, set dates and location details, and arrange delivery with clear daily pricing, including options starting at $25 per day. For teams that want a cleaner alternative to a DIY pit, it’s a practical way to keep the site compliant, organized, and ready before concrete work begins.