
Washout Concrete Driveway Setup Guide
The mixer truck is already on the driveway, the pump crew is waiting, and someone asks where the chute will be washed out. If the answer is “over by the edge,” you're about to turn a manageable concrete operation into a cleanup, property-damage, and stormwater problem. Fresh slurry can stain or etch finished surfaces, track onto roads, and move quickly toward a drain when rain starts.
A washout concrete driveway setup needs to work during the pour, not just look acceptable before it. The containment area has to hold alkaline washwater, heavy solids, vehicle splash, and rainfall while trucks continue arriving and leaving.
How Driveway Washout Containment Breaks Down
The mixer is still cycling through the pour when a driver backs toward a convenient corner, rinses the chute, and leaves a shallow gray pool on pavement or soil. It appears contained until a tire crosses it, a gust shifts the liner, or rain sends water toward the lowest route across the property. By then, cementitious residue may be moving toward a catch basin, maintained area, open ditch, or neighboring driveway.
Concrete washout is a slurry-control problem, not ordinary surface drainage. The water carries fine cement particles and remains highly alkaline, while settled solids harden into a dense mass that can damage surfaces and block improvised drainage paths. A residential driveway adds operating constraints: trucks need access and safe reversing space, finished paving needs protection, and the washout area cannot obstruct finishing crews or residents.
The scale behind the mess
The volume is large enough to make containment a site-logistics task rather than a housekeeping detail. Industry estimates put annual U.S. output from truck and pump cleaning at approximately 308 million gallons of washwater and 5 million tons of concrete-related solids, according to this environmental-management overview of concrete washout volumes.
Those figures combine truck-chute cleaning with pump operations. The material has two handling problems: liquid can overflow during active work or rain, while solids can harden into a difficult excavation and haul-off load. A driveway pan or lined pit must accommodate both phases, not just the water visible immediately after washing.
Site rule: If the crew can't point to the designated washout area before the first truck arrives, the area isn't ready.
The compliance issue is practical as well. Federal construction-stormwater requirements prohibit uncontrolled concrete washout wastewater, and EPA guidance calls for leak-proof containment that retains washwater and solids. Covered construction sites generally include projects disturbing at least one acre, plus smaller projects that form part of a larger common development, as described in the EPA construction and development effluent guidelines. Local permits, owner specifications, and responsible site management can require the same standard even when federal coverage does not apply. During a pour, the crew must also watch the available freeboard and account for rain before overflow becomes a property or stormwater incident.
Designing a Compliant Containment Zone
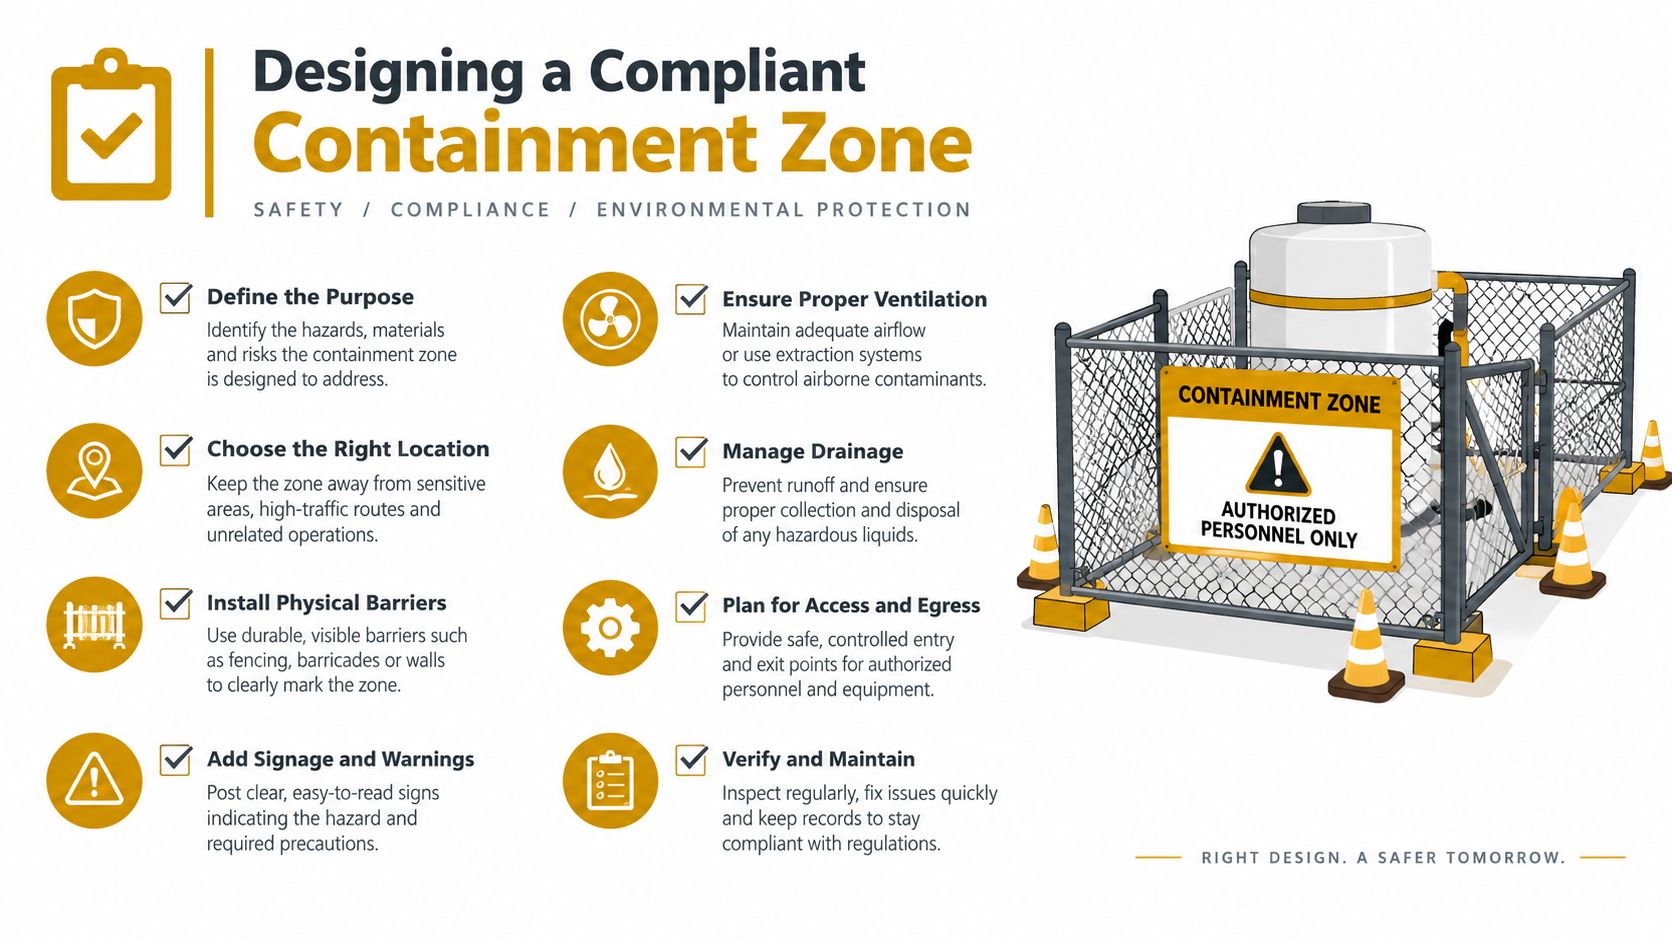
During a high-volume pour, placement determines whether washout stays manageable. Set the containment zone close enough for mixer and pump trucks to reach without awkward reversing, while keeping it out of drainage paths and away from sensitive surfaces. Maintain at least 50 feet from storm drains, open ditches, and water bodies, as specified in EPA concrete washout guidance.
That distance provides response time if a liner tears, a berm settles, or rain adds volume, but it does not replace containment. Mark the entrance with durable signage before trucks arrive, and stabilize the approach to reduce mud and concrete tracking onto the driveway. Confirm the access route still works when trucks queue during the pour.
Build the barrier around the work
Use an impermeable liner, engineered container, or purpose-built pan with sidewalls. Bare asphalt, soil, plywood, and thin plastic can leak, puncture, shift, or let slurry escape at the edges. For a field-built pit, one state DOT benchmark specifies a minimum 10-mil impermeable liner, with double 10-mil layers for earthen berm systems, as summarized in the EPA guidance document cited above.
Reserve freeboard for splash and rain. Above-grade facilities should retain at least 4 inches, while below-grade facilities should retain 12 inches, per the same EPA washout guidance cited above. During an active pour, treating every available inch as usable capacity leaves no margin when rainfall or an extra truck adds slurry.
Inspect the supporting surface before setup. It must remain stable under truck tires, avoid slopes toward drains, and support the pan or berm without deformation. Keep hoses, wheel chocks, warning signs, and access routes in fixed positions so drivers do not improvise. A compliant zone should be visible, reachable, and simple to use under pressure.
Choosing Between Field-Built Pits and Rental Pans
The choice usually comes down to site conditions, duration, and how much labor you can dedicate to maintaining the installation. A field-built pit can work where excavation is permitted, space is available, and the crew can build and inspect the berms carefully. It becomes a poor choice on a finished driveway, a tight residential lot, or a site where the ground drains toward sensitive infrastructure.
An above-grade rental pan is quicker to deploy and easier to remove without excavating hardened concrete from the property. It still needs the right location, freeboard, inspections, and an access route that won't cause splash or tire tracking. A pan doesn't make poor placement compliant.
| Feature | Field-Built Pit | Rental Washout Pan |
|---|---|---|
| Installation | Requires excavation, berm construction, and liner placement | Arrives ready for placement on a stable surface |
| Leak protection | Depends on careful liner installation and berm integrity | Uses engineered containment, but still requires inspection |
| Driveway protection | Excavation can damage finished paving and subgrade | Sits above grade and avoids digging into the driveway |
| Labor demand | Higher setup and dismantling effort | Lower setup effort, with delivery and removal to coordinate |
| Rain response | Berms and liner must remain stable as liquid rises | Sidewalls and freeboard provide a visible operating limit |
| Best fit | Longer projects with suitable ground and room for construction | Active pours, constrained sites, finished driveways, and short-term work |
Field-built systems are especially vulnerable at corners, seams, and vehicle entry points. A driver can catch a liner with a tire, while repeated traffic can weaken an earthen berm. If the crew cannot inspect the full perimeter easily, the apparent savings in materials may be offset by labor and failure risk.
Rental options simplify the physical installation, but they don't eliminate planning. Confirm the pan's liquid and solids capacity against the pour schedule, check delivery access, and arrange what happens when the unit fills. Reborn Rentals, for example, provides concrete washout pan rentals for driveway and construction work, with delivery, scheduled exchange options, and hauling and disposal services described on its concrete washout rental service.
Managing Volume and Preventing Overflow
During a high-volume pour, the washout area changes by the truckload. Each chute adds slurry and solids, the pump hopper contributes another load, and rain can consume freeboard while the crew is focused elsewhere. Assign one person to monitor the level, keep drivers within the marked zone, and request vacuum service or a pan exchange before the unit becomes difficult to control.
Set the operating threshold at 75% capacity. Above that level, liquid should be vacuumed off or allowed to evaporate where site conditions permit, reducing the risk that rain will push washwater over the containment edge. This approach follows California stormwater guidance for concrete washout management.

Operate the area like active equipment
Before the pour starts, name the level monitor and the person authorized to pause washout. Do not leave that call to the final driver at the end of the shift. Record the visible liquid level, liner or pan condition, access condition, and any leakage or tracking on a clipboard or inspection form.
Rain requires a separate response plan. Check the forecast, then inspect conditions during the pour instead of relying on it. A cover can reduce direct rainfall, but it may obstruct truck access or send runoff toward the containment edge. Keep the unit out of drainage paths, preserve freeboard, and confirm that a vacuum truck can reach it without crossing unstable ground.
Overflow control isn't a capacity contest. A large pan can still fail when runoff enters from uphill, trucks splash outside the zone, or nobody checks the level during a storm.
Vacuum removal usually provides the most controlled response as liquid approaches the operating limit. Evaporation can work when approved site conditions allow it, but it takes time and cannot rescue a unit that is already filling during heavy rain. Never discharge washwater into a drain, ditch, soil surface, or water body because the container is full.
Inspect the containment area daily and after heavy rain. Check for punctures, wall damage, leakage, sediment buildup, tire tracking, and reduced freeboard. Stop routine washout at the limit, then remove liquid or arrange an exchange before the next truck arrives. Keep the operational washout guidance cited above available with the site inspection records.
Executing the Final Cleanup and Disposal
Once the last chute is washed, the containment area still has work to do. The liquid may settle, and the solids will harden into a dense mass that must be removed without tearing the liner or damaging the driveway below. Keep unauthorized personnel and vehicles away from the area while the residue consolidates.
Use a controlled workflow:
- Stop new washout. Direct every remaining truck to an approved alternative if the primary unit is at its operating limit.
- Remove liquid responsibly. Vacuum accumulated liquid or manage evaporation only through an approved site procedure. Don't pump it onto the ground or into stormwater infrastructure.
- Allow solids to harden. Keep the containment intact while the concrete residue becomes stable enough to handle.
- Break up the hardened mass carefully. Use equipment suited to the site, keeping tools away from the liner and finished driveway surface.
- Lift out the pieces. Remove concrete chunks, sediment, and contaminated disposable materials rather than burying them in place.
- Recycle or dispose through an approved route. Hardened concrete may be suitable for recycling where the receiving facility accepts it. Confirm requirements with the facility and project specifications.
- Inspect the underlying area. Check the driveway, liner, access route, and surrounding soil for staining, tracking, leakage, or leftover alkaline dust.
Rental equipment adds a return condition to the closeout. Don't drag a loaded pan across finished paving or lift it with improvised rigging. Coordinate pickup after the solids and liquid have been handled according to the rental arrangement, and report liner or structural damage before removal.
The final inspection matters because small remnants become tomorrow's liability. A clean site has no hardened chunks in the grass, no slurry tracks on the driveway, and no unmarked residue that another trade can spread with a vehicle.
Your Pre-Pour Site Readiness Checklist
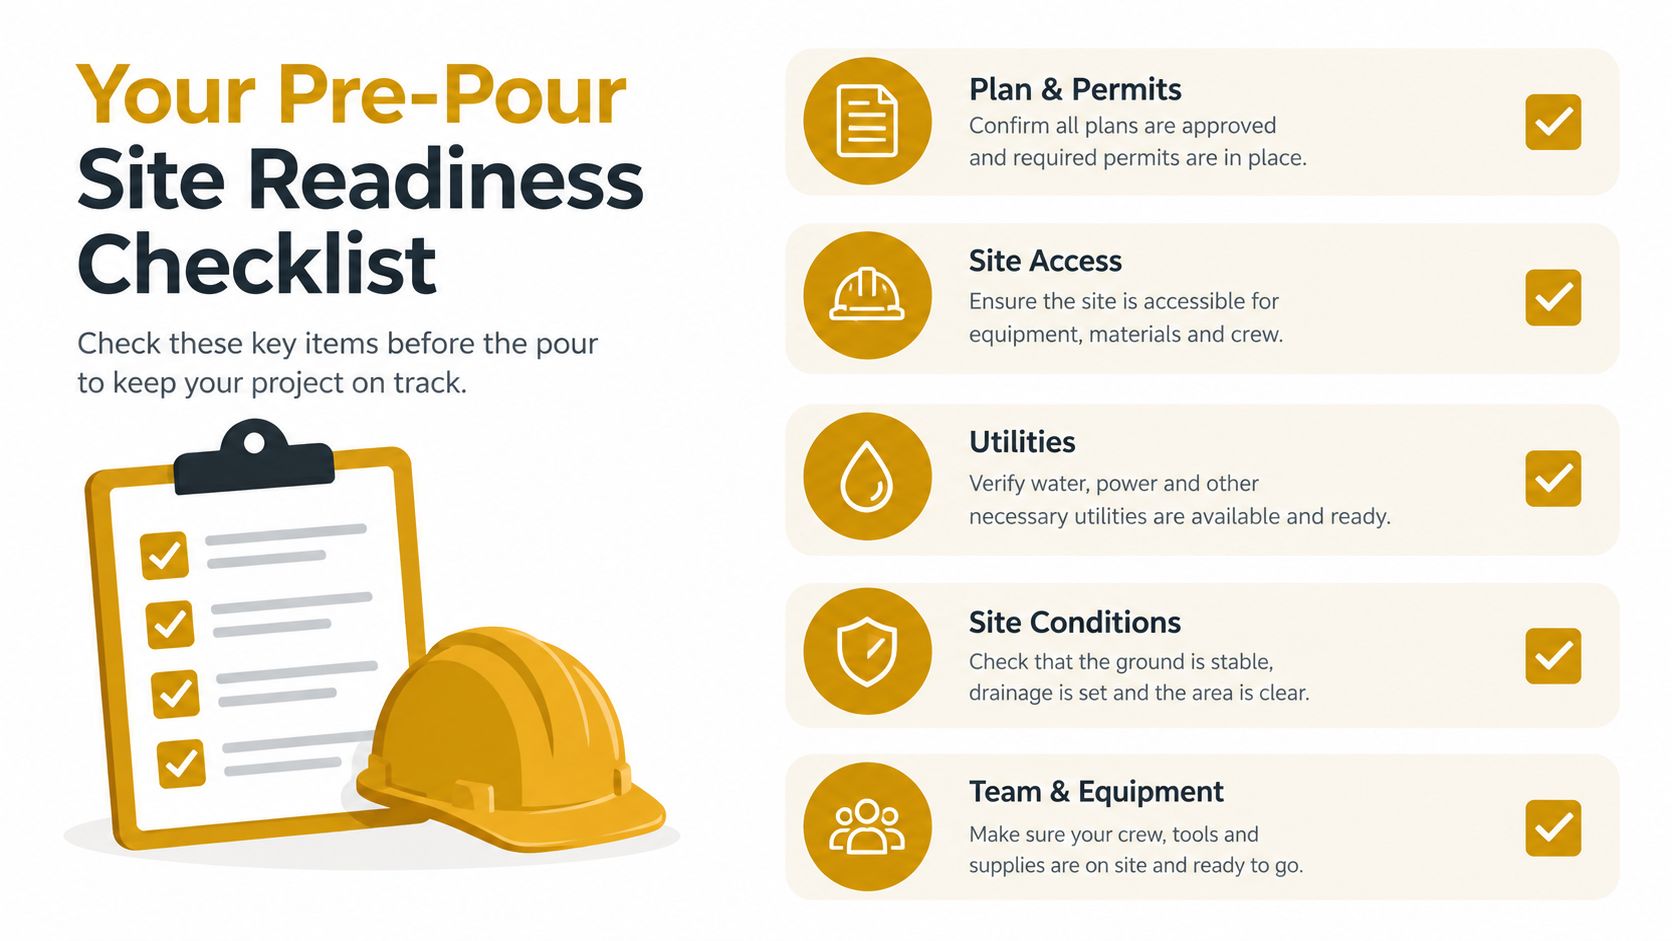
A washout plan fails quickly when the first trucks arrive and nobody owns the slurry. Use this checklist during the tailgate meeting, before concrete starts moving. The superintendent, concrete foreman, pump operator, and drivers should know the location, access route, inspection duty, and overflow response.
Location and access
- Confirm separation: Place the washout area at least 50 feet from storm drains, open ditches, and water bodies, per the EPA washout guidance cited earlier in this article.
- Keep drainage away: Check that the area is not downhill from a route that sends runoff toward a drain or receiving water.
- Protect traffic: Stabilize the entrance and provide enough room for mixer trucks to approach, wash out, and leave without crossing the containment edge.
- Post the instruction: Put clear signage at the entrance and brief every driver before the pour.
Containment condition
- Inspect the barrier: Check liners for punctures and open seams. Inspect sidewalls, berms, and exposed subgrade for damage or weak points.
- Check freeboard: Confirm the installation retains the required operating clearance. Above-grade systems need 4 inches, while below-grade systems need 12 inches, per the EPA washout guidance cited earlier in this article.
- Verify capacity: Compare expected truck and pump activity with the available liquid and solids space. Do not treat the container's full physical volume as usable capacity.
- Protect the surface: Make sure the pan or liner will not shift, puncture, or damage the driveway under vehicle loading.
Rain and response planning
- Review conditions: Check the forecast and identify the path stormwater will take if rain arrives during the pour.
- Assign ownership: Name the person responsible for checking levels and keeping washout traffic inside the marked area.
- Arrange removal: Have vacuum service, an approved evaporation procedure, or a clean-pan exchange ready before the containment reaches its limit.
- Set the trigger: At 75% capacity, remove liquid or stop routine washout to reduce overflow risk, following the operational washout guidance cited in the volume-management section.
Rain can fill a pan before the next truck arrives. Recheck freeboard after a storm, not only at the start of the shift.
Closeout readiness
- Plan hardened-concrete removal: Confirm who will break up, load, recycle, or dispose of the solids.
- Protect the driveway: Keep demolition tools and loaded equipment from scraping or puncturing finished paving.
- Schedule inspection: Check the area daily and after heavy rain. Document its condition before demobilization.
- Leave no trace: Remove slurry tracks, residue, broken concrete, damaged liner, and temporary signage when work is complete.
A reliable washout concrete driveway setup depends on assigned duties, usable capacity, and a response plan. If the project needs a delivered pan, scheduled exchange, or concrete waste hauling, review the containment options from Reborn Rentals' concrete washout rental service and confirm size, access, service timing, and site conditions before the pour. Their equipment is intended to collect concrete washout water and slurry while keeping delivery and removal organized.