
BMP Stormwater Management: Contractor’s Guide 2026
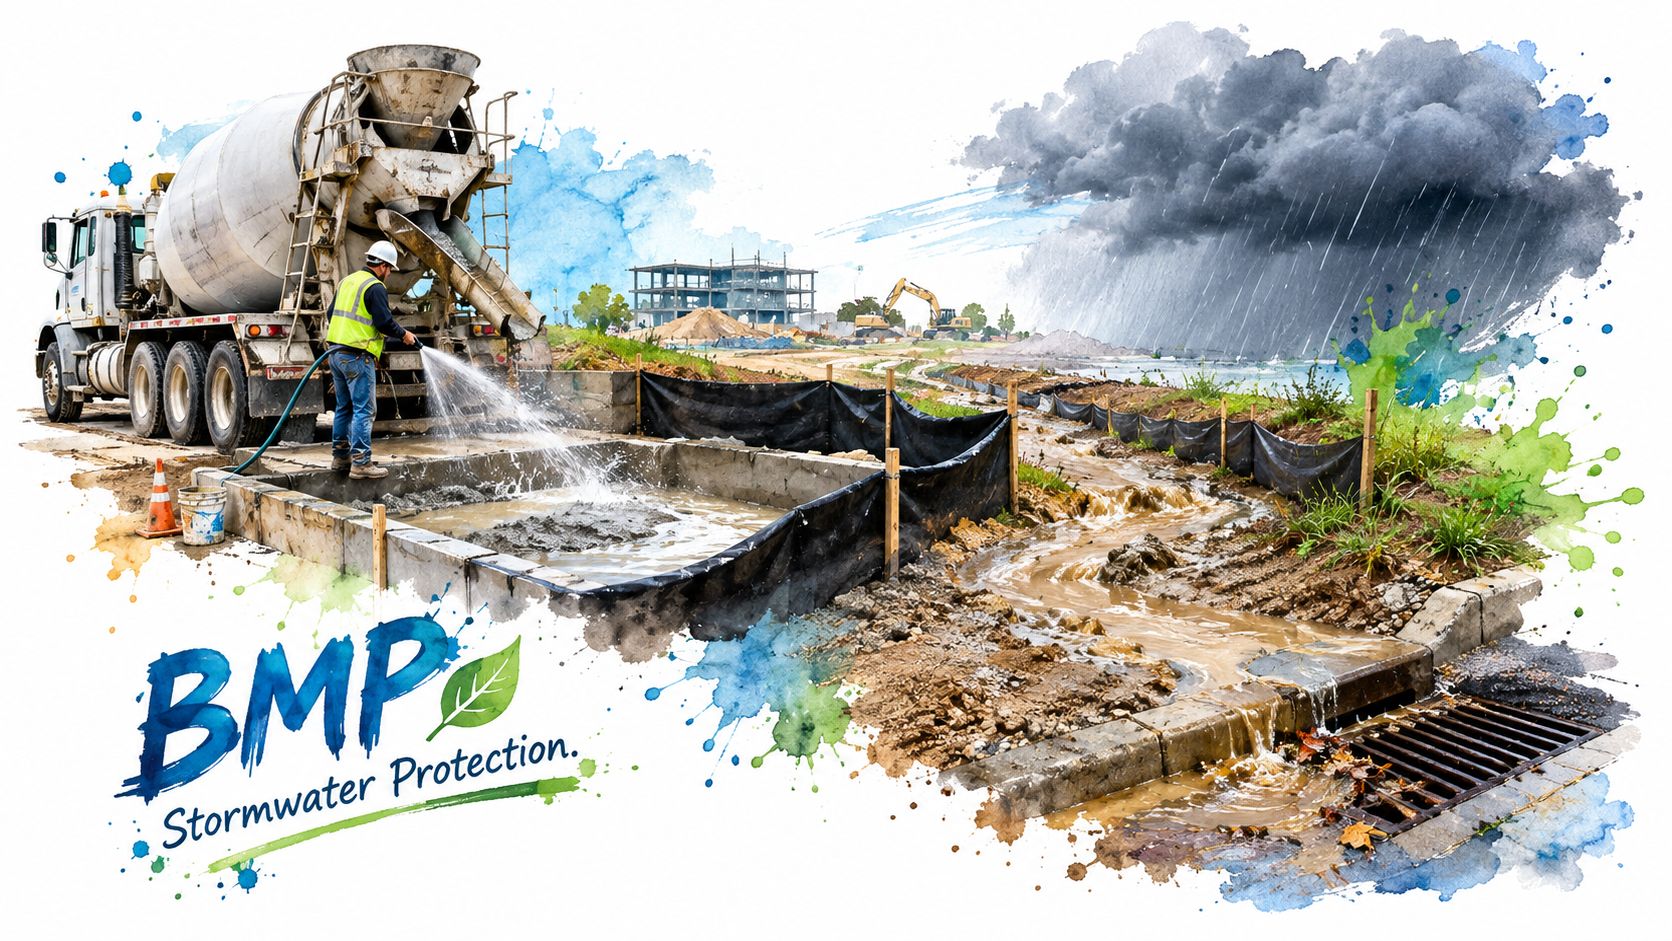
A concrete truck finishes its washout on Friday afternoon. Rain moves in overnight, and by morning, alkaline slurry and loose silt have crossed bare ground toward the nearest storm drain. The crew may have meant to clean up later, but runoff doesn't wait for the next shift.
What a BMP Is and Why It Matters on Site
A best management practice, or BMP, is a practice or device that keeps pollutants out of stormwater runoff. On a construction site, those pollutants can include sediment, concrete slurry, fuel, paint, and wash water. A BMP is a little like a seatbelt: it won't prevent every problem, but it can limit the harm. A seatbelt that's never buckled, like a BMP that's never maintained, won't protect anyone.
Follow the water's path. Rain falls on bare soil and paving, gathers along grades and gutters, flows toward an inlet, and may then travel through a storm drain to a creek. Each stage is a chance to stop pollutants from moving downstream. Covering materials, stabilizing a route, protecting an inlet, and containing washout all interrupt that path in different ways.
The federal Clean Water Act's National Pollutant Discharge Elimination System, or NPDES, framework made stormwater regulation part of the federal water-pollution control program. The U.S. Environmental Protection Agency describes BMPs as structural and nonstructural measures that can reduce runoff, peak flow, sediment, nutrients, metals, bacteria, and other pollutants before they reach receiving waters. Its green infrastructure performance overview draws on more than 150 studies across practices such as infiltration basins, green roofs, bioretention, bioswales, and wetlands.
On a construction project, the permit and the Stormwater Pollution Prevention Plan (SWPPP) set out which controls the site must use. A missing, damaged, or ineffective BMP can put the project out of compliance and lead to enforcement, cleanup work, delays, or rework. The useful first distinction is whether a control is a physical structure or a work practice.
Structural and Non-Structural BMPs Side by Side
The table compares common stormwater practices by category, purpose, and typical location.
| Practice | Category | Main job | Typical use |
|---|---|---|---|
| Infiltration basin | Structural | Stores runoff and lets it soak into soil | Post-construction drainage |
| Bioretention cell (rain garden) | Structural | Filters runoff through soil and plants | Parking lots and roadsides |
| Sediment basin | Structural | Settles sediment from site runoff | Mass grading areas |
| Inlet protection (filter sock, catch-basin insert) | Structural | Traps coarse sediment before it reaches drains | Active construction |
| Silt fence | Structural | Slows sheet flow and drops sediment at the edge | Site perimeter |
| Stabilized construction entrance | Structural | Removes mud from truck tires | Haul-road exits |
| Permeable pavement | Structural | Lets rain pass through the surface | Low-traffic paving |
| Concrete washout facility | Structural, containment | Holds slurry and wash water | Pour, chute, and pump areas |
| Good housekeeping | Non-structural | Keeps materials covered, stored, and labeled | Everywhere on site |
| Preserving existing vegetation | Non-structural | Keeps soil in place | Before clearing begins |
| Phasing and scheduling | Non-structural | Limits how much bare soil is exposed at once | Multi-phase projects |
| Crew training and spill response | Non-structural | Prevents mistakes from reaching drains | All projects |
Structural BMPs are physical controls you install, position, and maintain. Some are designed to store or treat water, while others contain a pollutant or intercept runoff before it enters a drain. Non-structural BMPs are the decisions and habits that prevent pollutants from getting into runoff in the first place: covering stockpiles, keeping lids on containers, protecting vegetation, sequencing work, and training crews to respond to spills.
The two groups work together. A silt fence can be installed correctly along a site boundary and still do little about mud carried from a busy entrance. If trucks track soil onto a paved road every hour, the missing control is the daily practice of managing that entrance and cleaning tracked material before it reaches a drain.
Most projects need both kinds of BMPs, but not every control serves the same phase. Temporary controls manage construction risks such as exposed soil and washout. Permanent post-construction features, such as bioretention cells or infiltration basins, manage runoff after the site is built and stabilized.
Practical rule: Stop pollution at its source, trap what escapes, then treat what remains.
How to Choose the Right BMP for Your Site
Start with the receiving water and the pollutant. Those determine how clean the discharge needs to be and whether the main concern is coarse debris, fine sediment, or another contaminant. Only then compare available space, soil conditions, access, and the crew's ability to maintain the chosen controls.
| Criterion | Question to ask | Decision signal |
|---|---|---|
| Pollutant particle size | Is the load coarse sand or fine silt and clay? | Fine silt needs settling time or filtration, not inserts alone |
| Hydraulic loading | How much runoff comes from the first 0.5 inch of rain? | Sizes the water-quality volume, about 12.7 mm |
| Receiving-water limit | What turbidity or discharge limit applies? | A stricter limit moves the site toward a full treatment train |
| Space and access | Is there room for storage and truck turning? | Tight sites favor above-ground or compact options |
| Soil and groundwater | Does the soil infiltrate, and is the water table high? | A high water table rules out below-grade pits |
| Maintenance capacity | Who inspects and empties the BMP, and how often? | No maintenance crew means choosing simpler devices |
| Storm sensitivity | Will heavy rain arrive during the pour? | Requires cover, freeboard, and a removal plan |
Use the table from top to bottom, then check that the combination fits the actual site. The Federal Highway Administration identifies detention, adsorption, biological removal, and filtration as principal treatment mechanisms. Many systems target the water-quality volume, often the first 12.7 mm (0.5 inch) of runoff from impervious surfaces. Its ultra-urban BMP guidance explains why a catch-basin insert is a pretreatment device, not a complete solution: it can capture coarse sediment and debris, but it doesn't reliably remove much of the silt- and clay-associated pollutant load.
Consider a grading site with fine clay runoff draining toward a sensitive creek. A catch-basin insert may catch leaves and larger particles, but fine material can pass through. The site needs controls that slow water for settling or provide filtration, with inlet protection as one layer in the system. A sediment basin also needs an emergency spillway or bypass provision, because storage alone can't safely manage flows beyond its design event.
Think about access and upkeep as well as treatment. A device that blocks truck circulation, fills quickly, or has no assigned maintenance owner can fail in practice even if it looks right on a plan. The cheapest BMP is the wrong choice if it can't handle the pollutant particle size or meet the discharge requirement.
How Well BMPs Perform and What They Cost
A portfolio of green-infrastructure practices in the Capitol Region Watershed District in Ramsey County, Minnesota, showed very different runoff-volume results by 2010. The surprise is the pond: a familiar BMP, but one that reduced runoff volume by just 5 percent in this project.
| BMP type | Runoff-volume reduction | What it shows |
|---|---|---|
| Infiltration trench | 77% | Strong reduction when soils accept water |
| Rain garden | 88% | Vegetated treatment performs well at the source |
| Underground storage-and-infiltration system | 100% | Storage plus infiltration captured the full volume in this project |
| Pond | 5% | A familiar BMP can perform poorly without the right design |
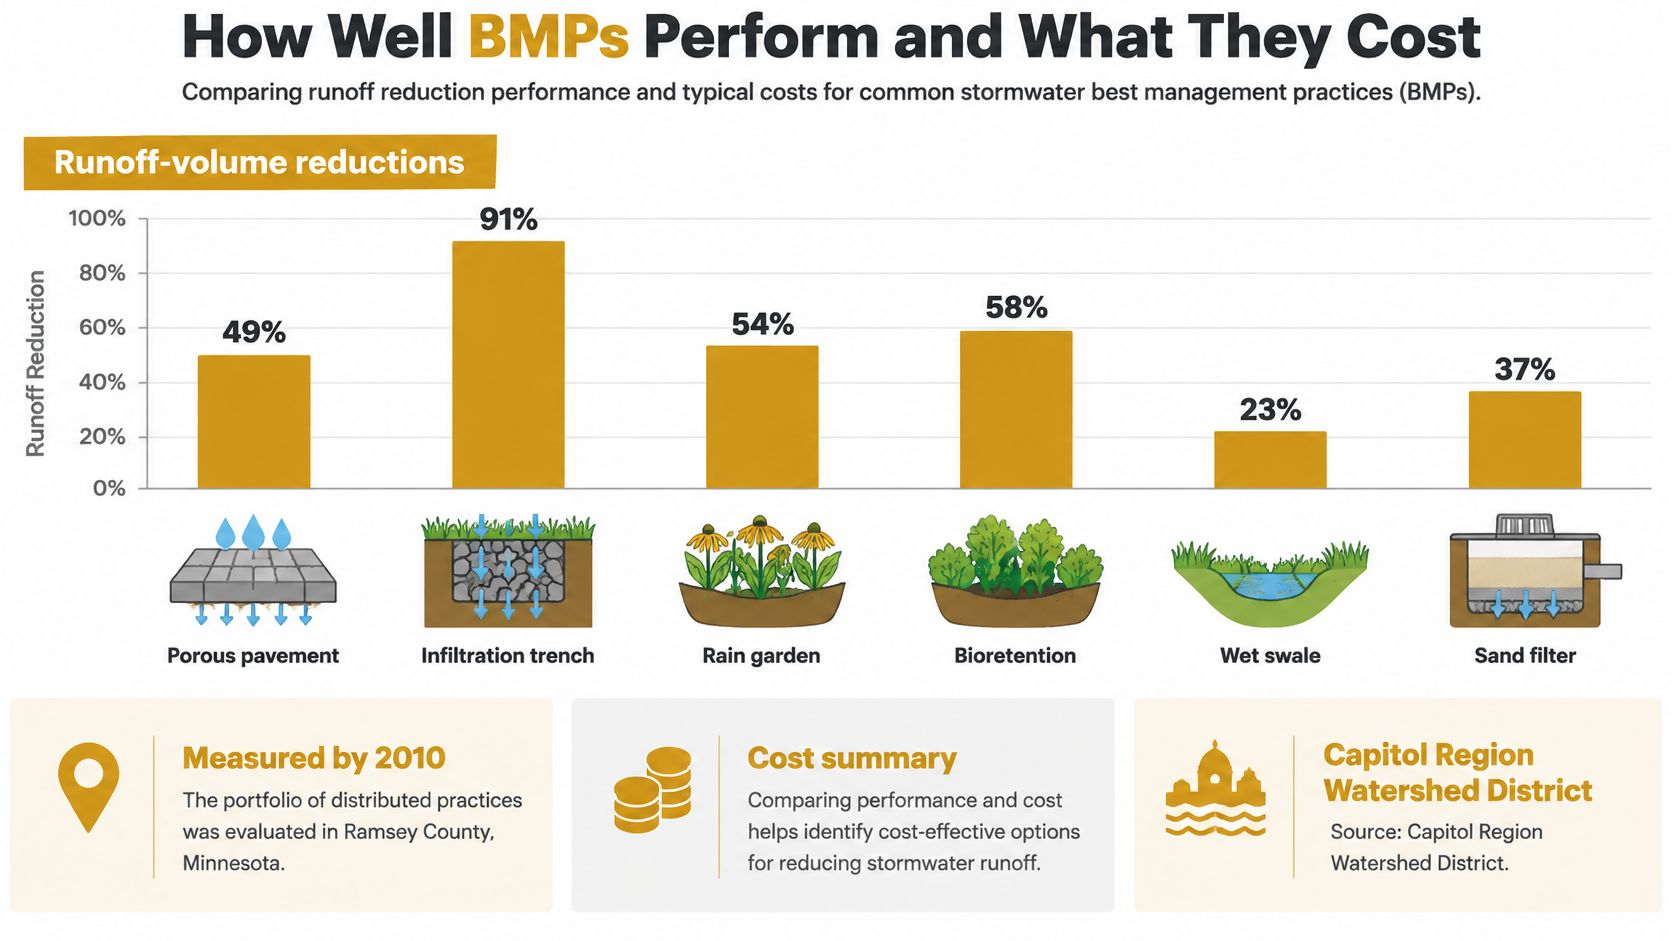
Those results aren't universal performance ratings. They describe specific practices in a particular portfolio, and they show why BMP isn't one technology with one dependable reduction rate. Design, soil conditions, storage capacity, infiltration potential, maintenance, and rainfall all affect what a system achieves.
The project also offers a cost comparison. The U.S. Environmental Protection Agency estimated the green-infrastructure approach at about $2 million, compared with $2.5 million for a new 60-inch-diameter storm sewer. That's an apparent saving of $500,000, or 20 percent, before broader environmental benefits are considered. The EPA account of the Minnesota project makes the case for comparing distributed practices with conventional drainage expansion on both performance and cost.
For a project team, the useful lesson isn't that one BMP always wins. It's that a practice should be judged by what it needs to accomplish, what it costs to build, and what it takes to keep it working. Compare options using five benchmarks:
- Runoff-volume reduction: How much water stays on site or gets infiltrated?
- Peak-flow control: Does the practice slow or spread out discharge?
- Pollutant capture: Does it address the sediment or contaminant of concern?
- Capital cost: What does installation require?
- Long-term operations: Who will inspect, clean, repair, or remove accumulated material?
Concrete Washout Containment and Placement
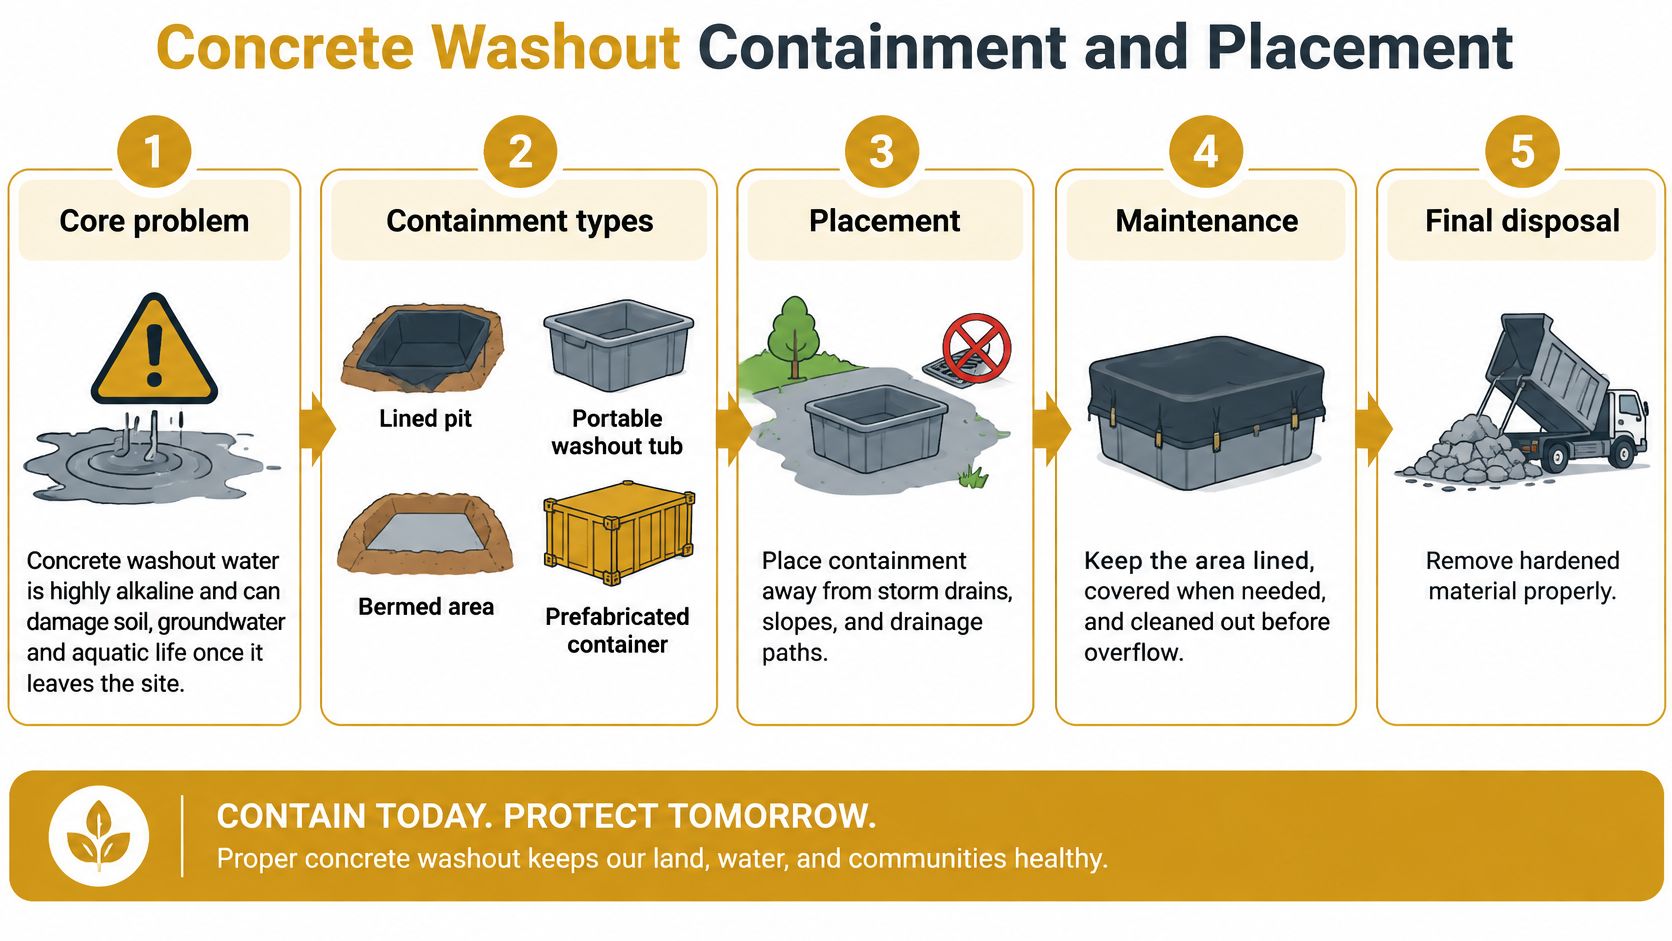
Concrete washout water is highly alkaline. If it escapes, it can damage soil, groundwater, and aquatic life. Containment type matters, but so does placement: a tub that drivers can't reach safely during a pour may be bypassed.
Common options include above-ground steel or heavy-duty poly pans with a lid; below-grade pits lined with plastic or geomembrane; bermed or lined earthen basins for larger pump or chute washouts; and small lined bags or tarp systems for minor pours. A pump truck may need a rear-washout ramp or a dug area that keeps rinse water contained.
The U.S. Environmental Protection Agency's concrete washout guidance captures the practical trade-off: washout should be near the pour for convenient truck access, while field guidance calls for keeping it at least 15 m (50 ft) from storm drains or receiving waters. A compliant location still has to work for the route, terrain, and crew.
Map drainage paths and inlets. Mark the flow directions, storm drains, and receiving waters on the SWPPP site plan. A mapped buffer is easier to check than a location chosen by eye during a busy pour.
Check truck turning radius and pump access. Walk the route with the drivers' needs in mind. Include the pump truck's approach, rear washout area, and the space required to enter and leave. If a driver can't reach the facility without blocking work or making an unsafe turn, the crew may wash out elsewhere.
Compare ground elevation. Look at where water would flow during a storm. A spot that meets the distance buffer may still drain downhill toward an inlet if it sits in the wrong place.
Choose the closest workable location outside the buffer. Keep the facility at least 50 ft from storm drains and receiving waters, while making access practical for the full pour. Don't solve a convenience problem by placing the containment where runoff can carry its contents to a drain.
Mark and sign the facility. Use clear field signs and markings so drivers and finishers know where to go. Put the location on the site plan and keep it visible after work areas shift.
Set a relocation trigger. Move the facility before the next pour if the pour zone changes, truck access is blocked, or heavy rain is forecast. Recheck the drainage path, route, and buffer at the new location.
When the ideal location isn't available, the answer is a mapped, signed, inspected facility with spare capacity, not an unmarked hole beside a drain. Check the facility daily and after heavy rain. When it passes 75 percent of capacity, remove liquid or allow it to evaporate before it can overflow. Record what you checked and what you did.
Saw-Cut and Drilling Slurry Containment
Washout isn't the only concrete-related pollutant. Saw-cutting concrete or asphalt produces slurry, and directional boring or drilled foundations produce drilling fluid. Both can travel across pavement to a storm drain quickly, so plan containment before the saw or drill starts.
Map each cut or drill location and its drainage path. Identify nearby inlets and the direction runoff will travel.
Build a barrier around the work. Use a dam, berm, or containment pan to keep slurry from spreading beyond the cut.
Collect slurry as it's produced. Use a wet vacuum or pump rather than letting material accumulate and flow away.
Add inlet protection as backup. A filter sock or catch-basin protection can intercept escaped material, but it doesn't replace containment at the work area.
Store the collected material safely. Use sealed containers or a lined pit. Don't put slurry into a concrete washout facility unless that facility is designed to accept it.
Dispose of and record the waste. Send collected slurry and hardened waste to a licensed facility, and note the volume and disposal action in the inspection log.
Never hose slurry into the street or a drain. If containment fails during a storm, stop the work until the crew restores a reliable barrier and collection method.
Inspection and Maintenance Schedule for BMPs
Use the schedule as a working checklist, then follow the inspection frequency and reporting rules in the project permit. The site lead should assign each check to a person who can make repairs or arrange removal, not just record that a problem exists.
| Item | Check frequency | What to verify |
|---|---|---|
| Concrete washout facility | Daily and after heavy rain | Liquid level, freeboard, cracks, liner tears, and lid |
| Washout liquid | When the facility reaches 75% capacity | Pump out or let evaporate before overflow |
| Inlet protection | At the permit's storm-inspection trigger | Sediment buildup, torn fabric, and bypass flow |
| Perimeter silt fence | At the permit's storm-inspection trigger | Undercutting, sagging, and sediment at the toe |
| Sediment basin | After each storm and monthly | Sediment depth, outlet clogging, and spillway condition |
| Treated discharge, where used | Per permit schedule | Influent and effluent turbidity, chemical dosing records |
| Inspection records | Every inspection | Date, findings, corrective action, and initials |
Give washout its own daily check, then inspect it again after heavy rain. Look for a rising liquid level, reduced freeboard, cracked sides, damaged liners, and a lid that no longer fits. Remove liquid or allow evaporation when the facility exceeds 75 percent of capacity, rather than waiting until an overflow is imminent.
For treatment systems, match inspection and sampling to the permit's requirements. The EPA's construction stormwater treatment guidance reports that treatment systems commonly reduce turbidity from about 300 NTU to about 5 NTU. Properly designed active-treatment systems can handle influent levels near 1,000 NTU, while project requirements range from less than 50 percent to more than 90 percent reduction depending on local standards and environmental sensitivity.
Operators should measure influent and effluent turbidity, verify chemical dosing when chemicals are used, and prevent untreated bypass during high flows. Start with source control and stabilized drainage, then use settling or filtration. Consider chemical treatment only when passive controls can't meet the discharge requirement.
The failures inspectors can spot are often straightforward: a washout overflows after a storm, a silt fence is undercut at a low point, or a full catch-basin insert sends water around the protection. Record the condition, corrective action, and initials for every inspection. The log is proof that the crew checked the BMP and acted when it failed.
Confirm Compliance Before the First Pour
Settle the washout location and BMP plan before the first truck arrives. A crew shouldn't be deciding where to rinse out while the pump is waiting and the pour is underway.
Use this pre-pour checklist in order:
- Confirm permit coverage and check that the SWPPP shows the washout location and drainage map.
- Verify that the location stays outside the 50-ft buffer from storm drains and receiving waters.
- Install signs and field markings that direct drivers to the facility.
- Place a spill kit and absorbent materials near the pour.
- Check the weather before each pour and prepare for runoff or a change in conditions.
- Open the inspection log and record dates, findings, corrective actions, and initials.
- Arrange for hardened waste to be removed and disposed of at a licensed facility.
Contractors need to follow applicable NPDES permit requirements, EPA stormwater rules, worker-protection requirements, and local rules and inspector expectations. Concrete can burn skin and injure eyes, so train workers to use appropriate protective equipment, including gloves and eye protection, and to keep washout material off their skin.
This week, walk the site with the SWPPP, mark the washout location, and open the first inspection log entry before the work schedule starts.
Need a concrete washout pan for an upcoming pour? Reborn Rentals offers 310- and 441-gallon washout pans, and you can reserve a pan and dates online or by phone. Visit Reborn Rentals to arrange containment that fits your site plan and truck access.