
Construction Site Cleanup: A Practical Playbook
The pour's done, the demo crew's already loading out, and the site looks like it got hit by a bad storm. There's hardened splash, muddy footprints, broken banding, dust on every flat surface, and somewhere near the curb, a washout area that's either full, uncovered, or both. That's the moment most crews say cleanup, but the better word is phase closeout, because what happens next affects safety, inspection readiness, disposal cost, and the next trade's ability to work.
Why Cleanup Deserves a Plan, Not an Afterthought
A site doesn't become “dirty” all at once. It turns into a series of separate problems, first wet slurry near the pour, then hardened chunks and packaging, then fine dust that migrates into places nobody notices until the inspector or drywall crew points it out. If you treat all of that as one generic cleanup pass, the crew burns time, misses hazards, and ends up cleaning the same area twice.
The job is to match the cleanup method to the phase. That's true after a concrete pour, after selective demolition, and after closeout work where a few missed scraps can stop follow-on trades from moving in. The U.S. Environmental Protection Agency reports that construction and demolition projects generated over 600 million tons of debris in the United States in 2018, with concrete and asphalt concrete making up 85% of C&D waste by weight and 76% recovered or recycled that year, about 455 million tons diverted from disposal rather than landfilled, which is a strong reminder that cleanup is a materials-management function tied directly to recovery and disposal, not just sweeping (EPA C&D debris data).
Practical rule: if the waste stream changes, the cleanup plan changes with it.
That's the part many crews get wrong. They send one laborer to “tidy up” everything, then wonder why the storm drain got dusty, the washout area overflowed, or the final pass still looks unfinished. On a good site, cleanup is scheduled the same way you schedule form stripping, inspections, or material deliveries. It's a task with a start condition, a containment method, and a handoff point.
Pre-Cleanup Planning and the Site Walkdown
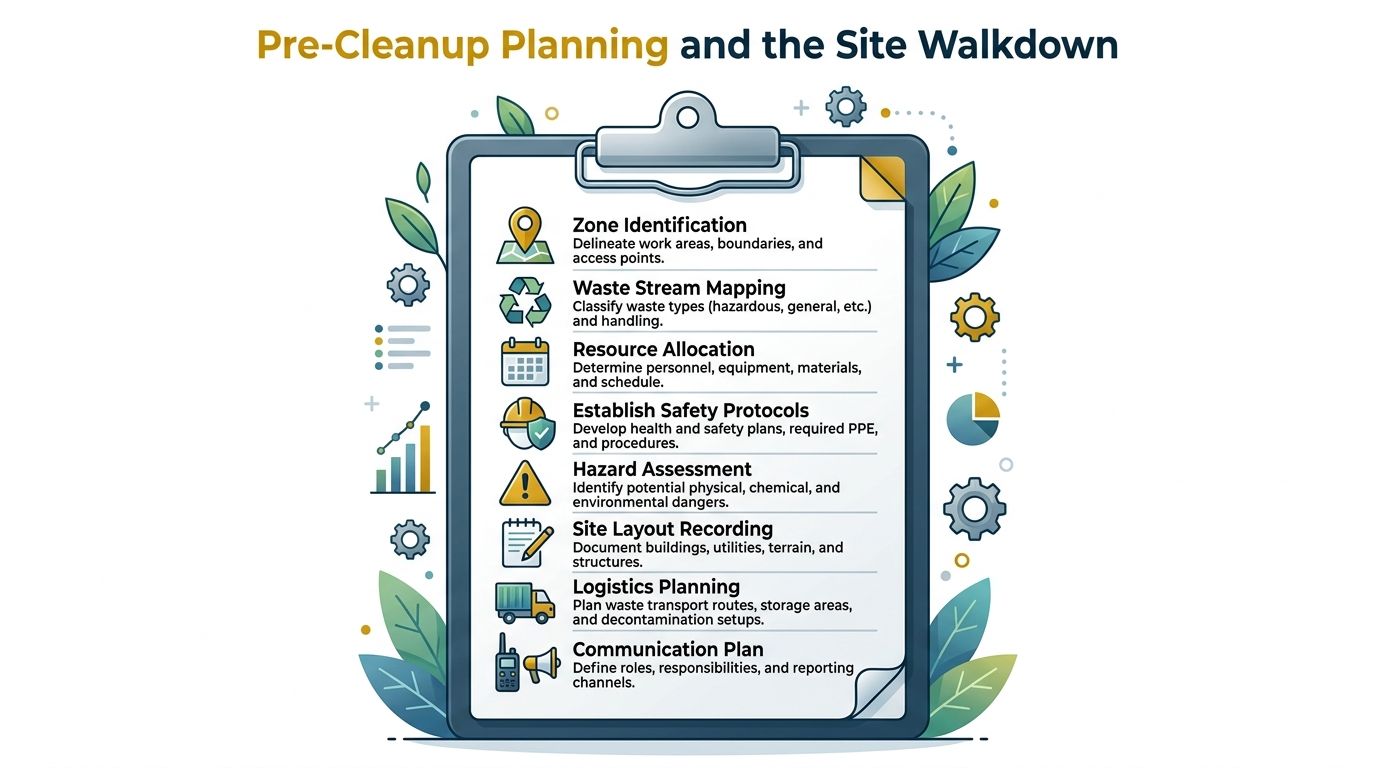
The cleanest jobs usually start with the ugliest question, where is the waste going to live while work is still happening. Before demo starts, before the first pour, and before any punch-out closeout, walk the site by zone and mark where debris will collect, where wet cleanup will happen, and where trucks can get in without blocking access or violating a permit condition. That walkdown should happen with the superintendent, the foreman, and whoever is handling disposal or hauling.
Walk the site by zone and waste stream
Start with the physical layout. Mark the workface, the material laydown area, the egress path, the washout area, and the nearest safe staging spot for bins, pans, or roll-offs. Then separate the waste streams on paper before they separate themselves on the ground.
Use this order:
- Zone identification. Know where the concrete work, demolition, or finish work will happen, and where waste is likely to drop first.
- Waste stream mapping. Split solid debris, dusty waste, slurry, packaging, contaminated wipes, and any regulated material into separate handling paths.
- Resource allocation. Confirm who moves bins, who sweeps, who monitors washout, and who calls for pickup.
- Permit triggers. Check whether the work phase touches stormwater controls, occupied spaces, inspection windows, or restricted access routes.
- Turnaround points. Decide when the site gets a mid-shift cleanup, when a container swap happens, and what triggers a final closeout pass.
Occupied renovations need an extra layer of planning. A building with tenants changes the cleanup playbook because dust control, noise, and path-of-travel issues matter as much as the debris itself. A hallway that works for one trade can become a blocked egress route the minute someone stages sheet goods or a full cart of scrap in it.
A one-page planning sheet is usually enough if it's honest. List the zones, the waste types, the pickup contacts, the staging area, and the inspection or turnover dates that force a cleanup handoff. That's the difference between a cleanup plan and wishful thinking.
Daily Housekeeping Routines That Actually Hold
A routine only works if the crew can keep it when the day goes sideways. Rain shows up, a delivery is late, a trade stacks material in the wrong place, and suddenly the “end of day” cleanup is the only thing standing between a decent site and a mess that'll greet everyone at 6 a.m. The fix is a routine built around triggers, not mood.
Morning, mid-shift, and closeout
Start the morning with the surfaces that affect everyone else. Clear walk paths, check scaffold access, and sweep the spots where yesterday's work left loose debris before anyone starts moving ladders or lifts. If there's grinding or cutting in the plan, set dust suppression before the first tool starts, not after the cloud is already floating through the job.
Mid-shift is where good sites stay good. That's the time to pull bags before they overflow, move sharp scraps out of walk paths, and clear around the active work area before a spill turns into a bigger mess. A crew that waits until lunch or quitting time usually ends up chasing debris instead of controlling it.
End of day needs a final perimeter check. Walk the fence line, the curb, the access road, and the washout area. If the site has changed by the afternoon, reset the bins, cover anything that can blow away, and make sure tomorrow's first access point isn't buried under today's leftovers.
On a normal Friday, the difference shows up in the last 20 minutes. The crews are tired, somebody wants to leave early, and the temptation is to “get it Monday.” That's usually when a foreman assigns one laborer to the walk paths, one to the bins, and one to the active workface, then does a last pass before lockup. It's not glamorous, but it stops Monday morning from turning into a cleanup emergency.
Practical rule: if a task creates debris, the crew that creates it owns the first cleanup pass.
Concrete Washout Containment and Rental Sizing
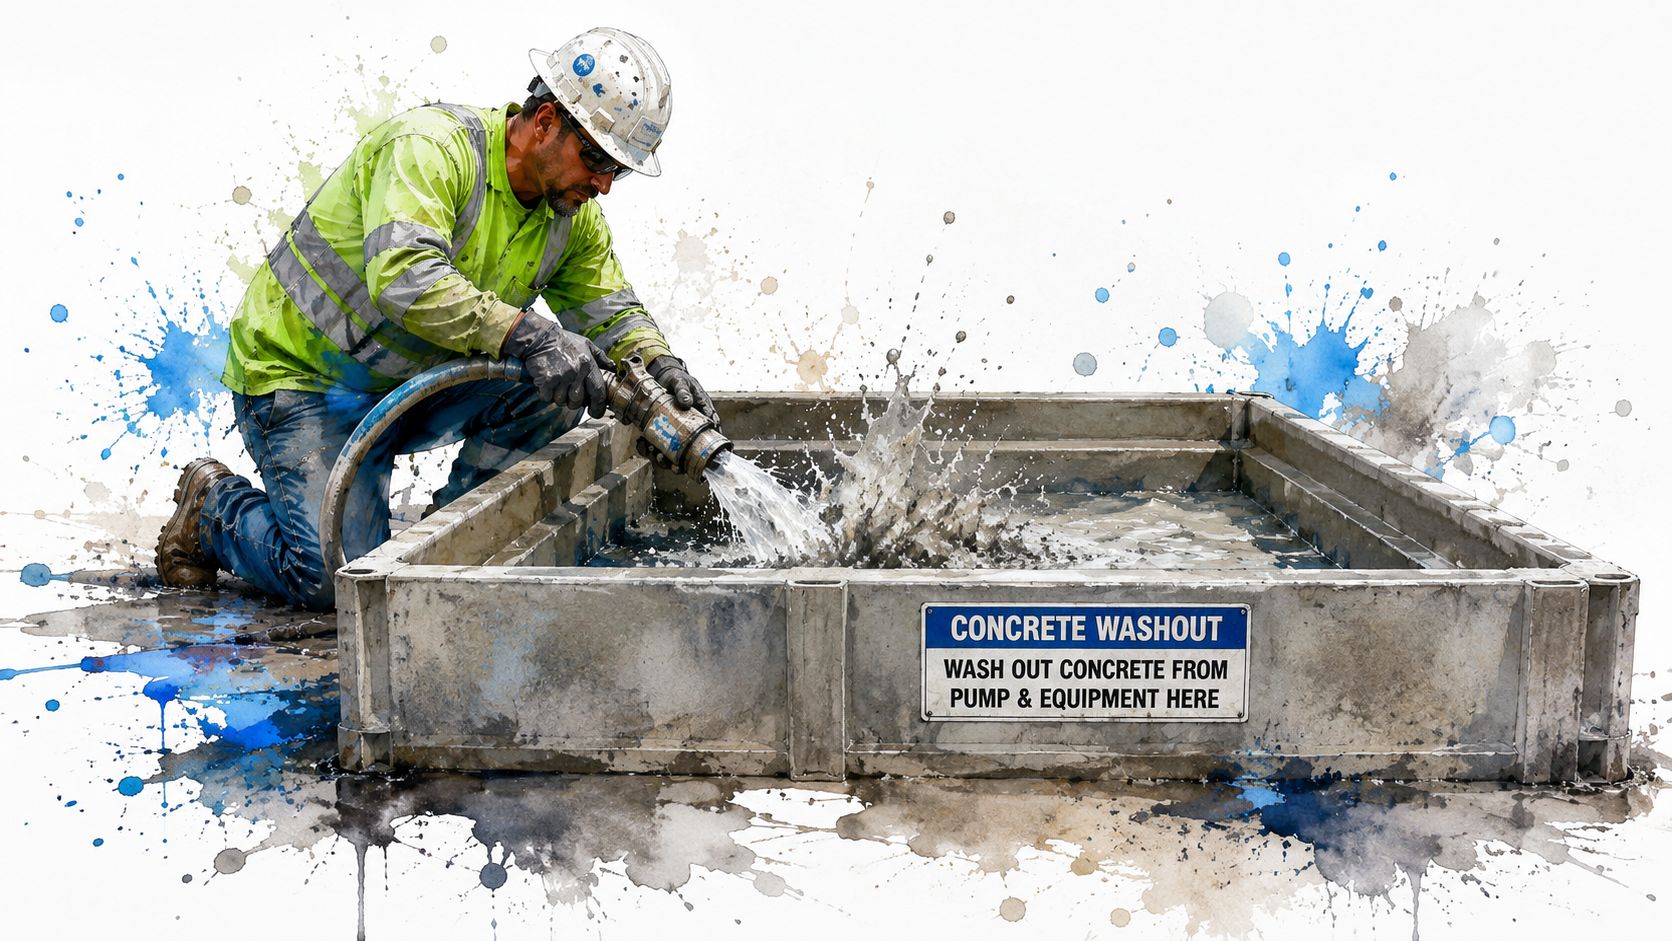
Liquid cleanup is where a lot of otherwise organized jobs fall apart. Dry debris is visible, but slurry, pump water, and tool washout move where they want to move, and if the containment is undersized or badly placed, the site gets a stormwater problem fast. OSHA-style housekeeping guidance covers trash, dust, and walking surfaces, but it doesn't solve liquid containment by itself, which is why washout needs its own plan.
Match the pan to the phase
The useful question isn't “Do we need a washout pan?” The useful question is “How much liquid does this phase generate, and what access does it need?” A pan that works for a small finishing crew may be wrong for a heavy pour with chutes, pump trucks, and repeated washdowns. Reborn Rentals' catalog illustrates the kind of capacity differences crews need to consider, including a 72' x 72' x 24' option at about 18.25 tons and ~441 gallons, and a 72' x 72' x 14' option at ~310 gallons, with daily pricing starting at $25/day and a checkout flow built for date and location selection.
Placement matters just as much as size. Set the pan on stable ground close enough to catch washout without forcing drivers or finishers into awkward moves, and keep it away from storm drains and low points where runoff can travel. If rain is in the forecast, cover the containment so clean water doesn't fill the basin and shrink the working capacity.
There's also a trade-off between swapping and pumping out. A smaller job can often get by with a basin that's swapped before it's packed or overflow-prone, while a longer phase or repeated washout cycle usually needs pump-out access and a bigger footprint. Oversizing wastes money and space. Undersizing creates a mess, which costs more than the bigger pan would have.
| Pan Size | Approx. Liquid Capacity | Best Use Case |
|---|---|---|
| Small washout pan | Lower capacity, phase-specific use | Small finish crews, short pours, light tool washout |
| Mid-size washout pan | Moderate capacity, flexible staging | Typical residential or tenant fit-out work with repeated washdown |
| Large washout pan | High capacity, longer-duration work | Larger pours, pump truck cleanup, heavier concrete placement |
The practical move is to size containment for the mess you expect, not the one you hope for. If the phase includes multiple truckloads, slurry, or repeated hose-downs, the washout plan should be treated like a production decision, not an after-hours cleanup detail.
Handling Hazardous and Regulated Materials
A site can look clean and still be wrong. A drum of solvent rags sitting next to general debris, adhesive containers tossed into a trash bin, or lead paint chips mixed into renovation waste can create a rejection, a compliance problem, or a contamination issue that's harder to unwind than the original cleanup. Segregation has to happen before the haul-out, not after someone notices the load looks mixed.
Keep separate waste streams separate
Handle cured concrete slurry differently from ordinary debris, because liquid or semi-liquid residue can't be treated like broken block or packaging. Keep solvent rags in sealed storage, label them clearly, and keep them out of the roll-off that holds ordinary construction scrap. The same goes for adhesives, treated lumber, and renovation waste that may carry lead paint chips. Those materials need their own path, their own label, and their own pickup sequence.
A small retrofit usually exposes the problem clearly. The facility manager has one drum for contaminated wipes, a roll-off for general debris, and a staging area that only works if nobody tosses the wrong thing into the wrong container. If the crew mixes waste streams, the cleanest thing on the site becomes the most expensive mistake.
Use language in the job hazard analysis that leaves no room for interpretation:
- Keep regulated waste labeled and sealed.
- Do not mix slurry, solvent wipes, and general debris.
- Store pickups so the contaminated container leaves on its own schedule.
- Place hazardous materials away from traffic paths and stormwater controls.
That's the level of discipline that saves time later. A mixed load is rarely a cheap fix, and on a busy closeout, a rejected dumpster can slow everyone down. Cleanup gets easier when the crew understands that not all debris belongs in the same container.
SWPPP Permits and the Documentation Inspectors Want
Stormwater paperwork is one of those things crews respect more after the first surprise inspection. If the site has a SWPPP, the plan should line up with what's happening on the ground, especially where washout containment, silt control, and dewatering intersect with cleanup. The inspector is usually looking for consistency, not theater.
Pull the records that prove control
Keep the plan current with the phase, not just the project title. When cleanup changes because the work has moved from demolition to pouring, or from rough framing to closeout, the documentation should reflect that shift. If the site manager changed the washout location, added a new access path, or moved the debris staging zone, the SWPPP notes should show it.
On a surprise inspection, the first things that matter are the inspection log, the current controls, and the site conditions that can spread sediment or slurry. An open washout area, a clogged control point, or runoff heading toward a drain will draw attention fast. So will a plan that doesn't match the actual site layout.
The cleanest habit is to update the documents when the phase changes, not days later. That means recording spills, washout maintenance, silt control changes, and any adjustment to access or containment as part of the cleanup rhythm. If cleanup is phase-triggered, the paperwork has to be phase-triggered too.
The best inspection log is the one a superintendent can hand over without hunting for the latest version.
Cost and Time Estimates With Crew Task Assignments
A cleanup budget gets blown when the plan treats every pass the same. A superintendent who separates rough cleanup, final cleanup, and slurry control can price the work by phase instead of guessing at the end. Independent industry summaries report post-construction cleanup commonly costs about $0.10 to $0.75 per square foot, with rough cleaning at $0.10 to $0.30 per square foot and final cleaning at $0.30 to $0.75 per square foot (Zters cleanup cost overview). For U.S. residential projects, the total cleanup bill is often reported in the range of $274 to $708, with a national average around $477, while commercial projects typically run from $1,500 to $5,000 or more depending on size and complexity (Zters cleanup cost overview).
Those ranges make sense once the crew is assigned by task, not just by headcount. Rough cleaning is heavy on debris and fast decisions. Final cleaning slows down because the crew is chasing dust, residue, thresholds, fixtures, and the small misses that show up during the handoff walk. If the same staffing pattern is used for both, the early shift has people waiting on each other, and the closeout shift ends up short on time.
Assign the right people to the right pass
A practical crew split usually looks like this:
- Laborer. Sweeps, bags debris, stages bins, and handles perimeter pickup.
- Operator. Moves equipment, helps with container swaps, and supports heavy debris handling.
- Foreman or superintendent. Tracks phase changes, verifies containment, and signs off on the closeout pass.
On a small commercial pour, a three-person crew can cover a lot of ground in two days if the work is sequenced with discipline. The first day usually goes to debris removal, washout management, and the first perimeter reset. The second day is for dust control, detail cleanup, and the handoff walk. If the site includes slurry, the crew also needs time for containment checks and pump-out coordination.
That sequencing keeps labor from getting wasted on interruptions. One person keeps the workface clear, one keeps containers moving, and one watches for overflow, cross-contamination, or blocked access paths. When those jobs blur together, the crew spends the afternoon shuffling bins, hunting labels, and fixing problems that should have been caught earlier.
What a closeout day looks like
Morning starts with rough pickup and anything that blocks trade access. Midday goes to the dust-heavy pass, the bin swap, and any washout maintenance. Late afternoon is for final detailing, glass, edges, and a last walk for material that got pushed into corners.
That rhythm is what keeps the budget honest. The closeout push is where crews find loose packaging, drywall dust, floor residue, and slurry that drifted farther than anyone wanted. The crew that waits until the end to deal with containment usually pays for it in overtime, a second trip, or a cleanup issue that lands on the next trade.
| Work Phase | What Usually Drives Cost | Crew Focus |
|---|---|---|
| Rough clean | Bulk debris, hauling, initial containment | Pickup, sweep, staging, washout control |
| Final clean | Dust, residue, detail work | Surface cleaning, perimeter check, handoff prep |
Closeout checklist: verify bins are empty or swapped, confirm washout is contained, check the stormwater path, inspect walkways, and document the handoff condition before the crew leaves.
The common mistakes are predictable. Overfilling washout pans creates overflow risk. Skipping the end-of-day bin swap leaves a morning mess that steals time before the next shift starts. Letting slurry reach a storm drain turns cleanup into a compliance issue. Treating final cleaning like one last generic sweep usually means the inspection still finds residue in corners, at thresholds, or around fixtures.
Cleanup works best when it is treated as a planned, waste-stream-specific discipline. That means matching the phase, assigning the right crew, and controlling solids and liquids before they become someone else's problem.