
Renovation Waste Disposal by Stream and Form
Hong Kong generated an average of 45,560 tonnes of construction waste per day in 2023, according to its Environmental Protection Department. That scale makes the pile in a renovation driveway look small. But even a bathroom remodel can produce several wastes that shouldn't travel in the same container.
Renovation waste disposal starts with physical form and source, not the room being renovated. A painted door, loose paint chips, hardened concrete, and concrete wash water need different decisions. Sorting those differences before loading protects recoverable material and prevents a convenient mixed dumpster from becoming an expensive disposal problem.
Renovation Waste Streams and Where They Go
U.S. construction, renovation, and demolition generated approximately 600.33 million short tons of C&D debris in 2018, more than twice municipal solid waste that year, according to the Environmental Protection Agency. Construction, including renovation, represented less than 10% of that total.
Small renovation sites still produce a complicated mix of drywall, concrete, timber, roofing, packaging, and fixtures. The useful question isn't what a material is. It's what form it's in, what contaminated it, and which facility will accept it.
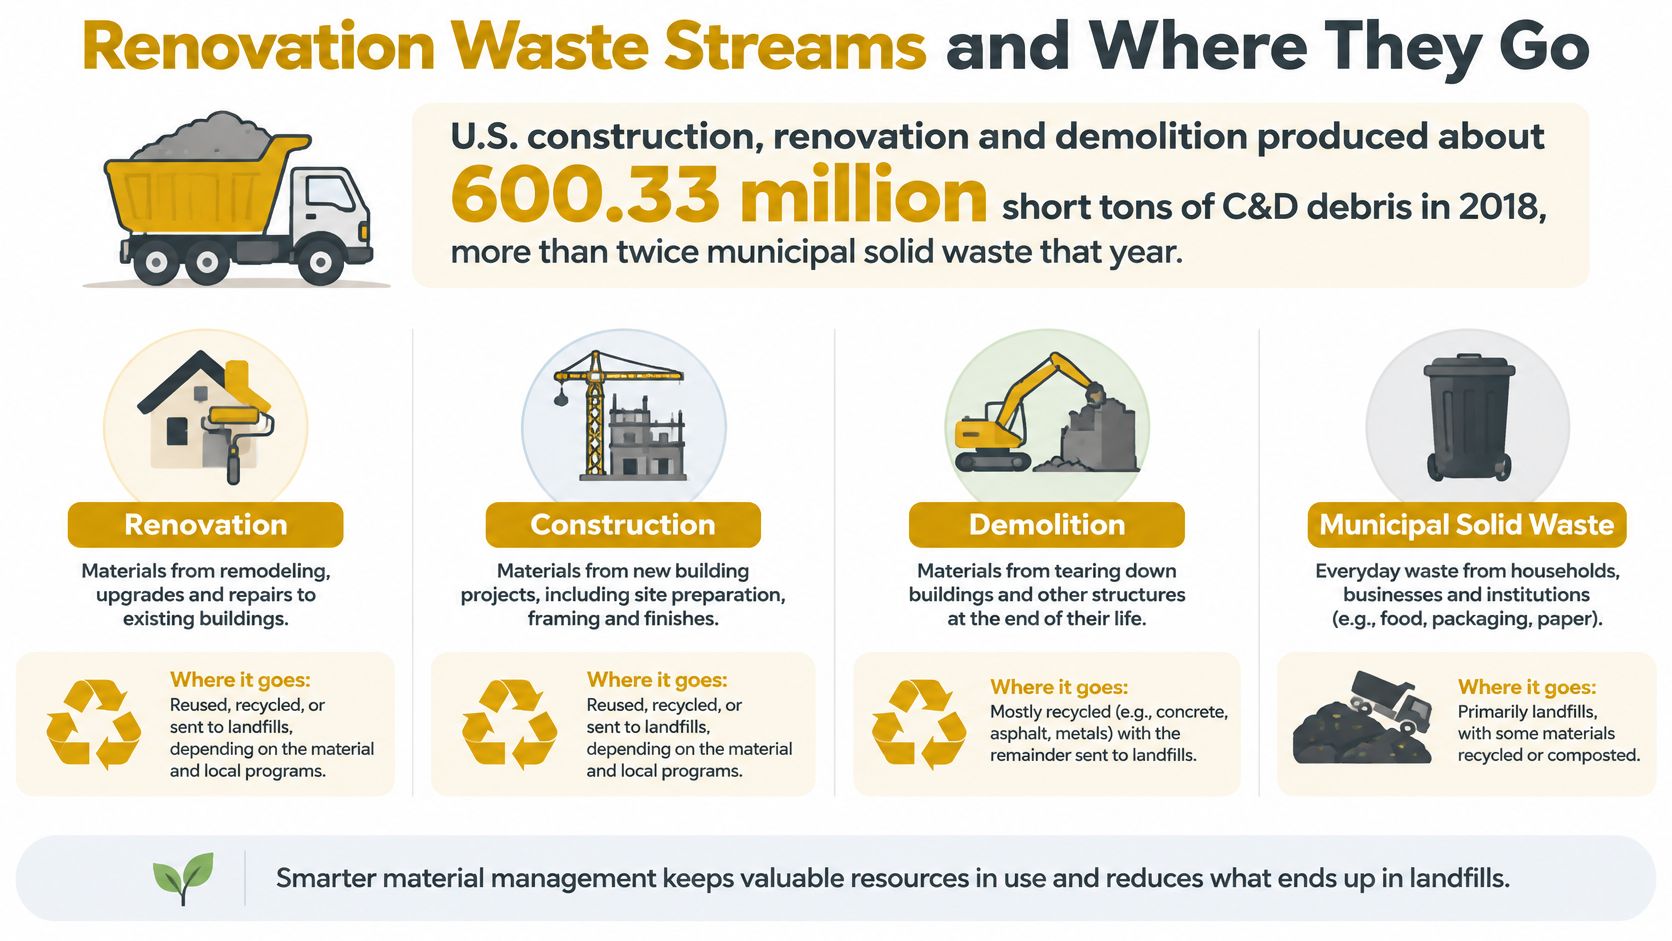
Match the pile to its route
These are usual routing options, not permission to load without checking local acceptance conditions.
| Waste stream | Form that changes the rule | Usual destination | Keep out of this load |
|---|---|---|---|
| Clean concrete, brick, block, pavers | Hardened, trash-free chunks | C&D recycler or aggregate reuse | Wet slurry, wood, trash, gypsum |
| Drywall and gypsum board | Dry sheets or scraps | Local gypsum recycler, otherwise permitted C&D landfill | Wet board, paint sludge, asbestos |
| Wood, cabinets, packaging | Clean lumber versus painted or treated wood | Reuse or wood recycler; treated wood to permitted landfill | Lead paint chips and solvents |
| Metals, wiring, fixtures | Loose scrap | Scrap metal buyer | Hazardous coatings and attached asbestos |
| Asphalt shingles and roofing | Tear-off material without asbestos | Shingle recycler or C&D landfill | Asbestos roofing |
| Painted building components | Whole components that pass testing | Permitted municipal or C&D landfill | Loose chips, dust, soil, sludge |
| Lead paint chips, dust, soil, sludge | Fines or sludge requiring characterization | Hazardous-waste facility if characteristic hazardous; otherwise lined landfill with leachate collection under applicable rules | Mixed dumpster and dry sweeping |
| Asbestos-containing material | Friable or intact material | Authorized asbestos landfill, kept wet and leak-proof wrapped | Ordinary C&D container |
| Concrete wash water and slurry | Liquid or unset paste | Contained washout, hardening, then approved haul and receiving facility | Storm drain, soil, mixed recycling loads |
| Unknown solvents, PCBs, pesticides, cleaners | Containers or residues | Isolate and obtain environmental-agency guidance | Any commingled dumpster |
Clean, hardened masonry can be crushed for aggregate. Its liquid counterpart can't be tipped into that load. Dry gypsum may have a recycling outlet, but wet board and paint sludge don't belong in the same recovery stream. Pull loose metals early so they remain accessible and saleable.
A painted component isn't loose paint waste
Georgia's FAQ, available in an EPA-hosted disposal document, illustrates the distinction: painted building components that pass testing may enter a permitted municipal or C&D landfill, while paint chips, dust, soil, and sludge require a permitted lined landfill with leachate collection. It also identifies 220 pounds or more per month as a quantity that triggers additional hazardous-waste duties.
Those are jurisdiction-specific instructions, not a universal household disposal rule. Choose the material row, then call the receiving facility before the container arrives. A mixed dumpster isn't the default destination for suspect waste.
How to Handle Lead Asbestos and Unknown Chemicals
Hazardous renovation waste needs a separate pathway, not a dirtier corner of the general debris box. The crew needs to know where suspect material goes before anyone starts breaking surfaces apart.
The EPA's renovation work-practice guidance addresses collection and containment to prevent dust and debris releases. Build those controls into the work sequence rather than leaving cleanup to the end.
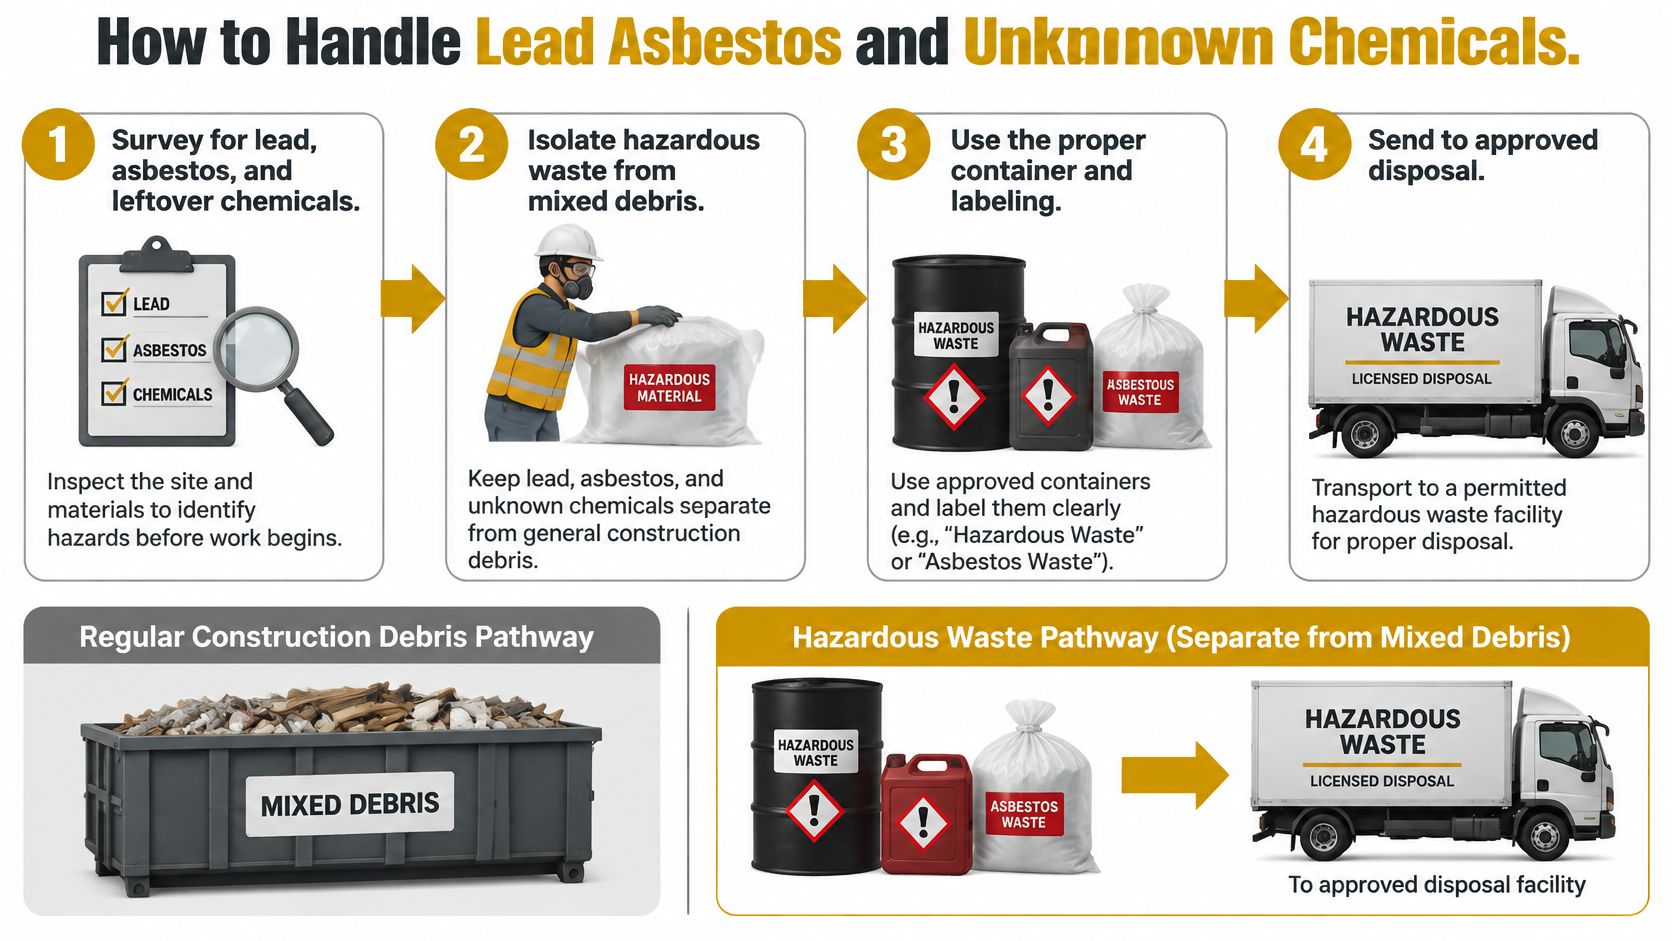
Put the hazardous pathway in writing
Survey before demolition. Arrange a hazardous-material assessment for suspect coatings, insulation, flooring assemblies, and leftover chemicals. Identify approved receiving facilities before disturbing materials. Appearance alone doesn't establish whether a component contains lead or asbestos.
Collect waste at the end of each workday and project. Don't leave paint chips scattered until the final clean. Keep collection containers close enough that workers don't carry uncovered debris through clean areas.
Contain storage and transport. Use sealed containers or barriers that prevent debris escaping. Label the staging area, protect packages from damage, and cover the transport load.
Characterize lead waste. Under the EPA guidance linked above, debris, chips, dust, and sludge with leachable lead above 5 mg/L meet the toxicity-characteristic threshold and may require stricter RCRA hazardous-waste management. Have the waste evaluated under the rules applicable to its source and generator rather than judging it by the amount of visible paint.
Use the asbestos pathway. Keep asbestos-containing material wet, segregate it where feasible, and use leak-proof wrapping. Arrange qualified handling and delivery only to a landfill authorized to receive asbestos. Don't break material into smaller pieces merely to fit an ordinary container.
Stop commingling unknown chemicals. Isolate unidentified solvents, pesticides, industrial cleaners, or suspected PCB-containing materials. Don't open, combine, or pour out containers to save space. Obtain environmental-agency guidance before deciding how to package and route them.
Keep final acceptance documents. Retain characterization results, transporter details, required manifests, and receiving-facility records together. A pickup receipt alone doesn't explain what the facility accepted.
Control the release, not just the destination
Uncontrolled breakage, dry sweeping, and open loading create routes for airborne dust and cross-contamination. Appropriate wet methods, sealed packaging, labeled staging, and covered transport reduce those routes.
Jobsite control: A municipal landfill's existence doesn't mean it accepts every material your renovation produces.
Give the supervisor a page recording inspection, segregation, container type, label, transporter, and final acceptance. If workers uncover something the plan doesn't identify, pause that portion of work instead of improvising a disposal route.
How to Contain Wet Concrete Slurry
A gray trail from the mixer to a storm inlet is a containment failure, even when the pour itself is small. Concrete wash water is highly alkaline, and letting it run across soil or into drainage creates a pollution pathway.
Slurry also spoils otherwise recoverable debris. Pouring it onto clean concrete chunks is like pouring wet cement into a carton of clean cardboard: the original material may be recoverable, but you've made the receiving facility's job harder.
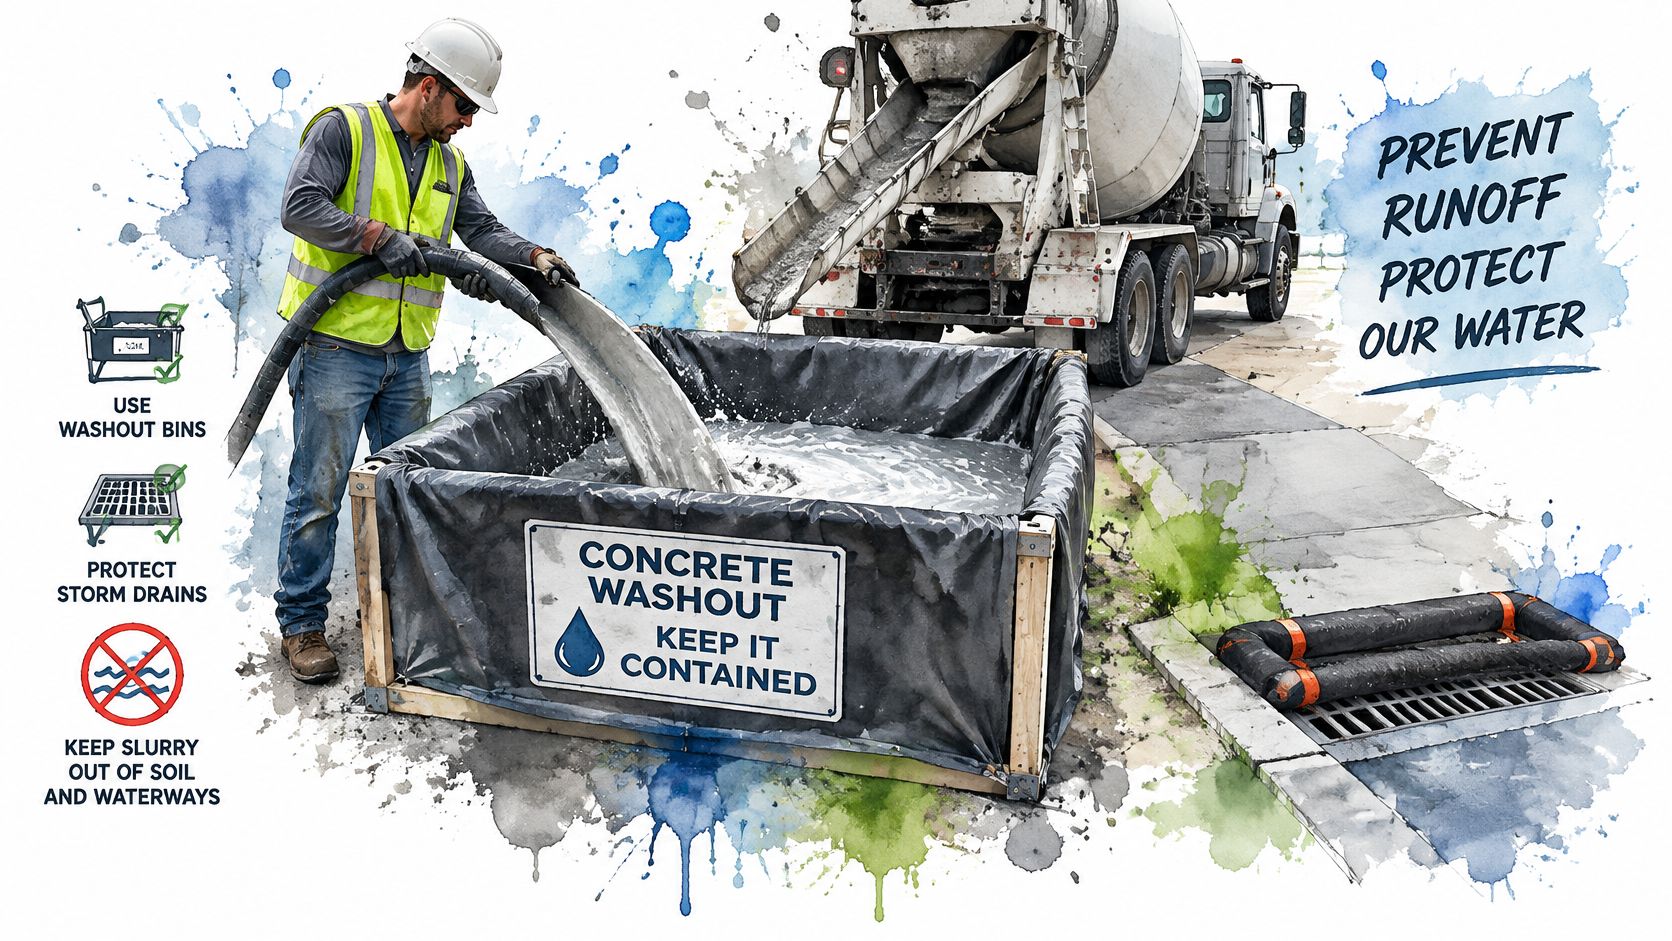
Set up before mixing starts
Choose a flat, stable location. The truck chute, pump tube, or tool-cleaning station must reach the pan without workers dragging wet equipment across a drain. Leave room for the collection vehicle to retrieve it.
Use a watertight washout pan. Size containment for the planned washout, not just the concrete placed in the finished work. A loose plastic sheet or an unlined hole in the ground isn't a reliable substitute.
Keep room below the rim. Stop adding material before the pan is full to the edge. Workers need room for wash water and handling without splashing residue onto the surrounding surface.
Cover it against rain. Secure a suitable cover overnight or when rain is expected. Keep clean stormwater out so it doesn't consume capacity or cause an overflow.
Allow residue to harden under the disposal plan. Don't drain off standing water onto the ground to speed the process. Solid-looking material can still conceal liquid, so check the collection requirements before arranging pickup.
Arrange removal and replacement. Name the person responsible for calling when usable capacity runs low. Keep washout available if concrete work will continue after collection.
Make the handoff part of the pour
At Reborn Rentals, we deliver 310- and 441-gallon concrete washout pans across the Denver metro. Our large pan rents for $29 per day, $175 per week, or $588 for four weeks, and our all-included Pan Swap & Waste Removal service costs $300 per pan, including immediate replacement and slurry disposal at a recycling facility.
We swap a full pan for a clean one on your schedule, then haul off and dispose of the concrete waste in a fully compliant manner. We're SWPPP compliant, but the site team still needs to preserve access, prevent overfilling, and keep unsuitable waste out.
Accepted cementitious washout isn't an invitation to hide solvents, chemical containers, or general rubbish. Tell every trade where tool cleaning happens and what may enter the pan.
No wash water leaves the pan as an uncontrolled discharge. Hardened material leaves through the planned haul and receiving route.
A Bathroom Gut and a Short Rental Pour
Say a contractor is gutting an older bathroom. The work produces tile, drywall, a vanity, copper pipe, steel fixtures, and a small concrete patch for the shower base.
The failing version looks convenient at first: everything goes down the same debris route, loose paint dust gets swept into the container, and the crew rinses the concrete tools on the driveway. By collection day, the useful scrap is buried and nobody can confidently describe the contents of the load.
The bathroom with separate decisions
The working version starts with the hazardous-material assessment and a marked washout location. Workers remove the vanity intact if it's reusable, pull accessible copper and steel, and protect the dry gypsum pile from weather.
Suspect paint chips stay contained instead of being swept into general rubble. Tile and mortar go into the agreed heavy-debris route, while the concrete patch has its own washout arrangement.
- At the doorway: Mark separate staging locations so carrying debris out doesn't become a fresh sorting exercise every trip.
- During removal: Keep sharp tile fragments contained and don't bury bags of suspect fines beneath masonry.
- Before collection: Compare the actual contents with the facility's acceptance description, not merely the name written on the container.
It's like packing a suitcase by category rather than stuffing everything into the same pocket. Separation takes deliberate handling, but workers don't have to unpack the whole load to recover something useful or isolate something questionable.
The rental turnover with almost no demolition
A short-term rental needs a shower-base pour between bookings. There's little demolition, so a large debris container would solve the wrong problem.
The main waste-control task is the liquid residue from mixing and cleaning. The manager reserves space for containment, makes sure the finishing crew can reach it, and protects it if rain is forecast.
A contained cleanup avoids the gray trail toward the storm inlet and the driveway stain the next guest would notice. It also gives the manager a definite collection task instead of an unexplained patch of residue after the trades leave.
Both jobs need decisions before work starts, but they don't need identical equipment. The bathroom needs several distinct disposal routes; the small pour mainly needs a controlled liquid phase and a clear removal handoff. Clean mineral material can remain eligible for recovery because the crew hasn't used it as a dumping surface.
What Actually Changes Disposal Cost
The cheapest quoted container isn't necessarily the cheapest completed disposal job. A rejected load, overweight haul, or unplanned return trip can cost more than the sorting effort someone tried to avoid.
Diversion percentages don't settle the question either. A European Commission BUILD UP publication reports that recycled-waste inputs in the EU-27 rose from 8.3% in 2004 to 11.7% in 2021. That measure concerns recycled inputs across the economy, not a renovation project's recycling rate, but it helps explain why sending heavy rubble to recovery doesn't automatically mean it becomes a high-value replacement material.
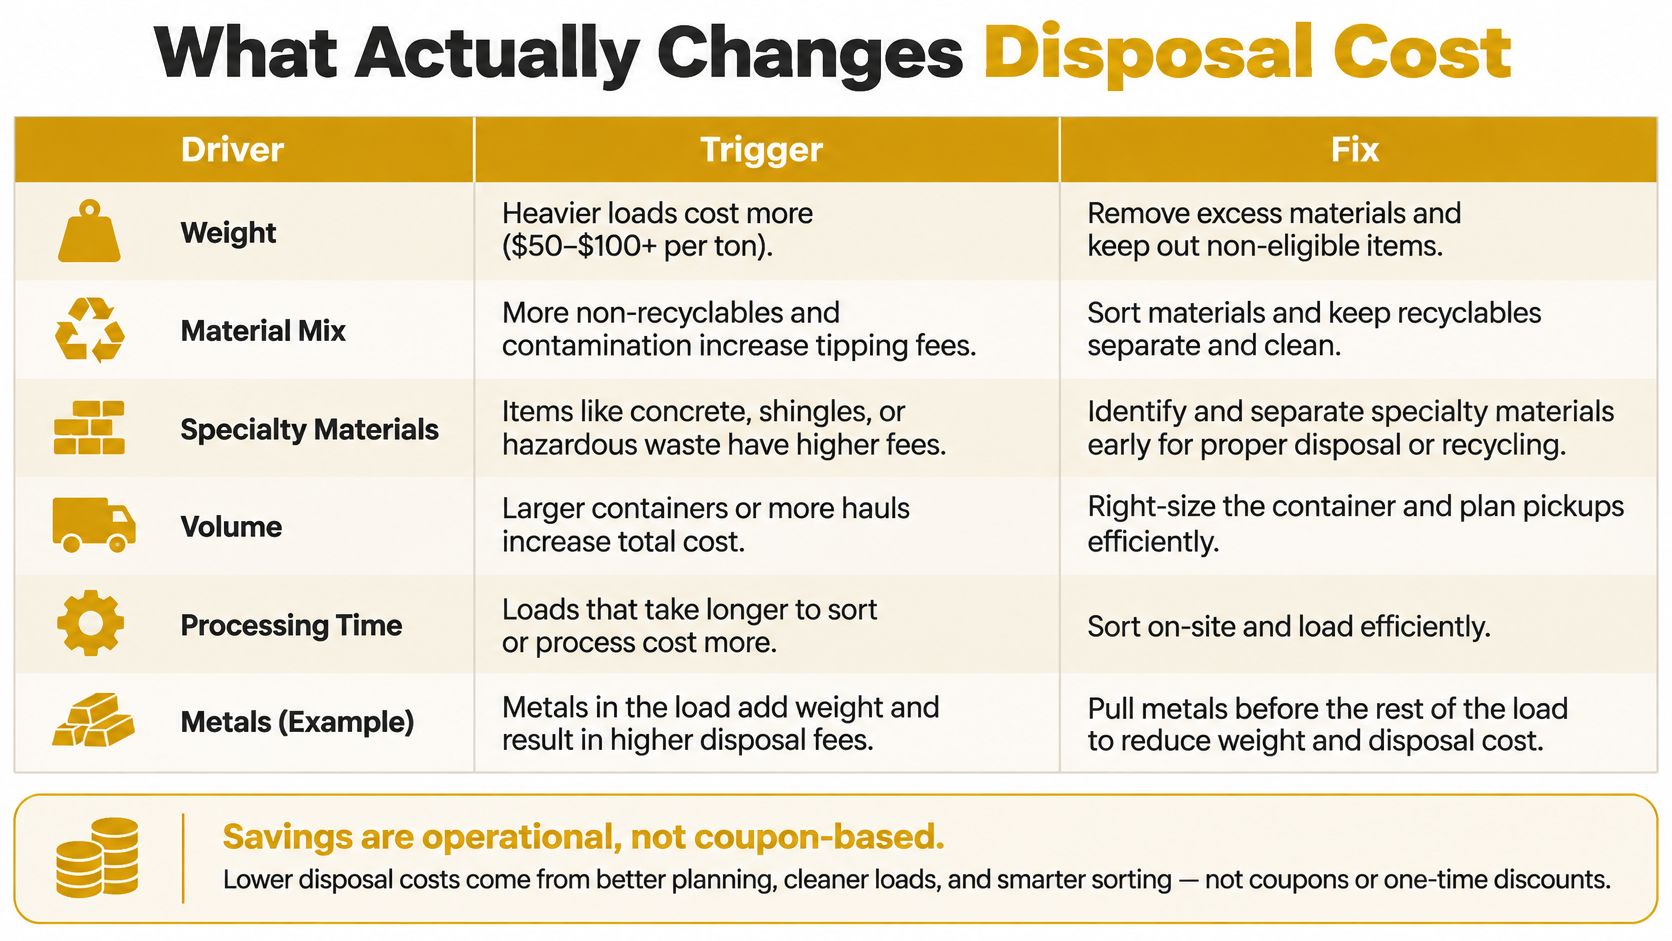
Match the charge to the preventable trigger
| Cost driver | What triggers it | How to avoid it |
|---|---|---|
| Rejected recycling load | Slurry, trash, or hazardous fines in a recoverable container | Characterize waste and keep wet or suspect material out |
| Overweight charge | Dense concrete or masonry above the container limit | Size the box for heavy debris and don't top it off |
| Hazardous-waste premium | Lead above the toxicity threshold or asbestos in the mix | Survey, test, and segregate before loading |
| Extra haul | A container arrangement that doesn't match changing work phases | Schedule container changes around the waste generated |
| Lost scrap value | Metals buried under mixed debris | Pull metals before the container fills |
| Downcycled or refused concrete | Trash or wet slurry on otherwise clean mineral waste | Harden slurry separately from dry concrete |
Compare the complete route
Savings are operational, not coupon-based. Keep gypsum dry, remove accessible metals, and choose the masonry container by its permitted load rather than how much empty space it offers.
Phasing matters too. A demolition-heavy stage and a packaging-heavy finishing stage don't necessarily need the same container arrangement. Avoid reserving equipment that occupies the driveway while workers wait for the relevant waste to appear.
For each proposed destination, compare contamination risk, material value, haul distance, and paperwork. A distant outlet isn't automatically preferable merely because it advertises recycling. Ask what specification the material must meet and what happens if the receiving operator rejects it.
Regulatory cost sits beside the invoice. Use an appropriately permitted transporter and a facility allowed to receive that waste form, and retain required hazardous-waste manifests. Our weight policy also makes customers responsible for overload charges and landfill or third-party fines caused by failing to meet dumpster weight restrictions.
A useful quote describes the accepted material, included hauling, load restriction, and rejection conditions. A price without those terms isn't ready for comparison.
Don't treat testing as an optional fee to eliminate. Characterization can prevent a much larger quantity of ordinary debris from being handled as a suspect mixed load.
Choosing a Hauler Container and Drop-Off for Small Jobs
A homeowner replacing a vanity doesn't need a commercial demolition setup. They still need a destination that accepts what they're carrying, including its coatings, moisture, and contamination.
Start with the heaviest material, not the largest-looking pile. A compact stack of tile and mortar can be a more demanding load than bulky packaging and light timber.
Run these checks before booking
Describe the contents accurately. Tell the hauler whether the pile contains masonry, dry board, treated timber, fixtures, or suspect coatings. Don't describe every renovation load as household junk.
Match container capacity to weight. Discuss the heavy stream separately and get the loading restriction in writing. Don't assume that unused space means permission to add more rubble.
Identify the destination. Request the receiving facility's name and material acceptance requirements before delivery. Confirm that the transporter can legally carry the specific stream.
Use household hazardous-waste options appropriately. For small household leftovers of paint, solvents, or cleaners, check the local program's accepted materials and appointment rules. A household program may not accept contractor-generated waste.
Check self-haul conditions. A C&D transfer station may accept separated wood or mineral pieces but refuse liquids or suspect material. Sort at home, secure the load, and confirm unloading arrangements before leaving.
Verify curbside rules. Don't assume ordinary trash collection accepts renovation debris. Ask the municipality about the actual material, not merely whether it offers bulky-item pickup.
Take useful information to the phone
A photograph helps describe a pile, but it doesn't establish its chemical composition. Provide the source of the material, whether it's wet or dry, whether coatings remain attached, and whether testing or a hazardous survey has been completed.
Ask for an acceptance email or save the facility's written instructions with the booking. Record any packaging conditions so whoever loads the vehicle follows the same instructions.
If you can't identify the material or explain its form, stop before loading. Testing or environmental-agency guidance is more useful at that point than driving an uncertain load from gate to gate.
Write the Waste Plan Before Demo Day
A useful waste plan fits on a page and names the people who will carry it out. It shouldn't require the crew to interpret a long environmental report while carrying rubble through the house.
Write the actual receiving destinations and collection arrangements, not just intentions such as recycle where possible. Give the site supervisor a copy and keep the acceptance records in the job file.
Fill these lines before ordering the container
- Hazardous survey: Record whether it's complete or scheduled, who is responsible, and which areas remain undisturbed until results are available.
- Expected streams: List the materials and their forms, including coatings, fines, liquids, and reusable components.
- Receiving facilities: Record phone confirmation, the accepting person's name, and any testing or packaging conditions.
- Container arrangement: Match the load restriction to heavy debris and preserve access for collection.
- Washout location: Mark the containment spot away from drains and identify who checks its condition.
- Removal responsibility: Name who arranges hardened-slurry collection and who confirms that ongoing work still has containment.
- Closeout records: Assign someone to file acceptance documents, required manifests, and collection receipts.
Resolve blanks before work starts
Walk the site with the person directing demolition and the person responsible for concrete cleanup. A location that works on a drawing may block the delivery vehicle or force workers to carry washout past a drain.
Keep the hazardous survey and washout location on the same checklist. Neither should become an improvised decision after the hammer swings or the mixer starts.
Separate and characterize first, recycle only what the destination accepts, and never let wash water choose its own path. If a line remains blank, hold the first container order until someone resolves it.
Reborn Rentals offers concrete washout containment with Denver metro jobsite delivery and scheduled swap-and-haul service to keep slurry separate from renovation debris. Visit Reborn Rentals to arrange containment and coordinate removal before your concrete work begins.