
Storm Drain Protection for Construction Sites
Monday morning starts the same way on a lot of concrete jobs. The washout hose is still wet, the subgrade is tracked up, and somebody notices a gray slurry trail moving toward a curb inlet that nobody covered before the trucks started rolling. By the time the foreman sees it, the crew is already behind on the pour and the easiest fix has turned into cleanup, documentation, and a conversation nobody wanted with the inspector.
Storm drain protection is what keeps that small mistake from becoming a clogged inlet, a stained sidewalk, or a compliance problem that follows the job longer than the pour itself. On a working site, it's not a side task. It's part of the sequence, the same way formwork, rebar, and concrete placement are part of the sequence.
What Storm Drain Protection Actually Means on a Concrete Job
A lot of crews still treat storm drain protection like a box to check after the work is done. That mindset breaks down the first time wash water finds the low spot in the lot and starts carrying paste, fines, and grit straight toward a drain opening. On a concrete job, the drain doesn't care that the pour is running late. It only cares where the runoff goes.
The problem shows up fast
The common failure starts with two things crews cause all the time. One is washout migration, when concrete slurry escapes from the designated area and moves across the site. The other is sediment-laden runoff, when disturbed soil and construction material wash into the inlet with the next rain or snowmelt.
A drain that looks fine at the start of the day can be the drain that gets flagged at the end of it.
That matters because storm drain protection is doing two jobs at once. It is keeping the system open so water can move, and it is catching the material you do not want in the public system. The Minnesota Stormwater Program says well-selected, installed, and maintained inlet protection devices can remove 25% to 35% of total solids and 15% to 25% of nutrients, while also keeping sediment from clogging pipes, ditches, and downstream traps or ponds (Minnesota Stormwater Program).
In scope means every opening that can take runoff
Crews get in trouble when they only cover the obvious inlet near the pour. Water does not follow the plan on paper. It follows grade, wheel tracks, and every compacted path the crew created with equipment movement. If a drain sits in the drainage path, it needs attention.
The practical consequence is simple. A missed inlet can become a blocked pipe, a cleanup call, or a Notice of Violation. A protected inlet, by contrast, buys time, keeps the site moving, and makes the next inspection easier to pass because the crew can show that the control was placed where runoff traveled.
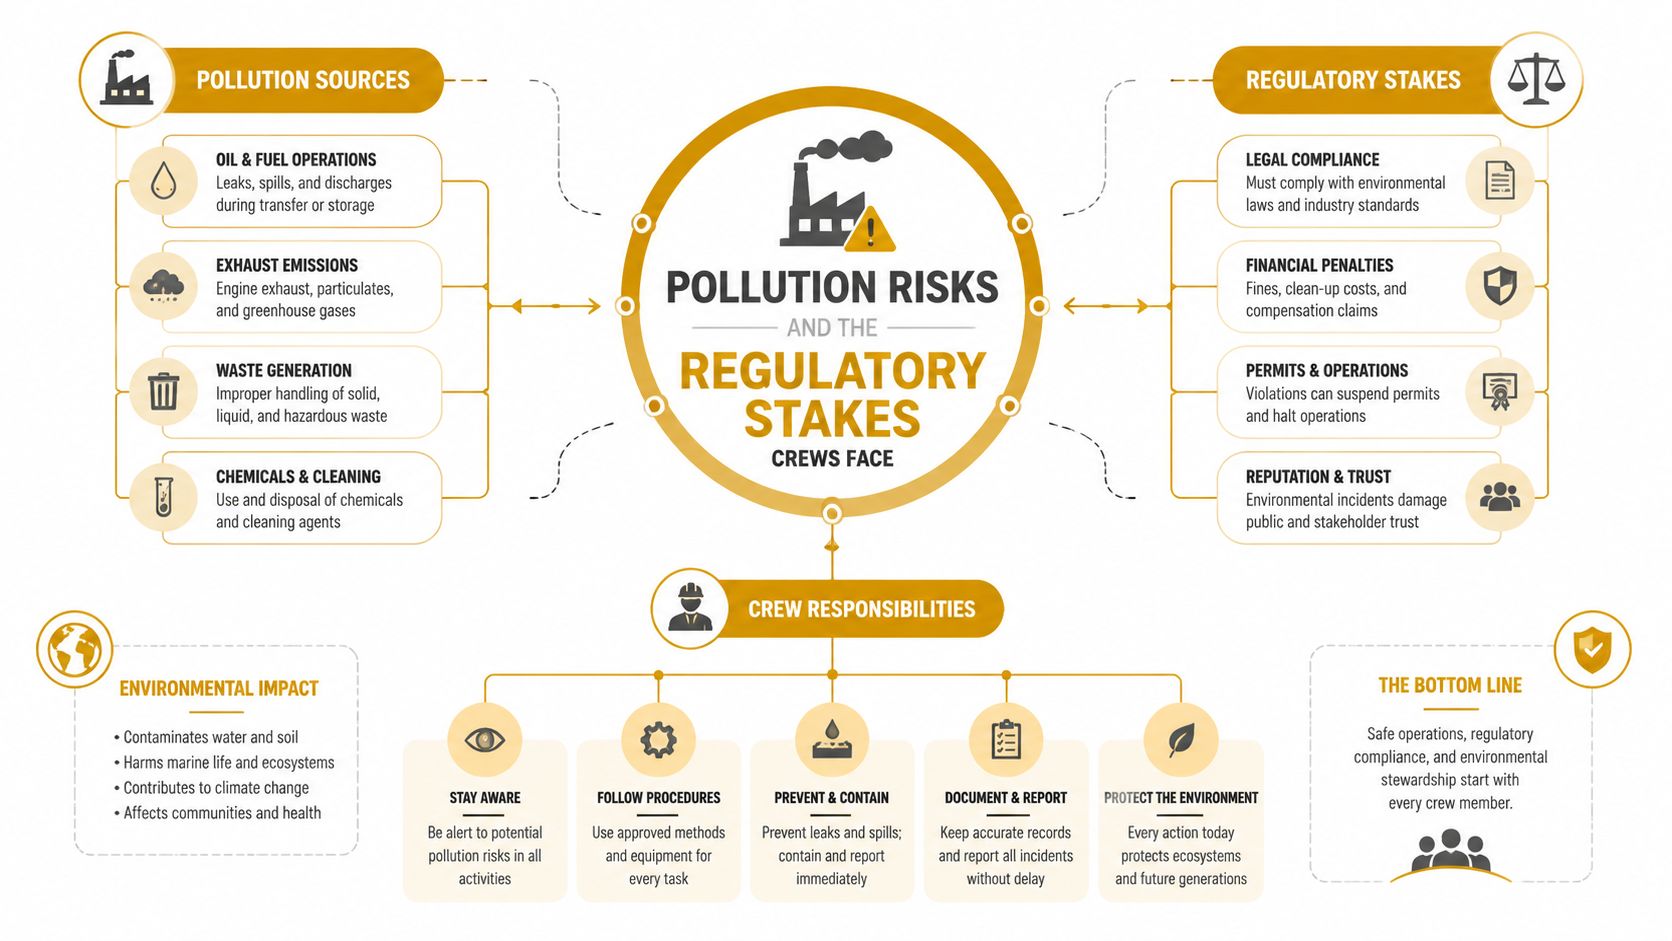
Pollution Risks and the Regulatory Stakes Crews Face
Concrete washout water is not ordinary dirty water. It can be high-pH, full of suspended fines, and heavy enough with residue to leave a visible trail if it escapes the containment area. Add sediment from grading, grease from equipment, and the fine material that settles in wheel ruts, and you have runoff that can create real downstream problems if it reaches a storm drain.
What crews actually need to recognize
Storm drain protection is part of pollution control, not just housekeeping. A drain opening is the last place you want washout residue to go because once it enters the public system, the cleanup is no longer controlled by the crew that caused it. The Minnesota guidance treats these devices as front-line sediment-control measures, not site-decoration pieces on a plan (Minnesota Stormwater Program).
The regulatory chain matters too. Crews hear different labels on different jobs, EPA stormwater requirements, state construction permits, local MS4 rules, and the project SWPPP. The person on site does not need to recite the whole legal framework, but they do need to know which document governs the job and where the inspector will look first. On many projects, that means the SWPPP, the field log, and the installed controls.
The safety side is no longer theoretical
Storm drain protection also reaches into life safety. In May 2024, a new U.S. Department of Housing and Urban Development rule took effect for new HUD-funded projects in flood-prone areas, requiring officials to consider protective measures for drain openings and document the safety features chosen or rejected (ProPublica's report on the HUD rule). That rule followed earlier HUD guidance in 2022, after reporting on storm-drain deaths.
ProPublica identified 35 cases since 2015 in which people were pulled into storm drains, pipes, or culverts during flood events in the United States, with 21 deaths and 13 of those deaths occurring in just the previous three years. Nearly half of the people who died were children (ProPublica). Those numbers explain why some jurisdictions now treat drain openings as a safety issue during design review, not just a runoff issue during construction.
Choosing the Right Controls for Each Inlet and Washout
Crews usually get into trouble by grabbing the first control that's on the truck and forcing it to fit. That works until the inlet geometry is wrong, the area is still under traffic, or the washout load is bigger than the improvised setup can handle. The better move is to choose the control based on the actual conditions on site.
Match the device to the inlet, not the inventory
A curb inlet needs a different answer than a drop inlet. A shallow settling pit has different constraints than a temporary perimeter berm. The manual from Mercer Island gives a field-ready block-and-gravel setup with the barrier top at least 1 foot above the inlet, generally 18 inches wider than the inlet on all sides, with the first block row recessed about 2 inches for stability and the surrounding slope kept at 2H:1V or flatter (Mercer Island BMP C220).
That kind of detail matters because a structure that sits too low or too tight around the inlet will bypass water at the edges. Once runoff goes around the control instead of over it, the sediment capture benefit drops fast and the barrier can wash out.
Side by side makes the decision faster
| Control Type | Best For | Avoid When |
|---|---|---|
| Drain covers and inlet filters | Quick coverage for a known grate or curb opening | The inlet will be hit by vehicle traffic or the device can't stay seated |
| Berms and sandbags | Short-term perimeter control around a stable flow path | Ponding water would create a pedestrian hazard or the area has active truck traffic |
| Block-and-gravel barriers | Open, buildable areas where runoff can be directed over the structure | The slope is too steep or the inlet can't be surrounded tightly |
| Dedicated washout pans or containers | Concrete cleaning, chute wash, and slurry containment | The site can't support delivery access or the footprint interferes with active work |
Practical rule: if runoff can go around the control, the control is wrong for that spot.
Another point gets missed in basic guidance. Neutral manuals note that sandbags, rock socks, and similar BMPs may be a bad fit where ponded water creates a public hazard, where traffic can run them over, or where protruding pieces turn into trip hazards (ES-24 BMP manual). That is why the best choice is often the least dramatic one, the device that fits the inlet, the drainage area, and the access pattern without creating a new problem.
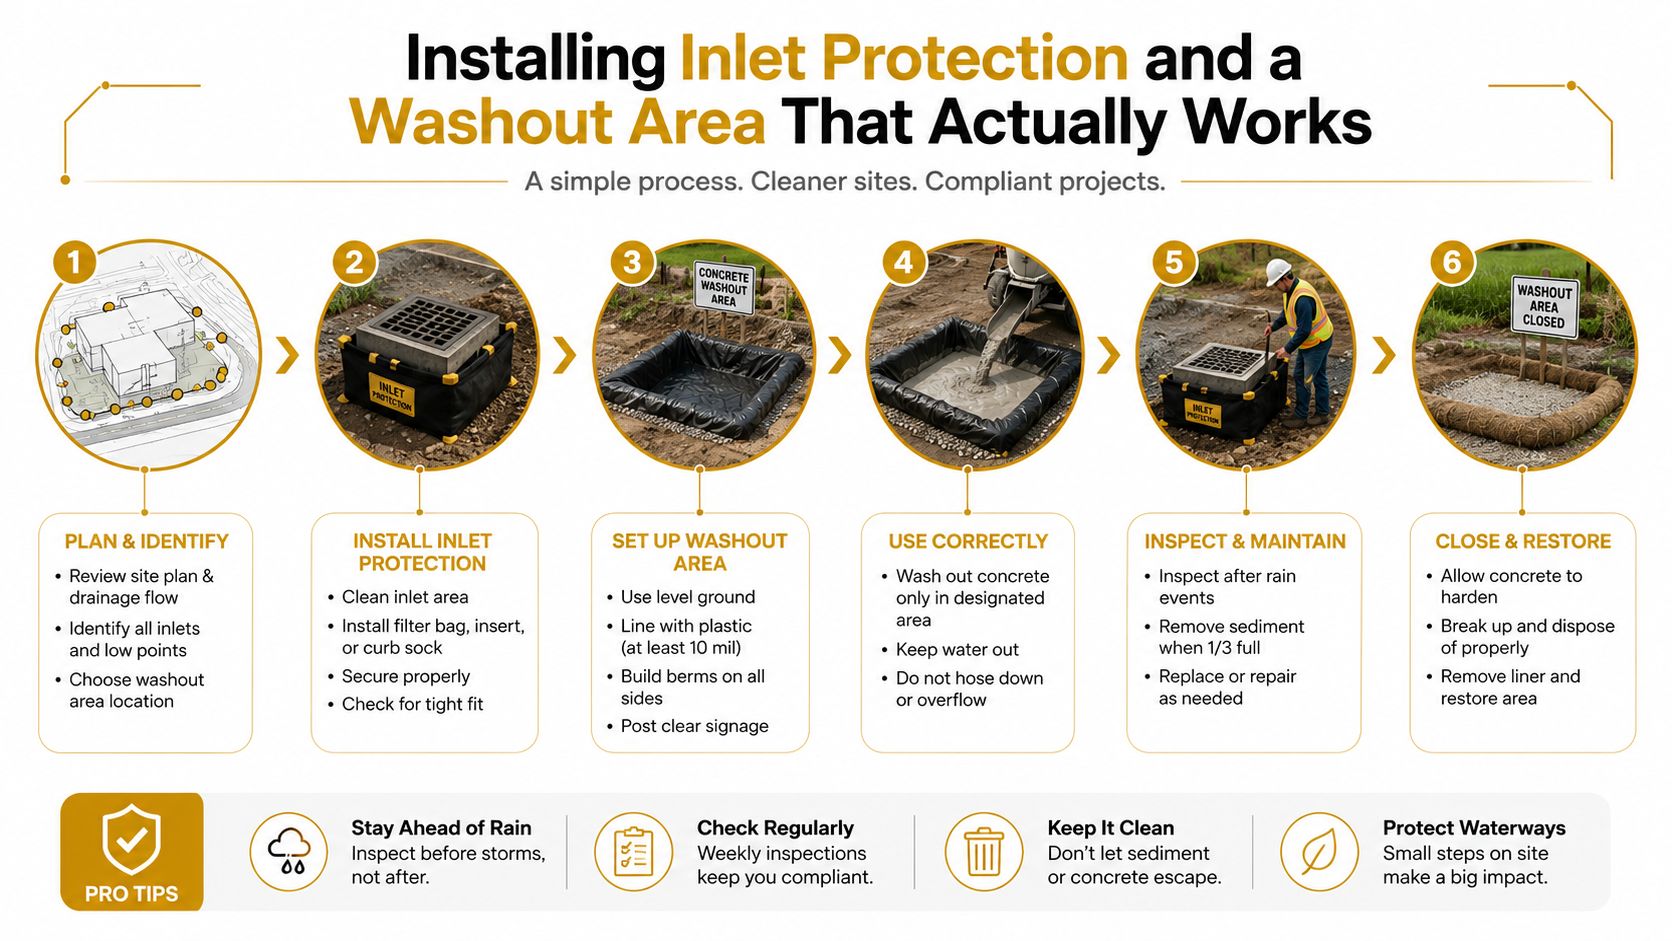
Installing Inlet Protection and a Washout Area That Actually Works
The install should start before the first truck backs in. Place the washout area where delivery trucks can reach it without crossing fresh work or cutting across the drainage path, then verify that any inlet in that path already has protection in place. If the crew builds the pour plan first and thinks about the drain later, the site usually tells on them by the end of the shift.
Start with containment, then build the traffic pattern around it
Set the washout so crews can dump chute rinse and tool cleaning into it without dragging slurry across compacted ground. The point is to keep the dirty water in one place from the start, not chase it after it spreads. Once that area is marked, position the inlet protection so every drain within the drainage path is covered before wash water or rainwater has a route around it.
For a block-and-gravel setup, build the barrier high enough and wide enough to force flow over the top, not around the sides. That means the top of the barrier sits at least 1 foot above the inlet, with the footprint generally 18 inches wider than the inlet on all sides. The first block row goes about 2 inches back for stability, and the slope around it needs to stay at 2H:1V or flatter (Mercer Island BMP C220).
The bypass mistake is usually a grading mistake
The most common install failure is simple. The inlet crest sits too high relative to the downslope ground, so the runoff finds an easier route around the control. Once that happens, the inlet looks protected but the flow path says otherwise. The workaround is to check the grade from the high side, the low side, and both corners before anyone signs off on the setup.
Runoff should pass over the structure, not hunt around it.
Keep the chute wash, hand tools, and cleanup water inside the washout area every time. If the crew treats the washout like an optional convenience instead of the only place slurry belongs, the site will start collecting concrete residue in places that are hard to clean and harder to explain later.
Inspection Cadence and the Maintenance Traps That Sink Compliance
Most storm drain protection failures do not start with a bad install. They start after the first rain, when nobody checks the control, the sediment pile rises, and runoff begins to sneak around the edge. That is why a control that looked perfect on the day it went in can be the one that fails inspection a week later.
Use a simple rhythm that fits the job
A workable cadence is straightforward. Walk the inlet protection before each pour. Check it immediately after any rain event or snowmelt. Then do a deeper look once the site has seen enough runoff to tell you whether the device is holding shape, seating tightly, and keeping bypass from forming.
The Minnesota guidance says inlet protection should be inspected immediately before and after rain events and snowmelt, which is exactly the kind of timing that keeps a temporary control from turning into a hidden problem (Minnesota Stormwater Program). Some SWPPP protocols say sediment should be removed once it reaches about 50% of capacity, and extended-storm protocols may tighten that to about one-third. The point is not the exact trigger alone, it's that the device needs service before it becomes a blockage.
Watch for the traps that cause rework
- Bypass at the edge: water carves around the berm or filter instead of through it.
- A clipped or shifted device: a truck bumps the control and it no longer seats tightly.
- Ponding around the inlet: water stands where it should be moving, which usually means clogging is starting.
- Hardened washout in the pan: slurry gets left to set until the container loses usable volume.
A cheap device can cost a lot when it fails because maintenance was skipped. That is the part many general guides understate. They explain the install, but the field reality is that temporary controls need reseating, sediment removal, and replacement when the device is no longer performing.
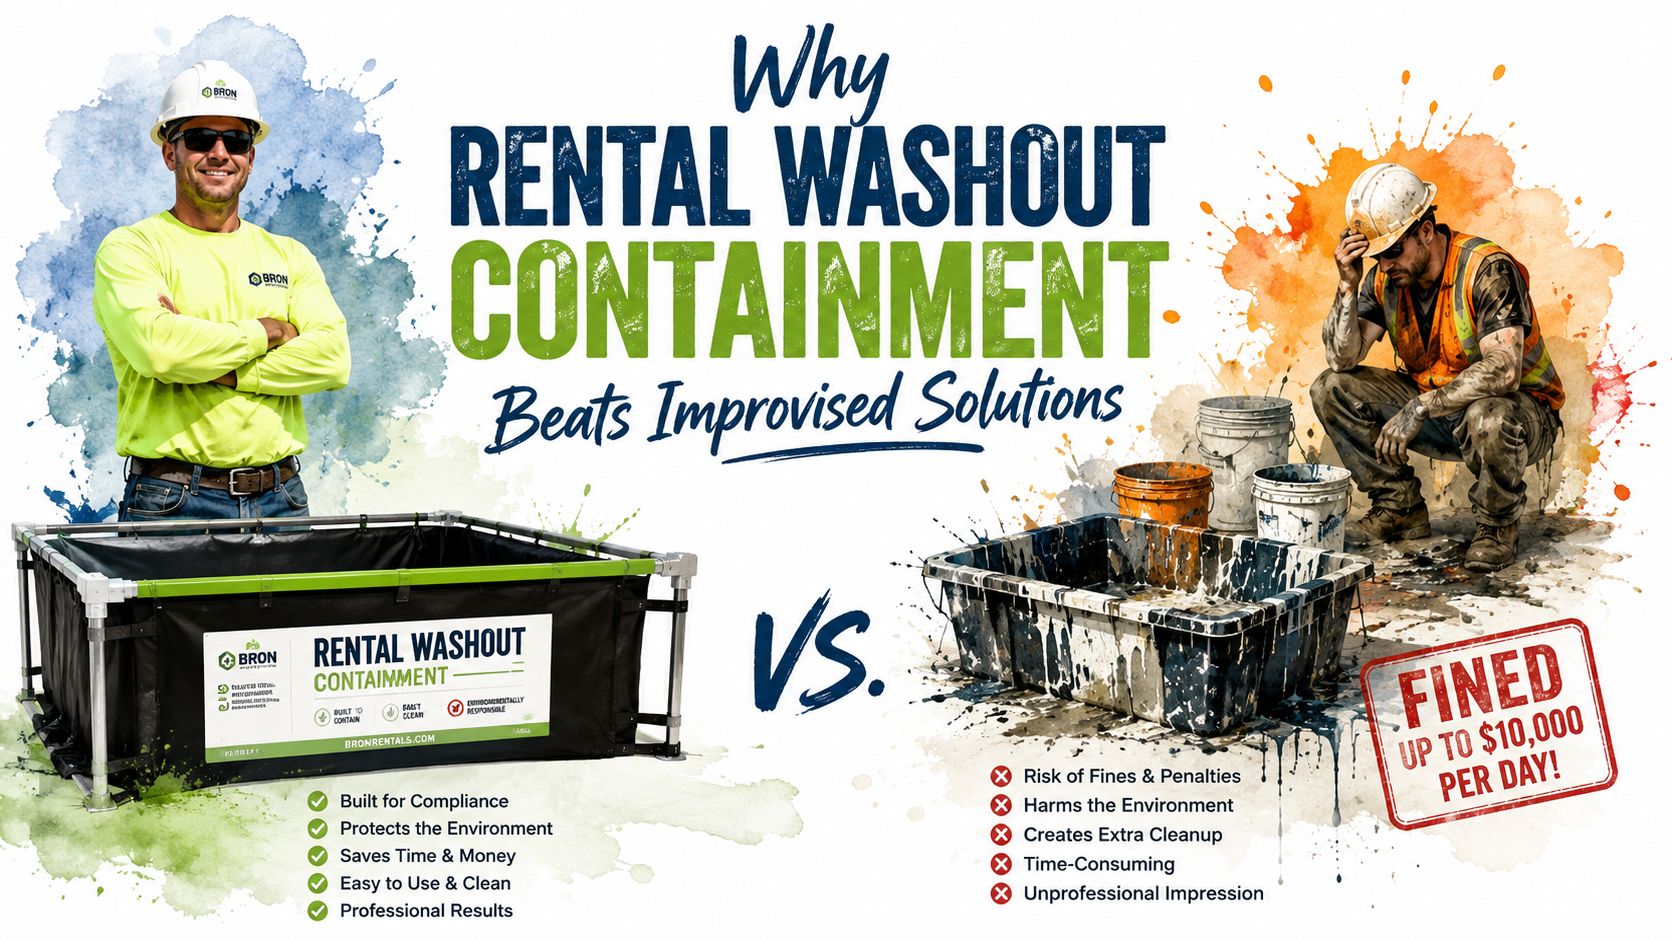
Why Rental Washout Containment Beats Improvised Solutions
The temptation to improvise is strong on a busy job. A bucket, a dug-out pit, or a curbside workaround looks cheap until the first escape of slurry turns into cleanup, drain work, and schedule delay. Purpose-built containment removes that guesswork and gives the crew a known place to put the material that would otherwise migrate.
Budgeting for the real risk is smarter than chasing a cheap workaround
Rental washout containment gives the project a defined footprint, predictable capacity, and a cleaner path for waste handling. That matters because slurry management isn't just about catching water, it's about keeping the site from producing a trail of hardened residue that somebody has to chip, vacuum, or haul away later. A temporary pit or makeshift bag usually creates hidden labor, not savings.
Reborn Rentals publishes daily pricing starting at $25/day and offers heavy-duty washout pans and containers with listed capacities such as 72' x 72' x 24' at approximately 18.25 tons and ~441 gallons, plus 72' x 72' x 14' at ~310 gallons. Those specs are useful because they give project managers a concrete benchmark when they compare delivery, footprint, and capacity against a homemade solution.
The line item is easier to defend than the cleanup
A proper container is easier to explain to an owner and easier to document for the SWPPP record. It also reduces the chance that the crew will be cleaning concrete residue from a curb line or calling for emergency drain clearing after a spill. That is not theory. That is the difference between a controlled pour and a day spent recovering from a preventable mistake.
For crews who want the simplest possible answer, the rental container is usually it. The device shows up ready to use, stays in one place, and keeps the washout where it belongs instead of letting every hand tool decision become a runoff decision.
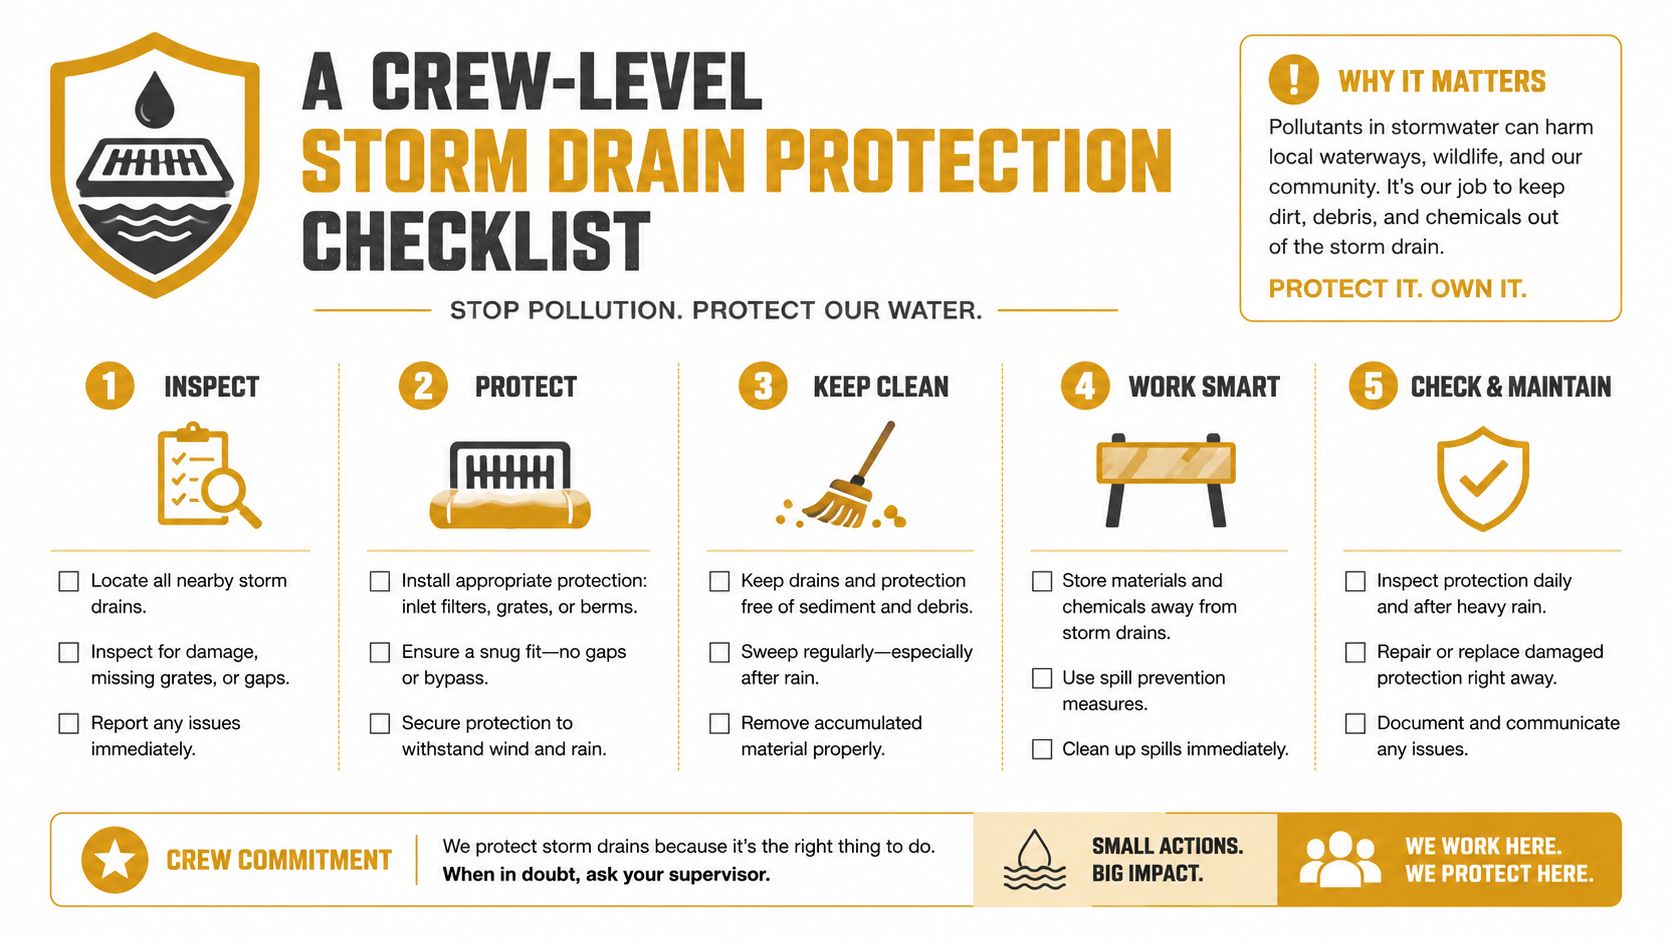
A Crew-Level Storm Drain Protection Checklist You Can Pin in the Trailer
Before the pour, cover every inlet in the drainage path, stage the washout where trucks can reach it cleanly, and make sure the crew knows where slurry goes and where it does not. After the pour, inspect the controls, clear sediment before capacity gets tight, and document any damage or bypass before the next rain hits.
Trailer-ready checklist
- Pre-pour coverage: Verify every drain in the flow path is protected.
- Washout placement: Keep the containment area accessible without crossing fresh work.
- Edge check: Make sure runoff cannot slip around the control.
- Post-pour inspection: Look for sediment buildup, clipping, or shifted material.
- Retire the temporary control: Once the area is fully stabilized, swap to a permanent surface such as sod where that fits the final site condition.
The simplest habit is the one crews repeat without debate. Walk the drains, check the washout, and fix the bypass before it becomes the inspector's problem.
If you need a cleaner way to keep concrete wash water contained and the site easier to manage, take a look at Reborn Rentals. Their washout pans and containers are built for the kind of day-to-day control concrete crews need. Use them to keep slurry where it belongs and make storm drain protection one less thing to scramble over on pour day.